- Hardware Setup
Initial Cash Drawer Setup.
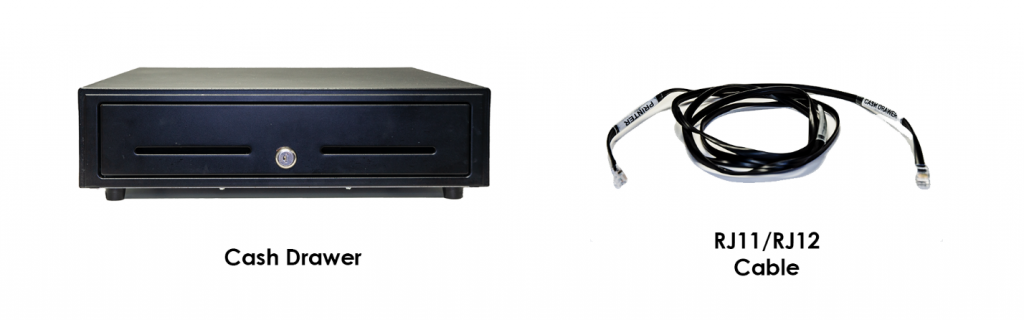
1. Out of the Box should include an OVVI cash drawer with a key and an RJ11/RJ12 cable.
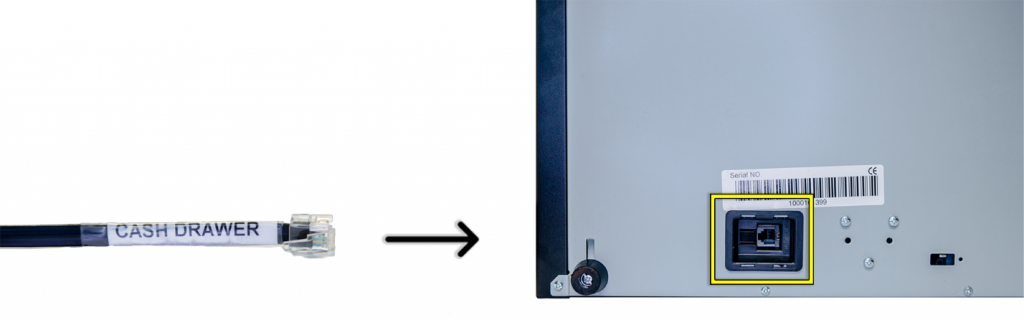
2. Turn over the cash drawer and locate the ‘RJ11/RJ12 port’ then connect the end of the cable labeled ‘Cash Drawer’ to the port on the bottom of the drawer.
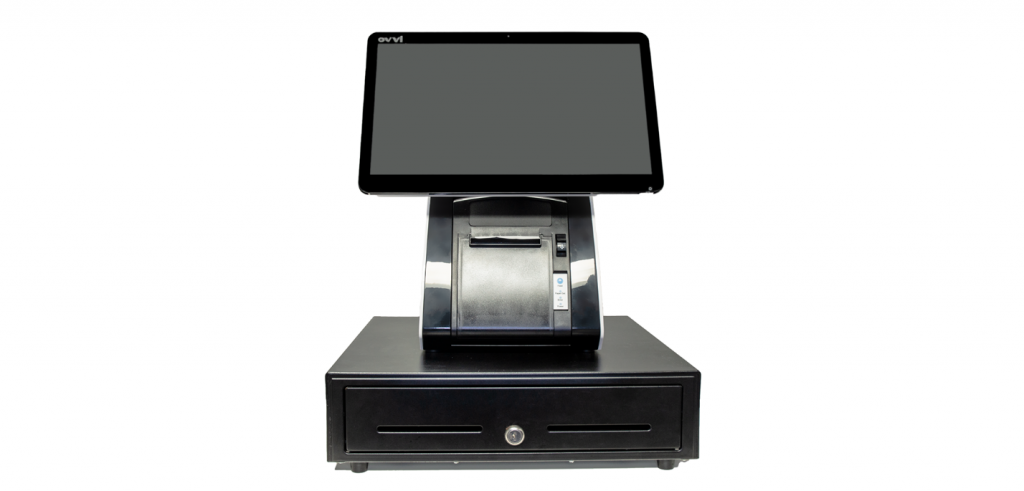
3. Turn the drawer back over and place the POS station on top.
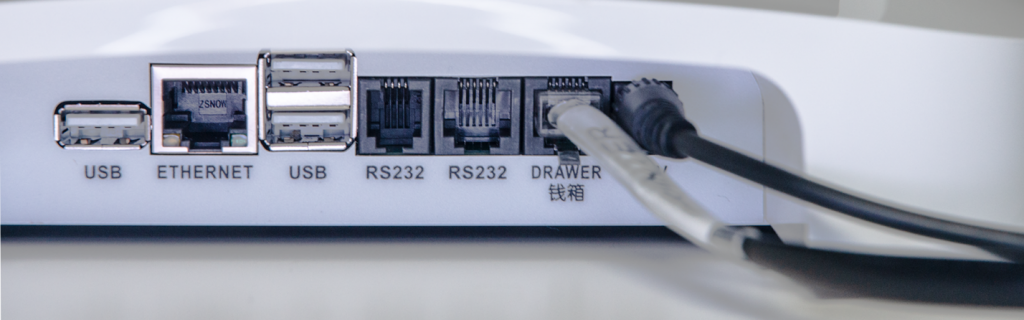
4. On the back of the POS station, locate the port labeled ‘Drawer’.
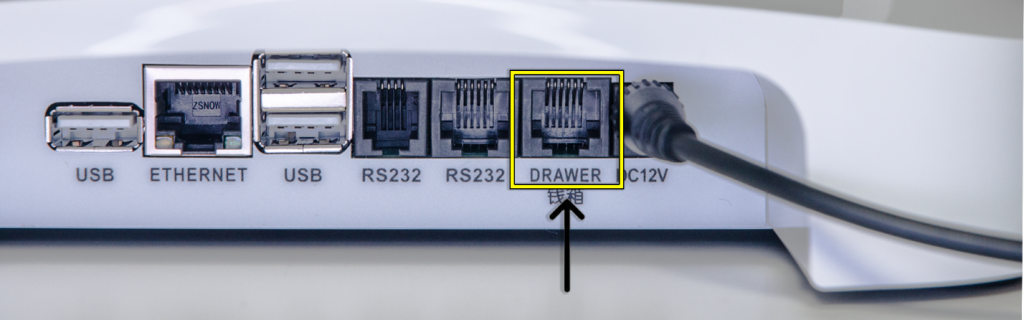
5. Connect the opposite end of the cable labeled ‘Printer’ to the ‘Drawer’ port.

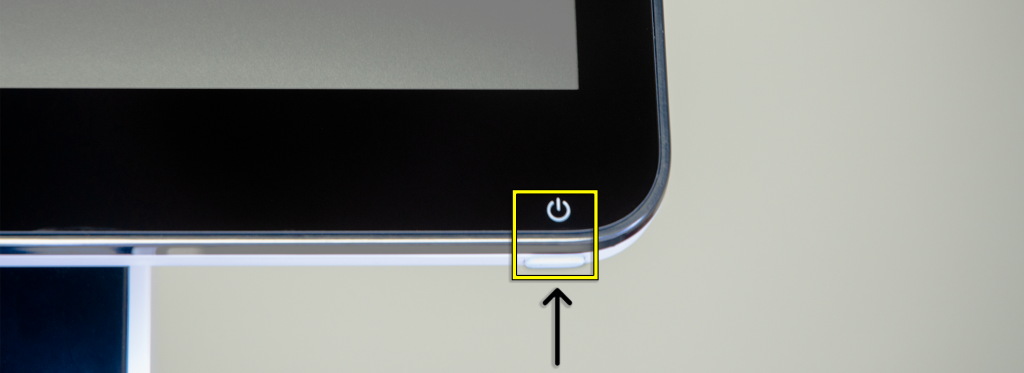
6. Power the POS station on by clicking the button located in the lower right corner of the display just below the icon.
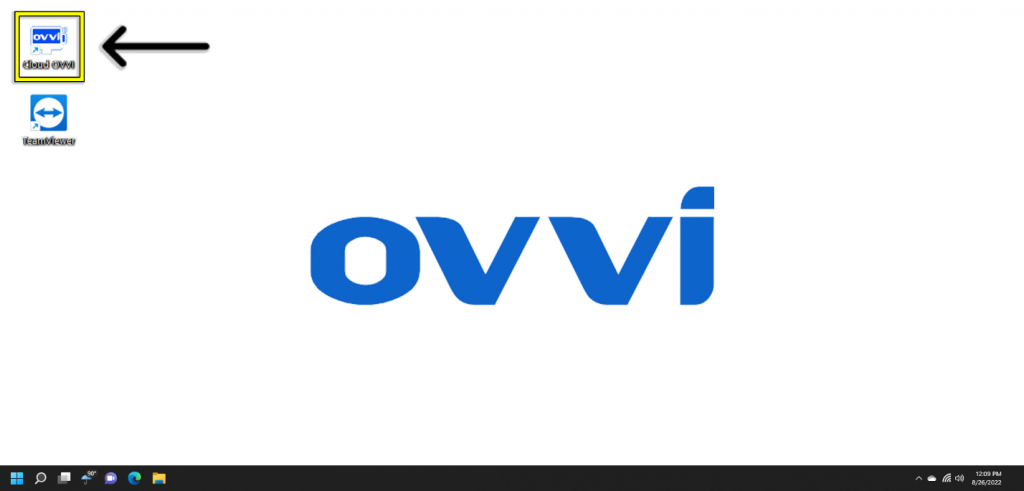
7. Once the station has powered on, open the Cloud OVVI application.
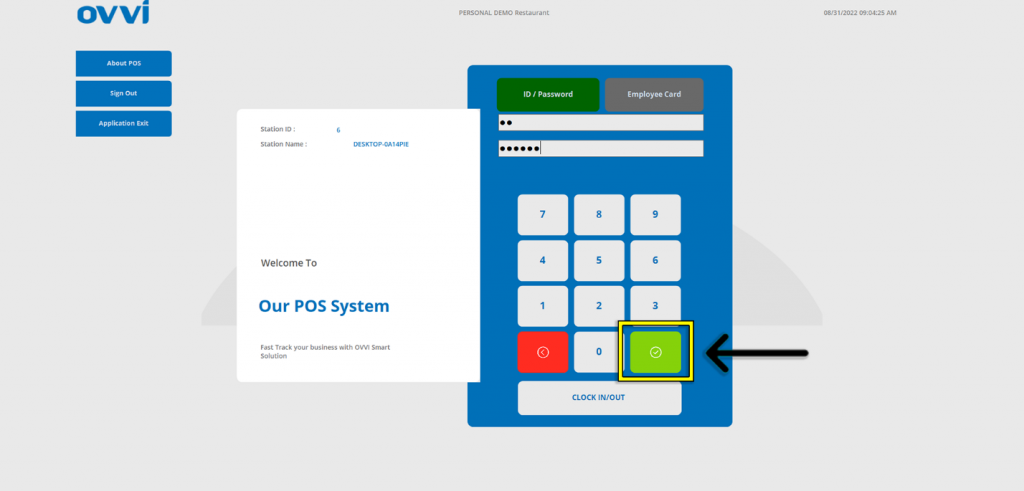
8. Login with manager credentials.
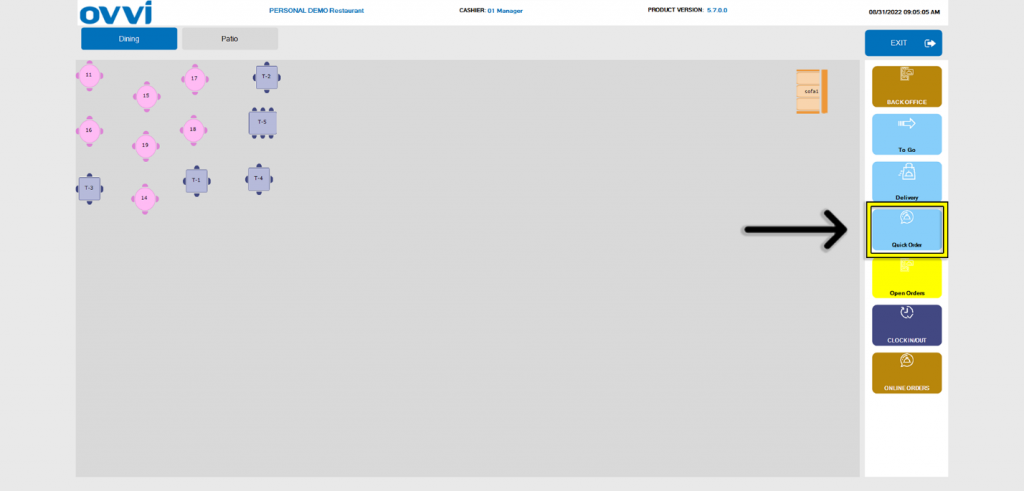
9. Tap the ‘Quick Order’ button.
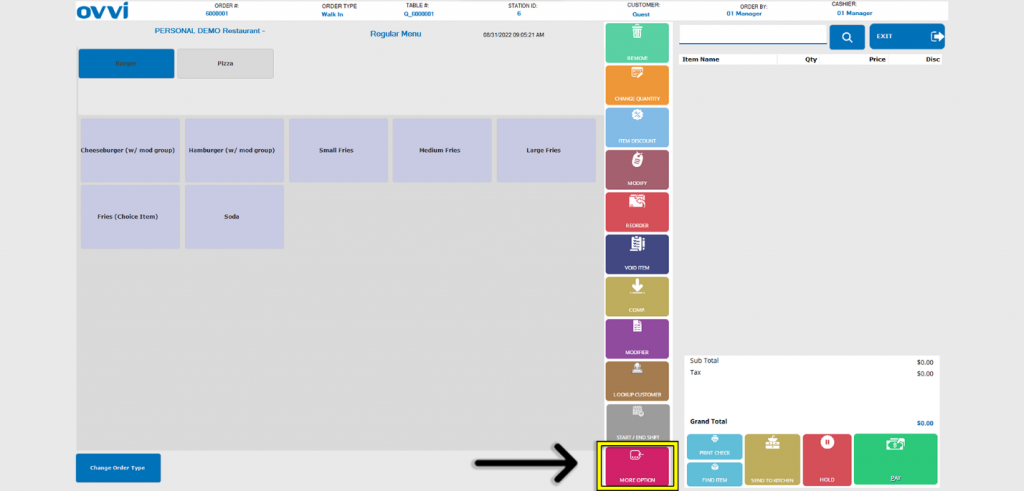
10. Tap the ‘More Options’ button.
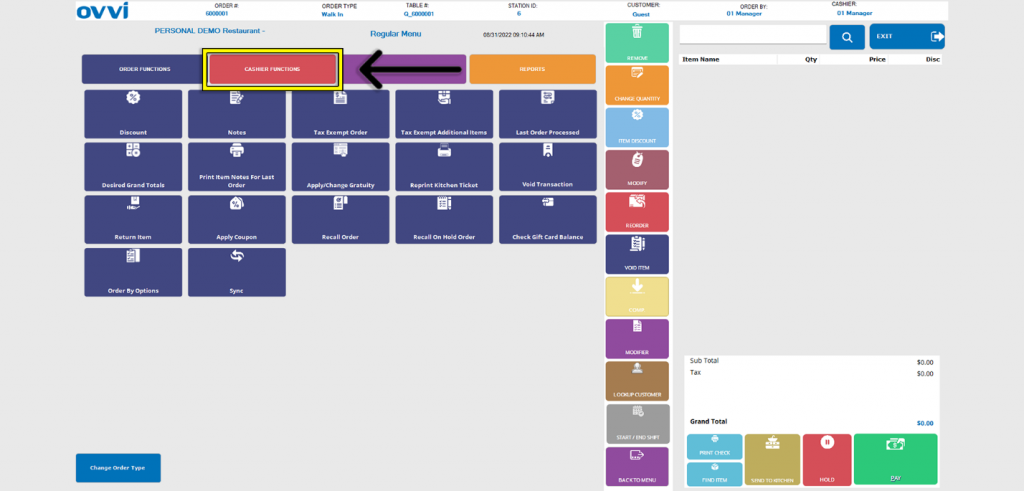
11. Tap the ‘Cashier Functions’ button.
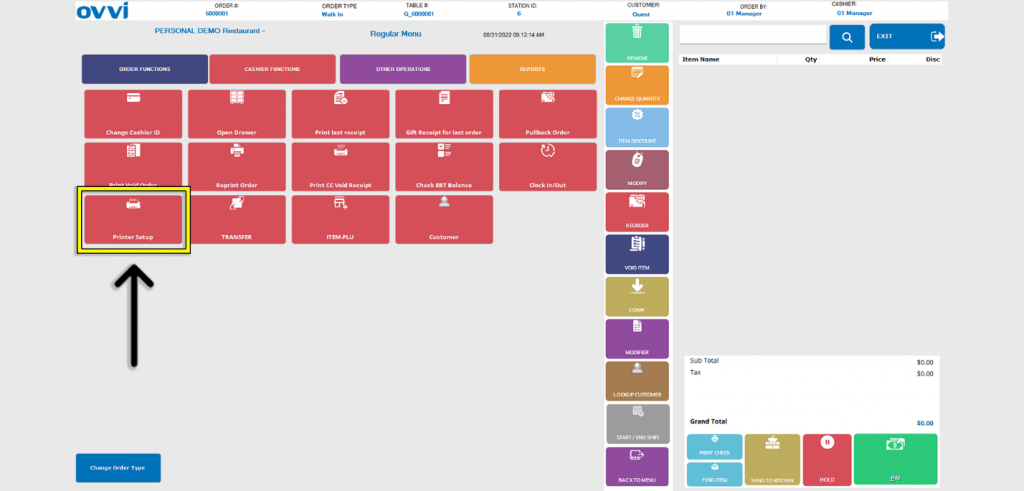
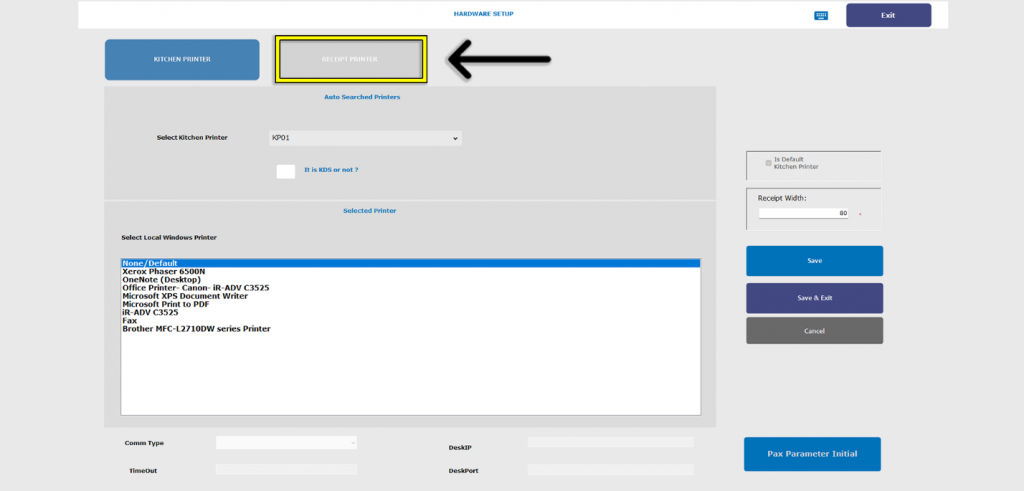
12. Tap the ‘Printer Setup’ button.
13. Tap The ‘Receipt Printer’ button.
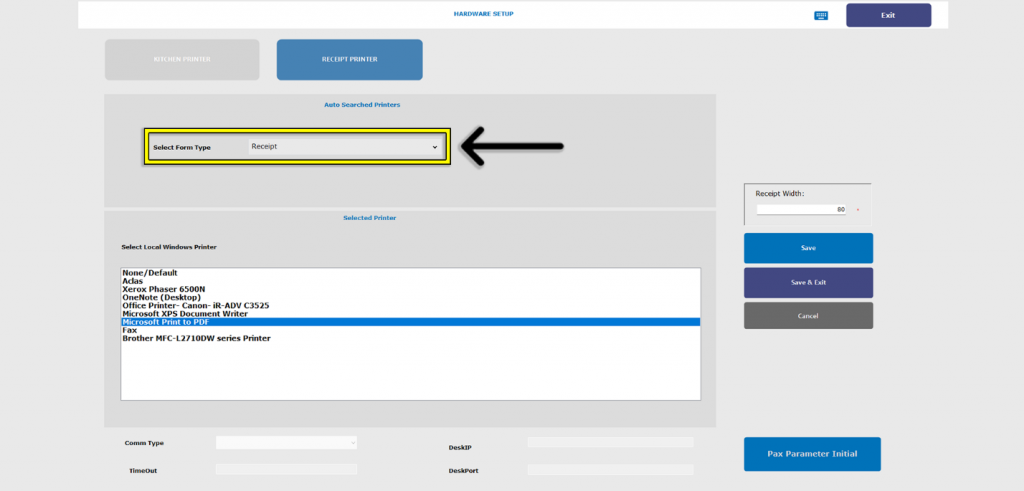
14. Set the ‘Select Form Type’ to ‘Receipt’.
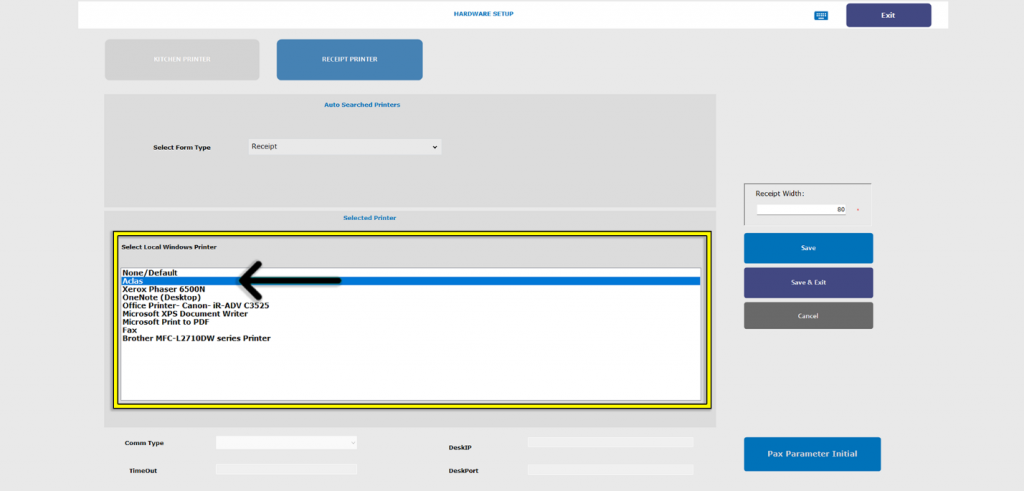
15. Tap the ‘Aclas Printer’ option in the ‘Select Local Windows Printer’.
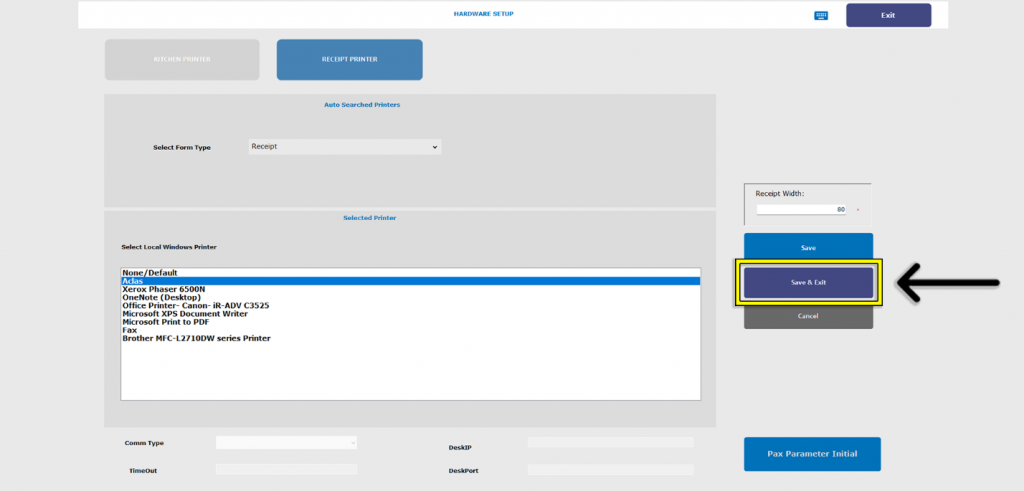
16. Tap the ‘Save & Exit’ button.
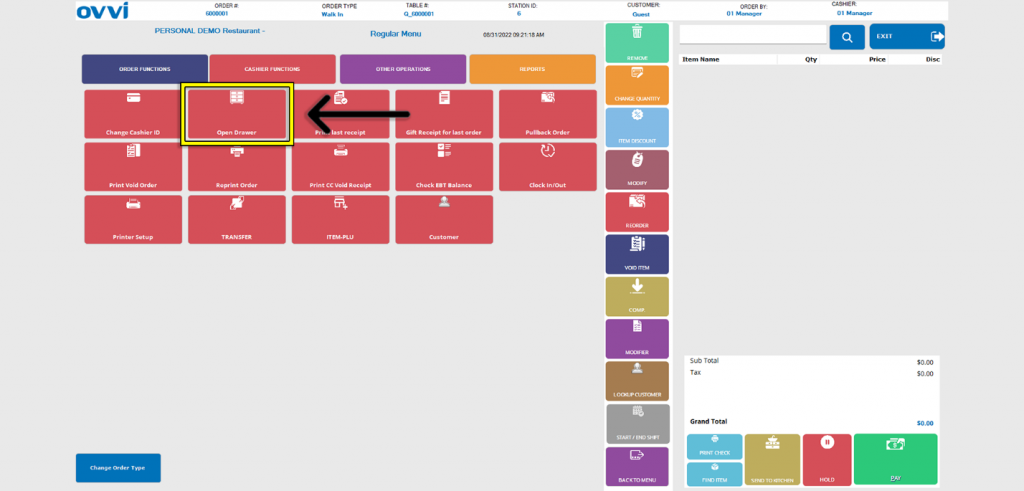
17. To verify successful connection, Tap the ‘Open Drawer’ button.
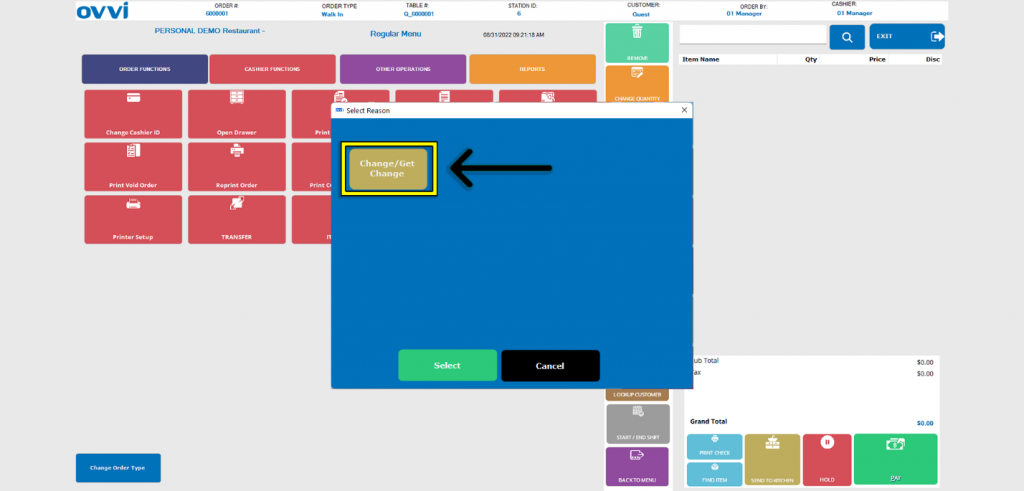
18. Tap the ‘Change/Get Change’ button and the cash drawer should open successfully.
19. This concludes the guide to setting up a cash drawer.
Was this article helpful?
YesNo
Quick Links: