- OVVI POS
Guide to Time Clock Management (FOH).
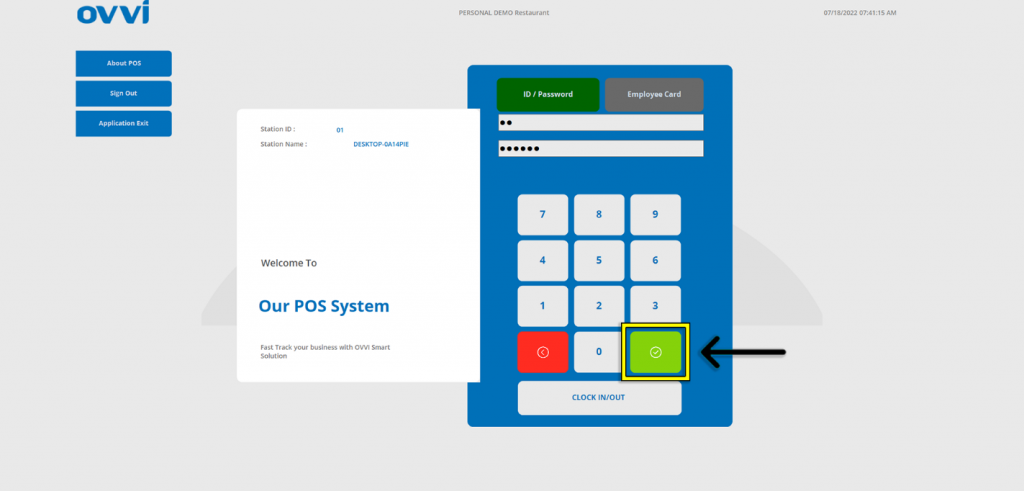
1. Login to the Cloud OVVI application with the employee credentials then tap the green check mark in the lower right.
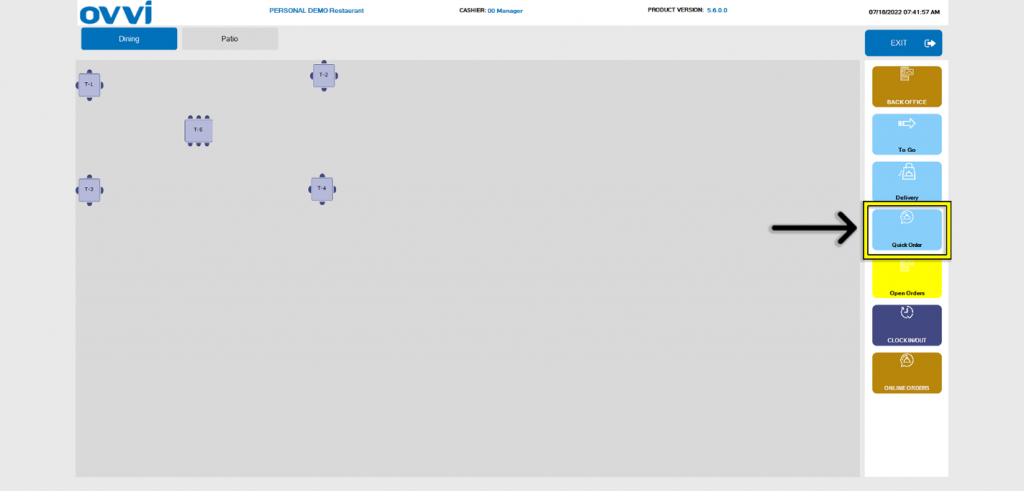
2. Tap on the ‘Quick Order’ button.
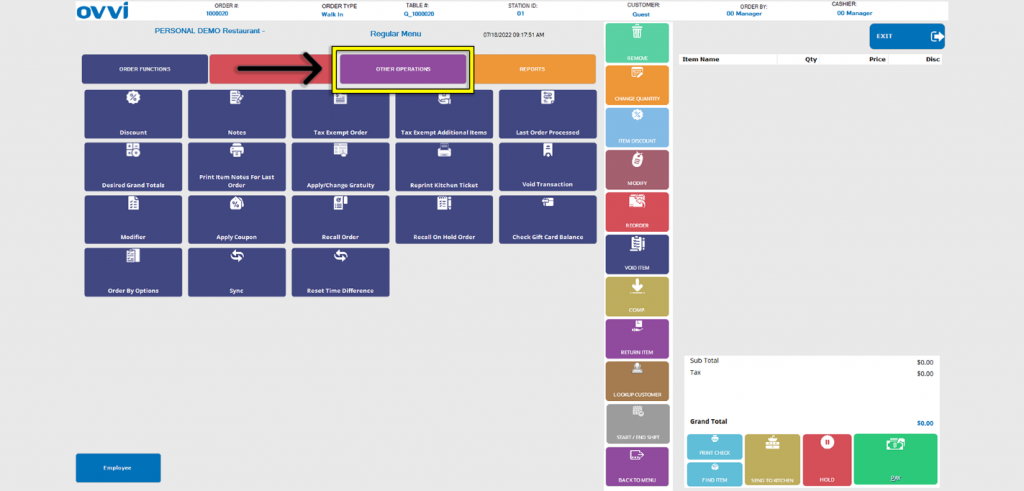
3. Tap on the ‘More Option’ button.

4. Tap on the ’Other Operations’ button.
5. Tap on the ‘Time Clock Management’ button.

6. Tap on the drop-down menu under ‘Employee Name’ to select a specific employee or to show all employees with clock-in/out data.

7. Users can filter the date and time range that they wish to edit for employees’ clock in/out data by tapping on ‘Start Date’, ‘End Date’, ‘Start Time’, and ‘End Time’.
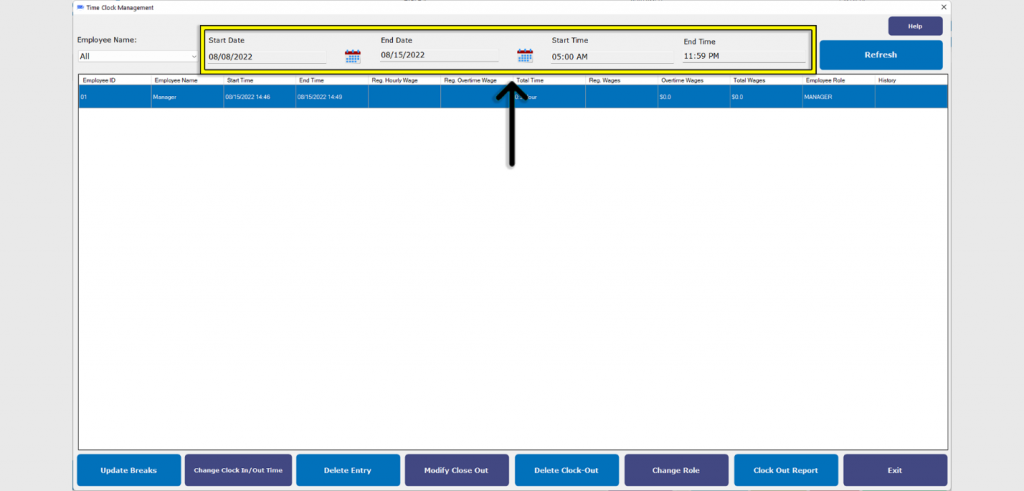
8. Tap the ‘Refresh’ button to apply the filtered time range.

9. Tap on the desired employee and time range in the main selection screen.
Please Note: selections will be highlighted in blue.

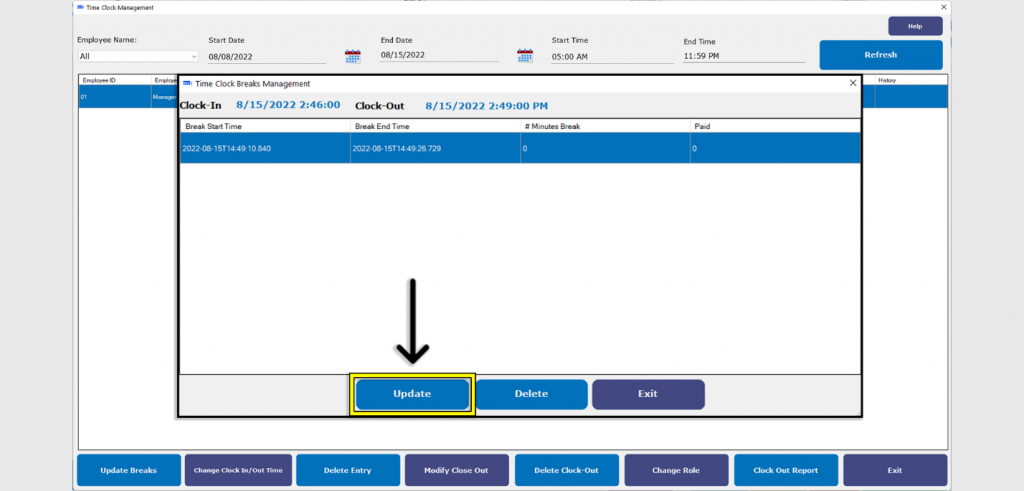
10. To modify employee breaks, tap on the ‘Update Breaks’ button.
Please Note: Employees must be clocked out before break times can be edited.

11. In the pop-up, select the break time to modify the tap the ‘Update’ button.
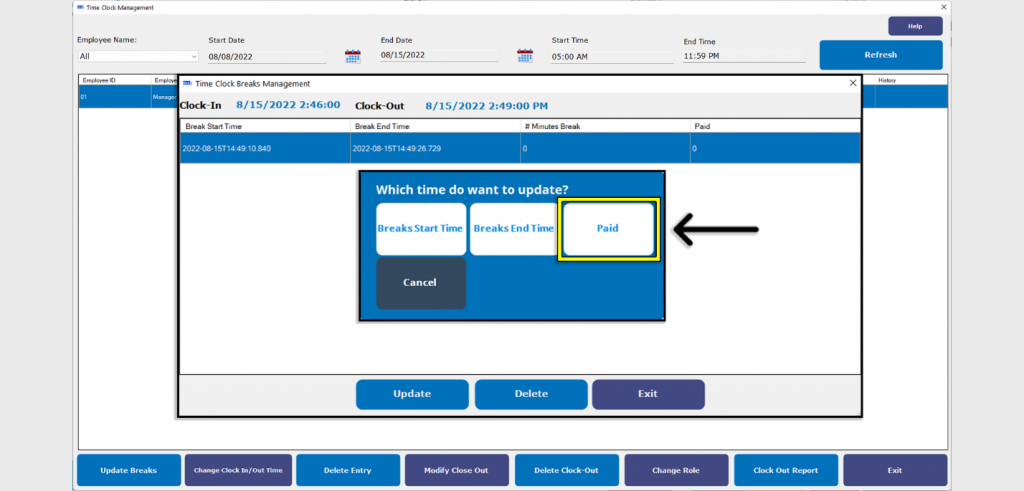
12. User’s can choose if breaks are paid or not paid by tapping the ‘Paid’ button.
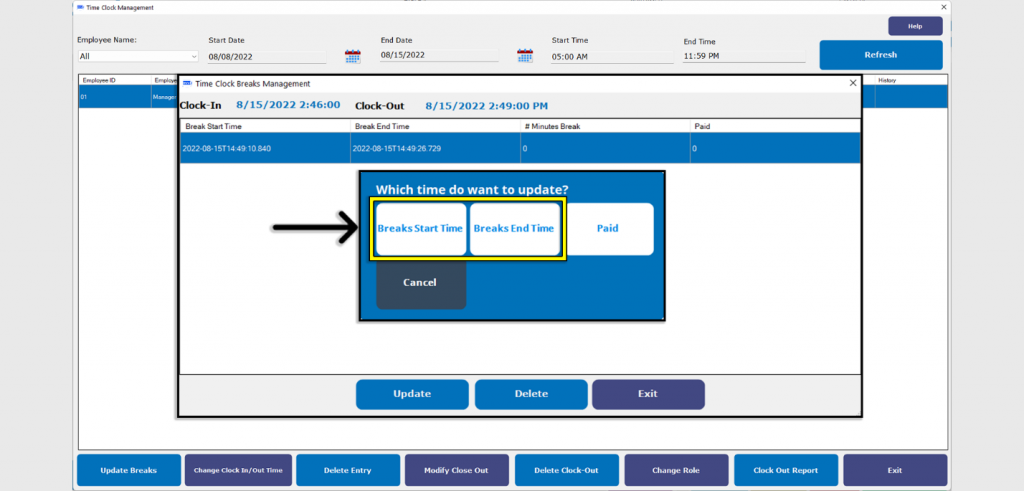
13. To modify the start time, tap the ‘Breaks Start Time’ or alternatively the ‘Breaks End Time’ to modify the end time for breaks.
14. Chose the date of the break and tap the ‘Select’ button.
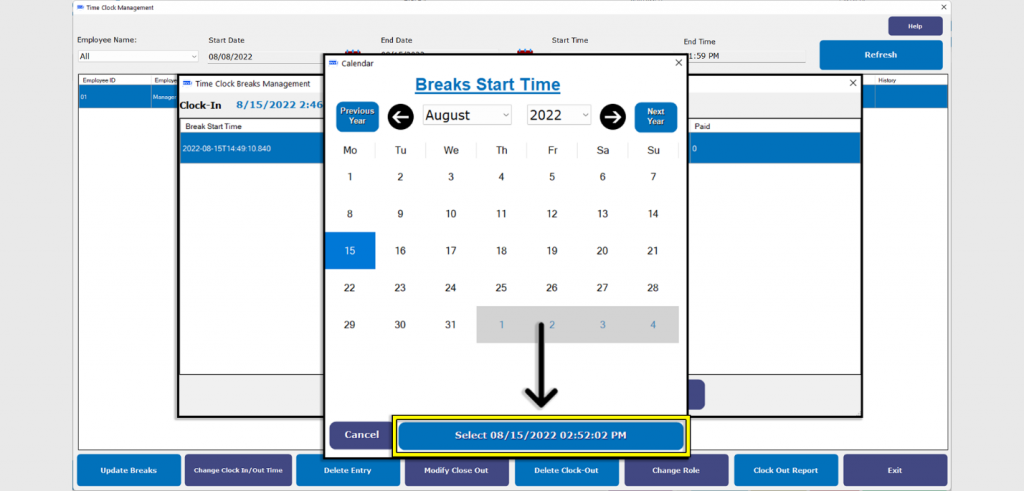
15. Set the desired time then tap the ‘Select’ button.
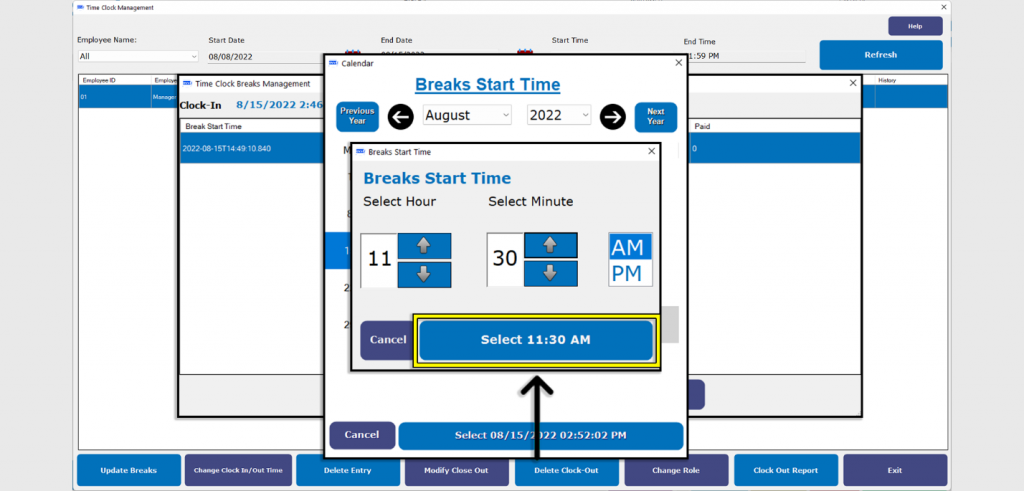
16. Users will get a prompt stating update was successful, tap the ‘OK’ button to close the pop-up.

17. Tapping the ‘Delete’ button will completely remove any select break.
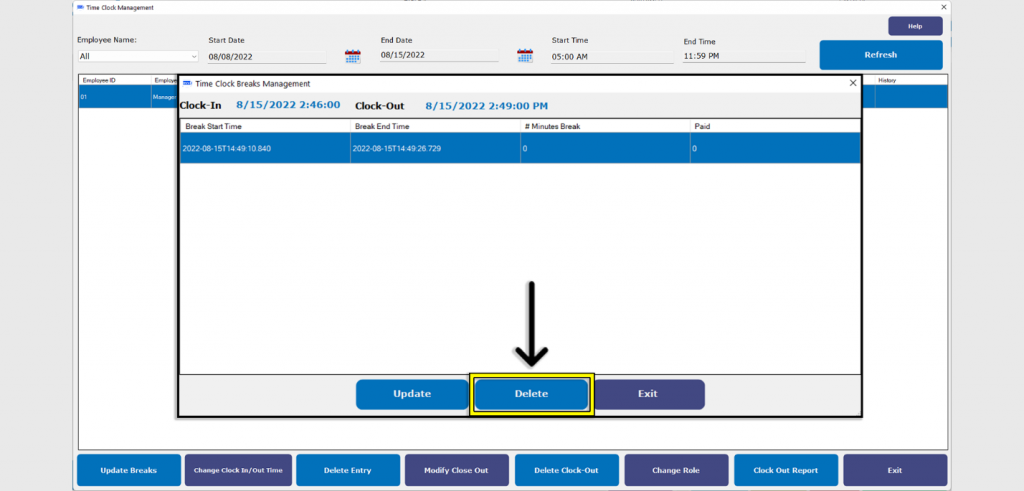
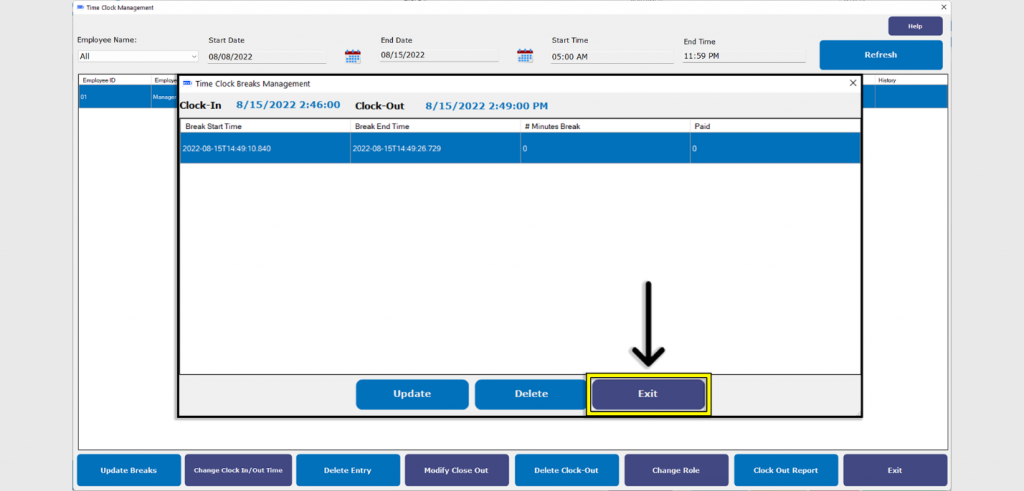
18. Tap the ‘Exit’ button when editing breaks have been completed.
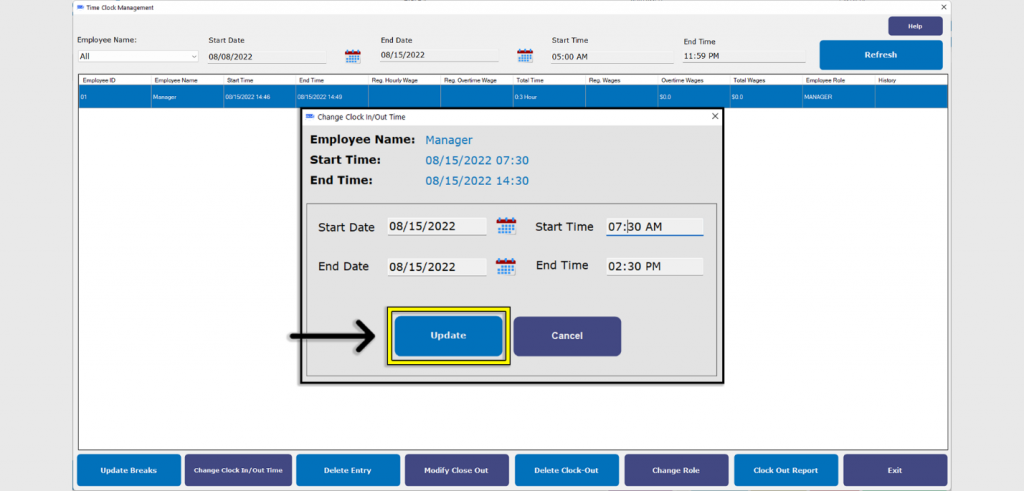
19. Tapping the ‘Change Clock In/Out Time’ will allow users to update/edit the start and end times of an employee.
Please Note: Employees must be clocked out before start and end times can be edited.

20. Tap on the ‘Start Date’, ‘End Date’, ‘Start Time’, and ‘End Time’ sections to modify the clock in/out data.
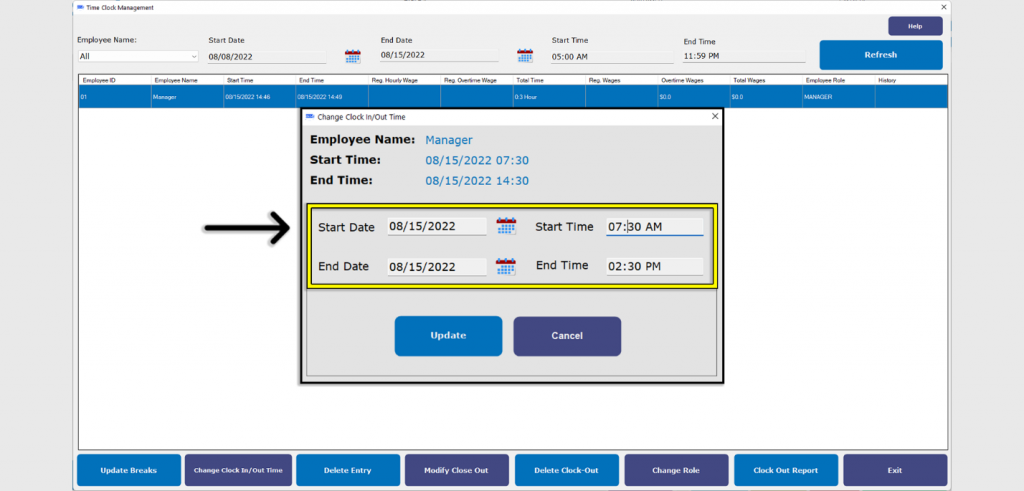
21. Once the date and Time has be set, tap the ‘Update’ button.
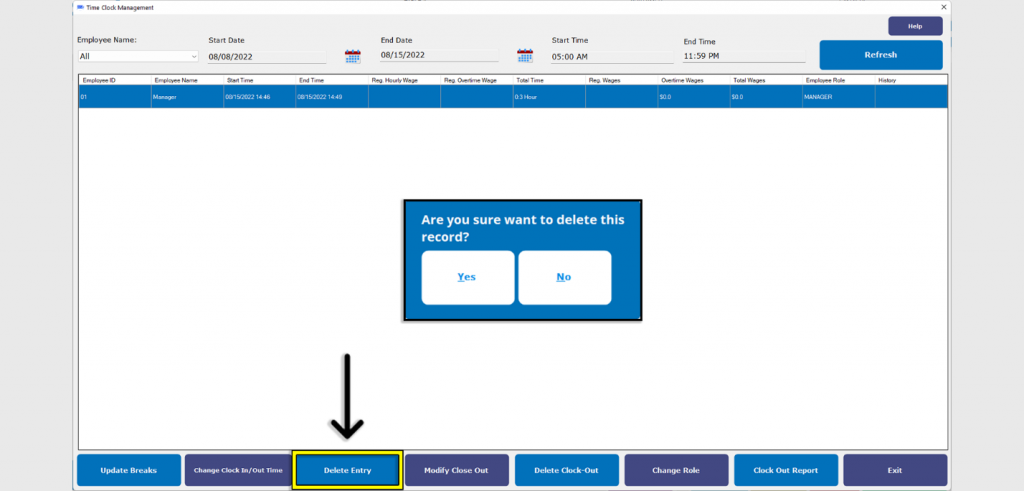
22. Tapping the ‘Delete Entry’ button will permanently remove the selected time data for that employee.
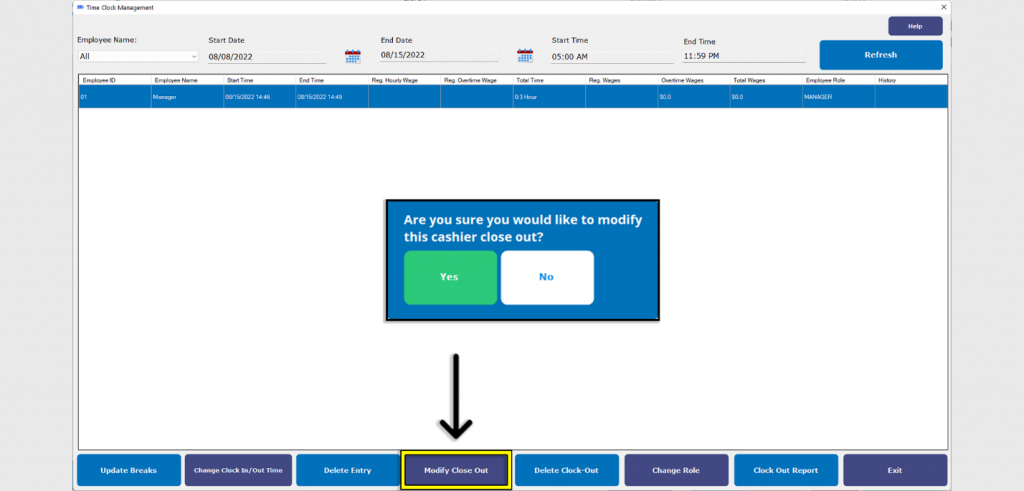
23. Tap on the ‘Modify Close-Out’ button to modify the close-out time for the selected employee.
Please Note: Employees must be clocked out before close-out can be modified.
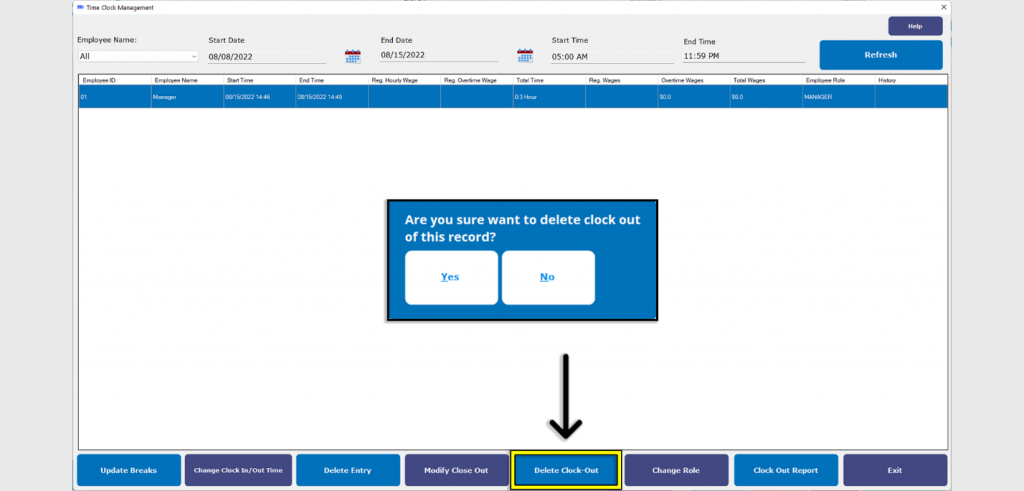
24. Tap on the ‘Delete Clock-Out’ button to remove an unwanted or accidental clock-out for the selected employee.
Please Note: Employees must be clocked out before deleting the clock-out entry.
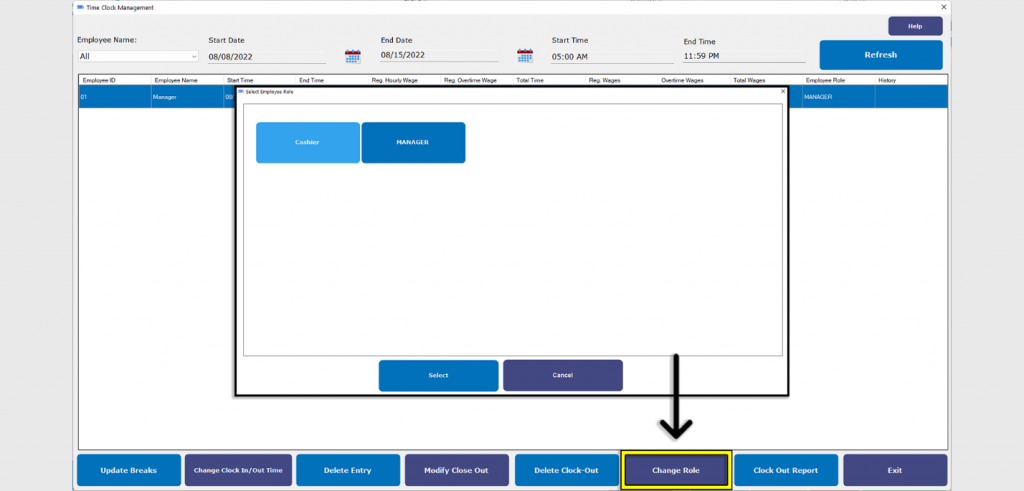
25. Tapping the ‘Change Role’ button will modify the assigned role for an employee if they are performing duties that differ from their usual assigned role.
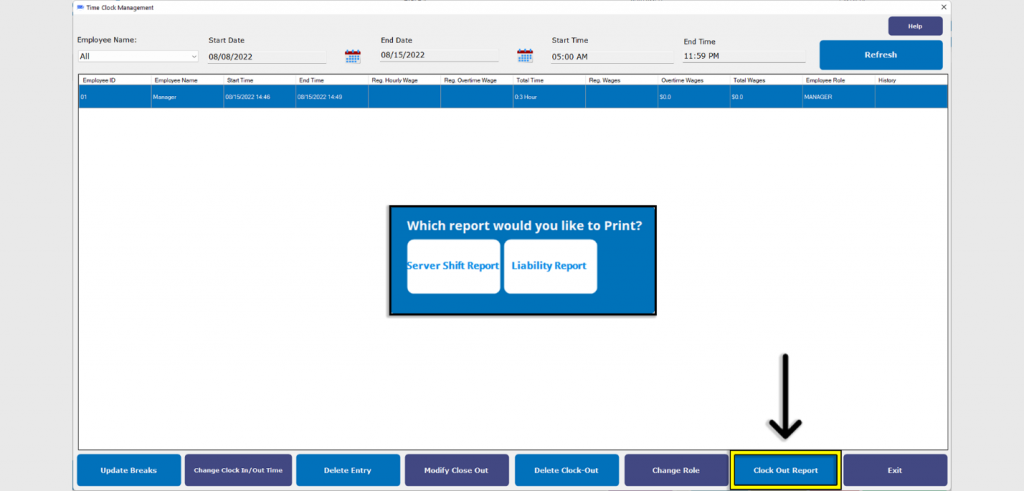
26. The ‘Clock out Report’ button allows users to view and print a Server Shift Report and Liability Report for their records.
27. When editing is complete, tap the ‘Exit’ button to return to the other operations section.

28. This Concludes the Guide to Time Clock Management (FOH).
Was this article helpful?
YesNo
Related Article: