- Category
How to Add a Category.
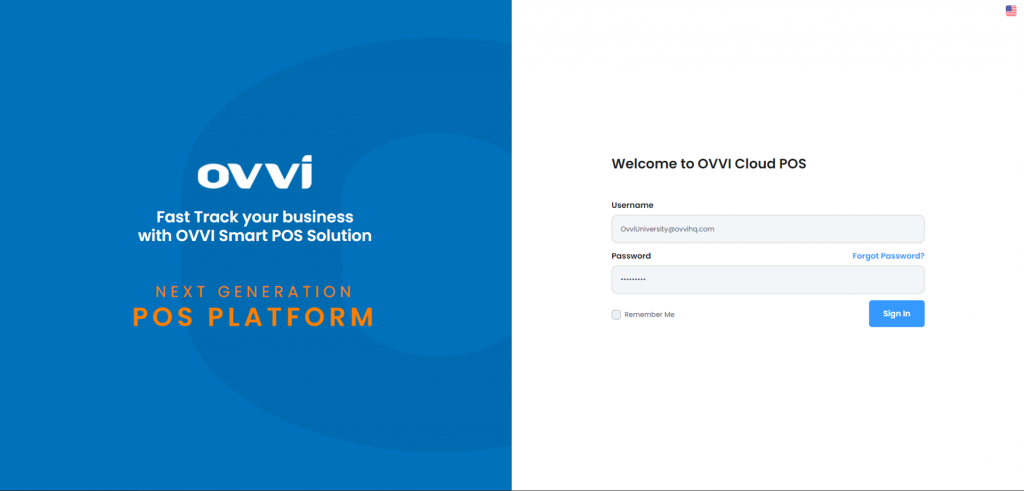
1. Go to cloud.ovvihq.com and login using your merchant username and password.
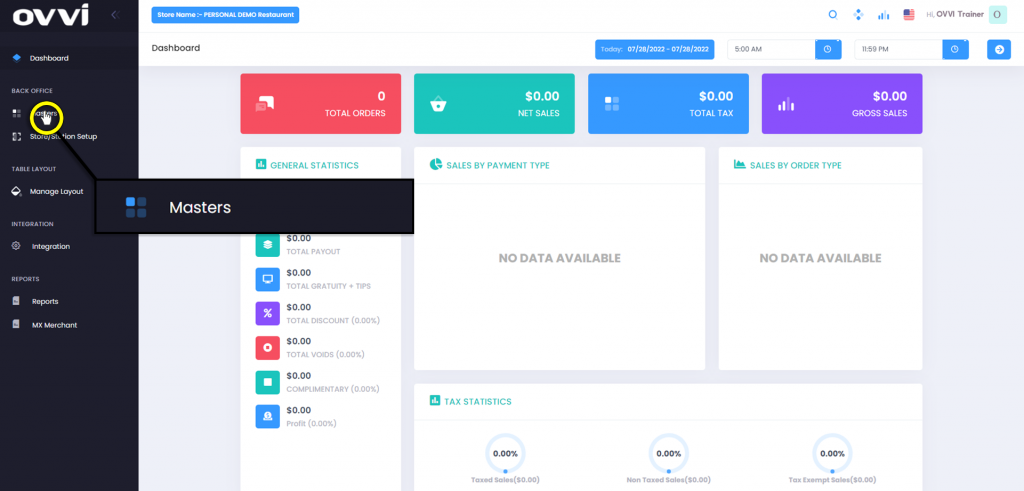
2. From the main dashboard navigate to the panel located on the left side of the site and click on the options ‘Masters’.
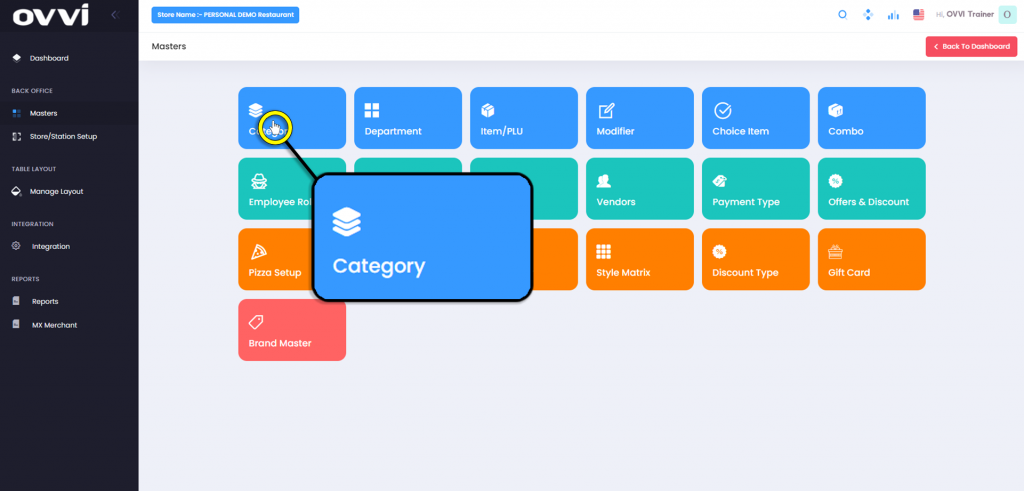
3. From the ‘Masters’ page, locate and click on the ‘Category’ button.
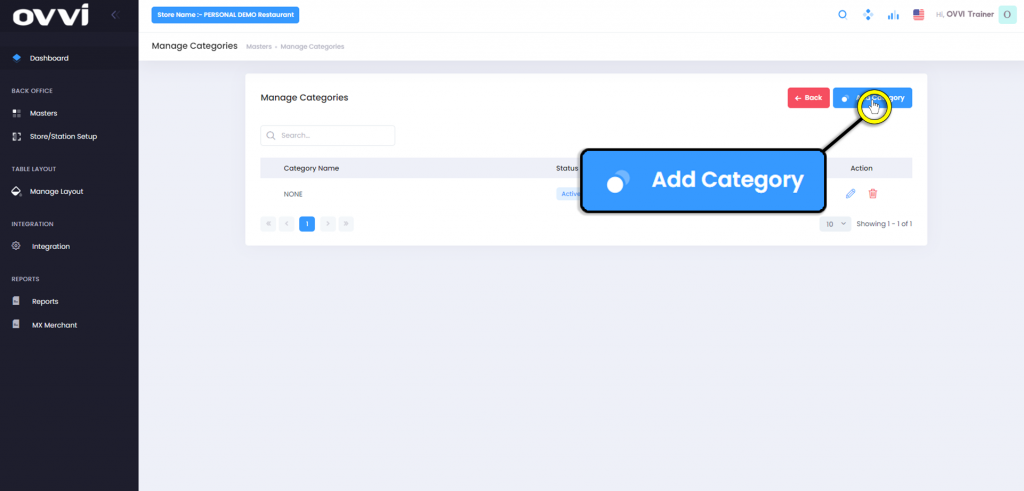
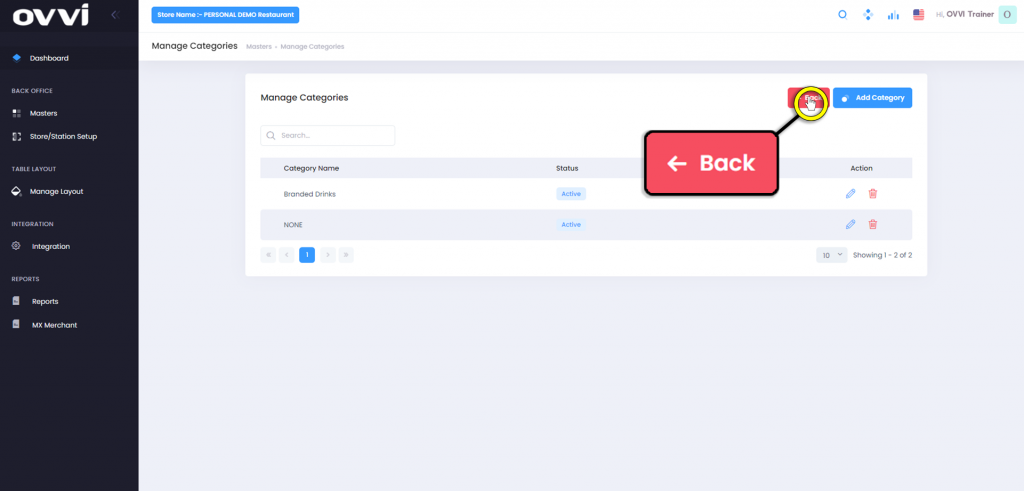
4. In the ‘Manage Categories’ page locate and click the ‘Add Category’ button.
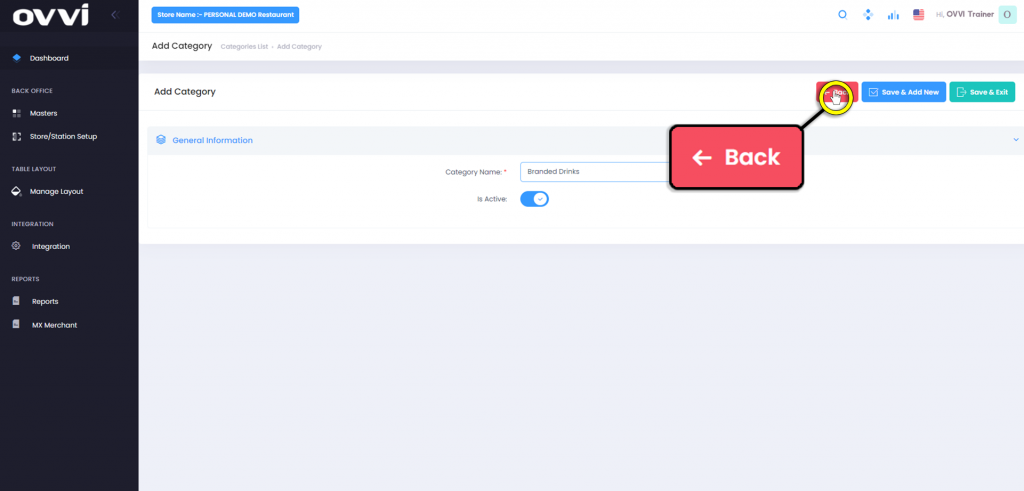
5. Under the general information section of the ‘Add Category’ page Locate the ‘Category Name’.
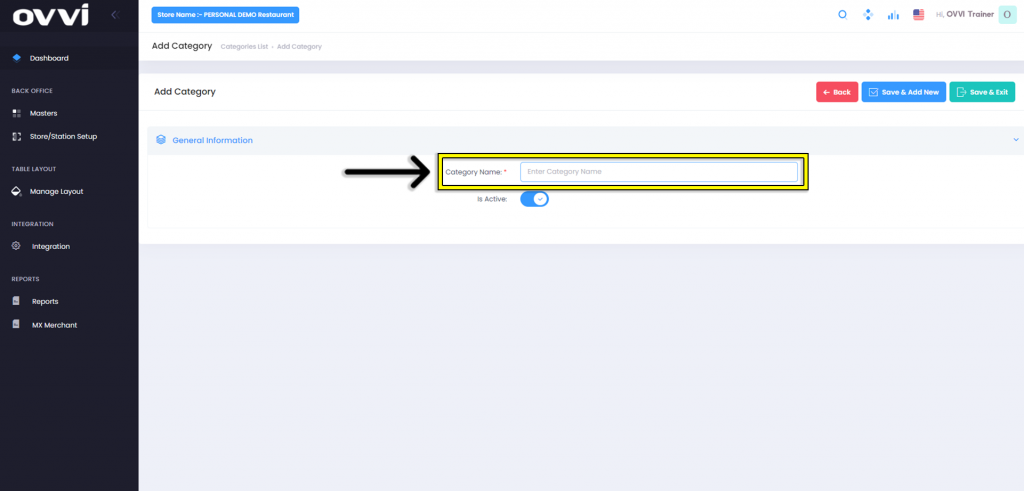
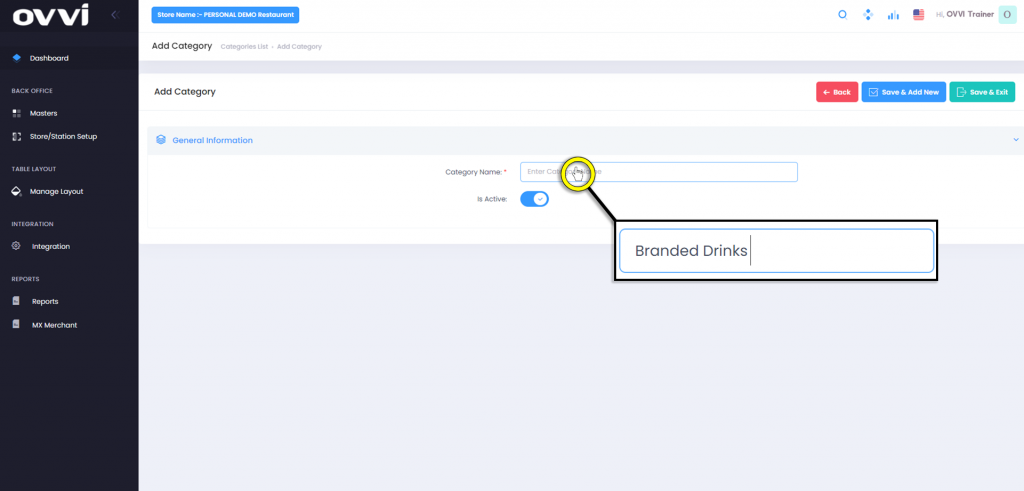
6. Click in the Text box and input the desired name of the Category.
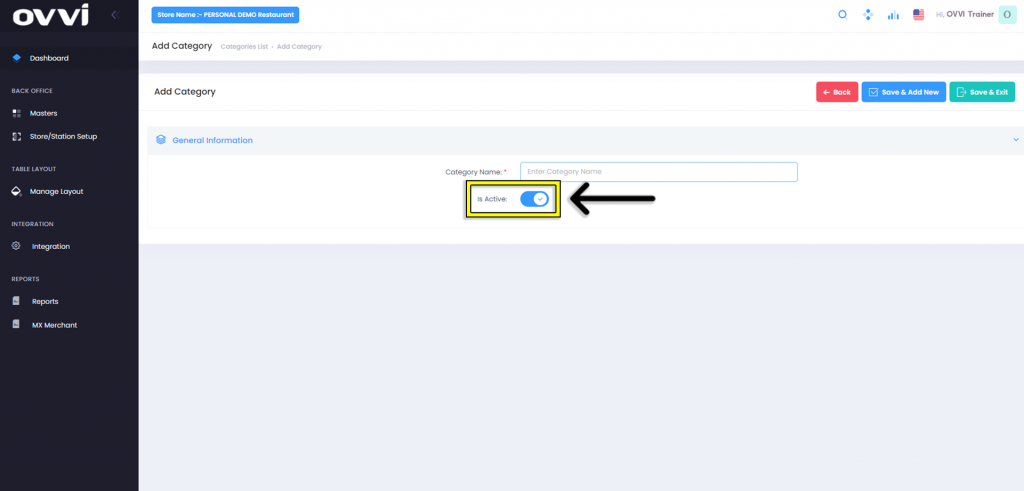
7. Verify that the option labeled ‘Is Active’ is in the ON position.
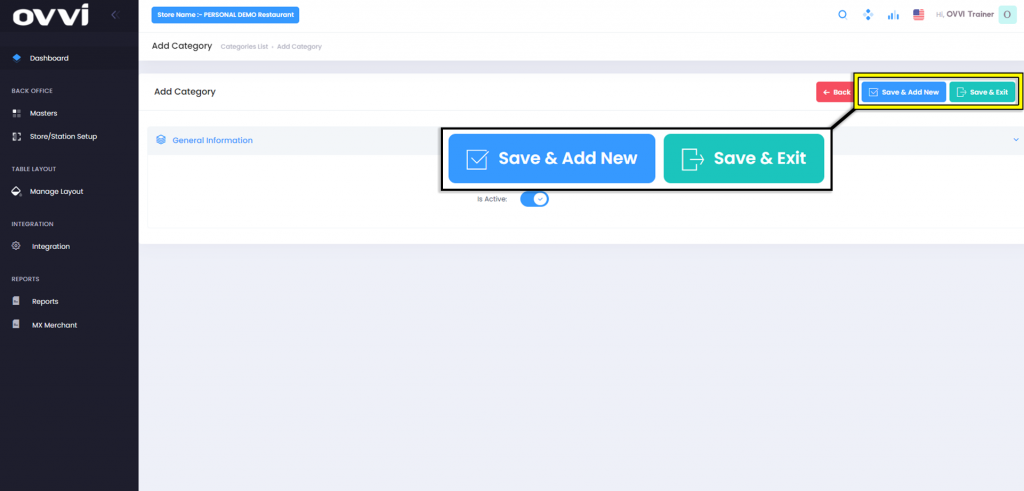
8. click the ‘Save & Exit’ to go back ‘Manage Categories’ Page or the ‘Save & Add New’ button to continue creating additional Categories.
9. Click on the ‘Back’ Button to return to the ‘Manage Discount Type’ page without saving any changes.
10. Back in the ‘Manage Discount Type’ page the options to edit or delete discount types by clicking on either the ‘Pencil’ or ‘Trash Can’ action buttons.

11. Click on the ‘Back’ button to return to the ‘Masters’ Page when done creating and editing discount types.
12. This concludes the Guide on How to Add Categories.
Was this article helpful?
YesNo