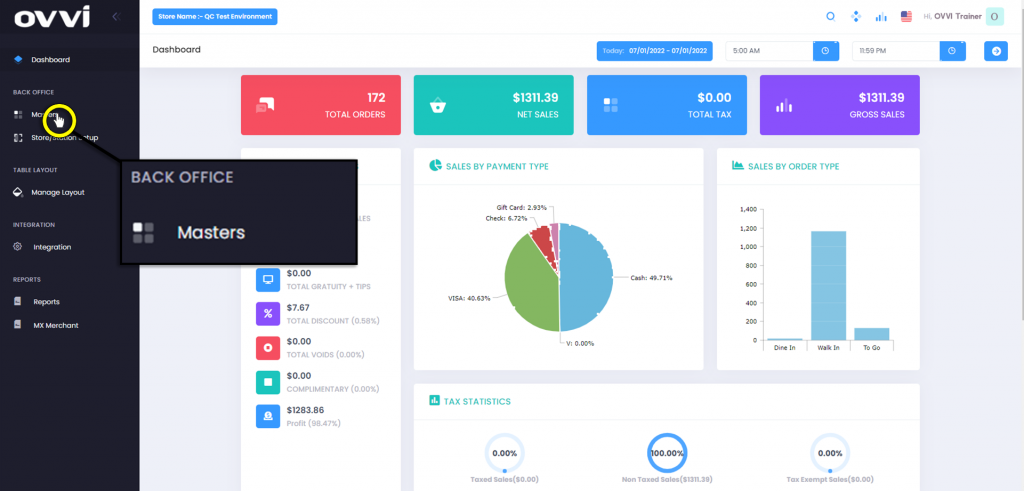
2. From the main dashboard, navigate to the panel located on the left side of the site and click on the option ‘Masters’.
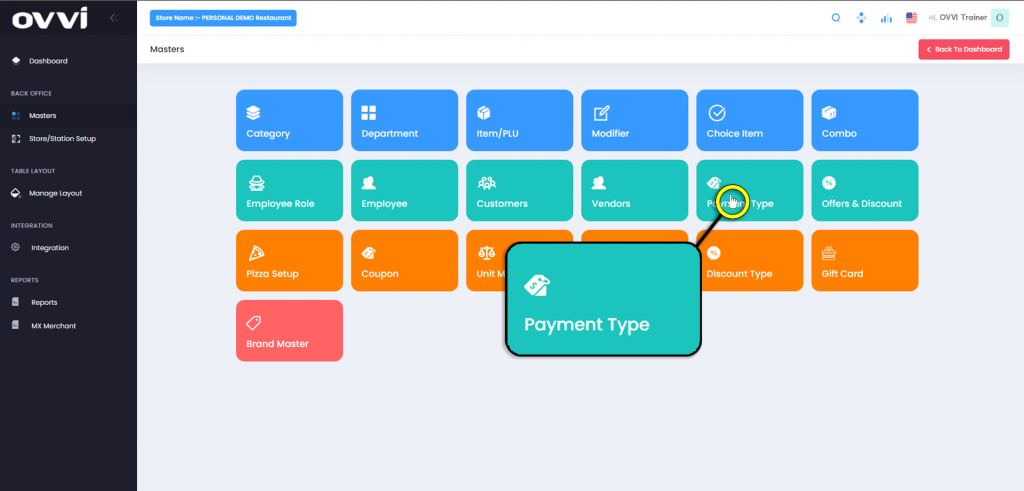
3. From the ‘Masters’ page, locate and click on the ‘Payment Type’ button.
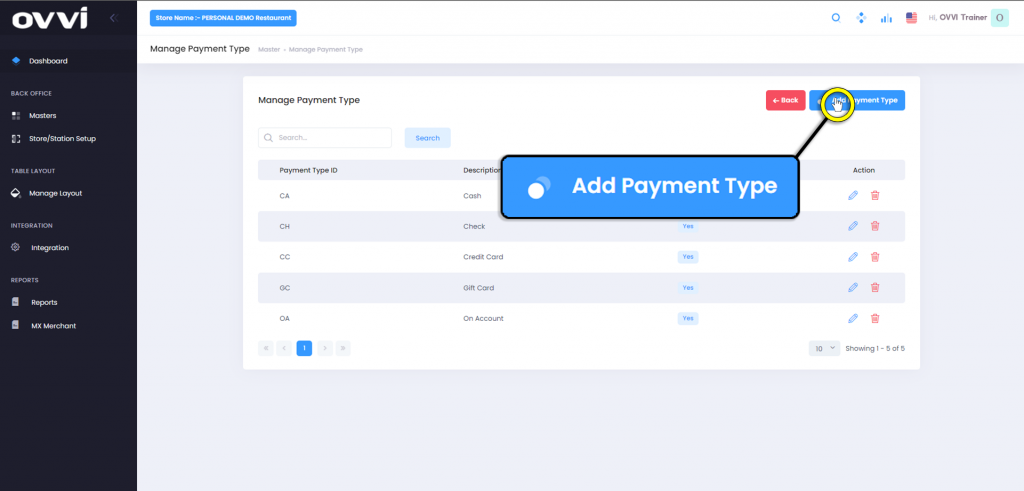
4. Click the ‘Add Payment Type’ button in the upper right corner of the page.
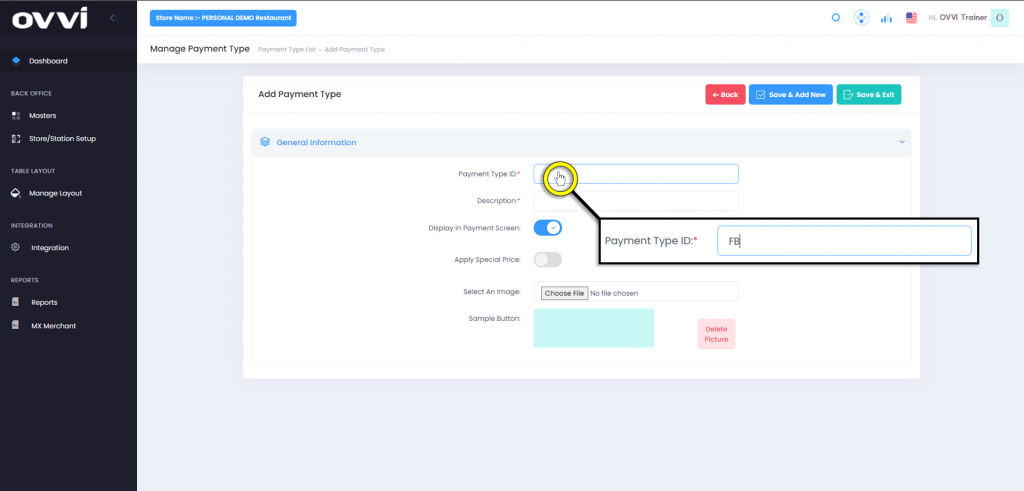
5. Click the text box labeled ‘Payment Type ID:’ and input the ID.
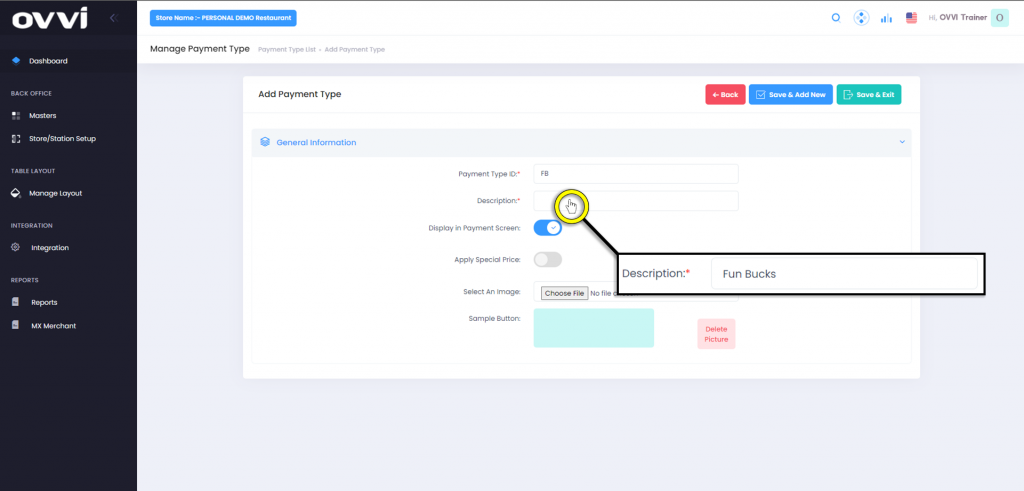
6. Click the text box labeled ‘Description:’ and input the name of the payment type.
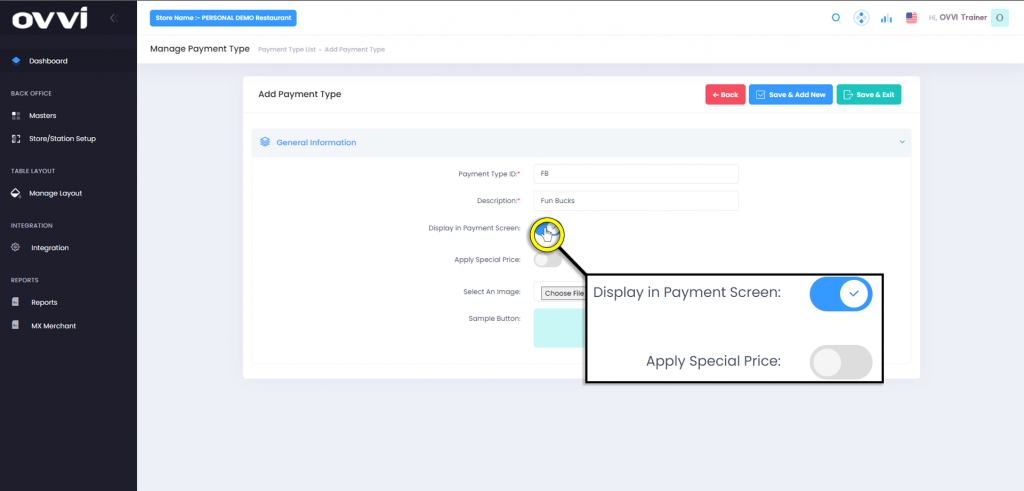
7. Make sure the ‘Display in Payment Screen’ is toggled in the on position so that it will appear in the OVVi application.
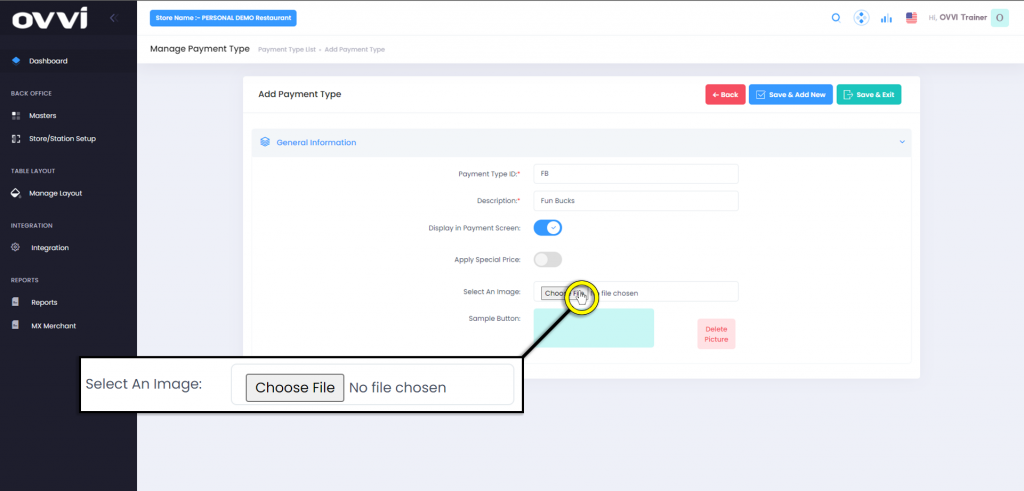
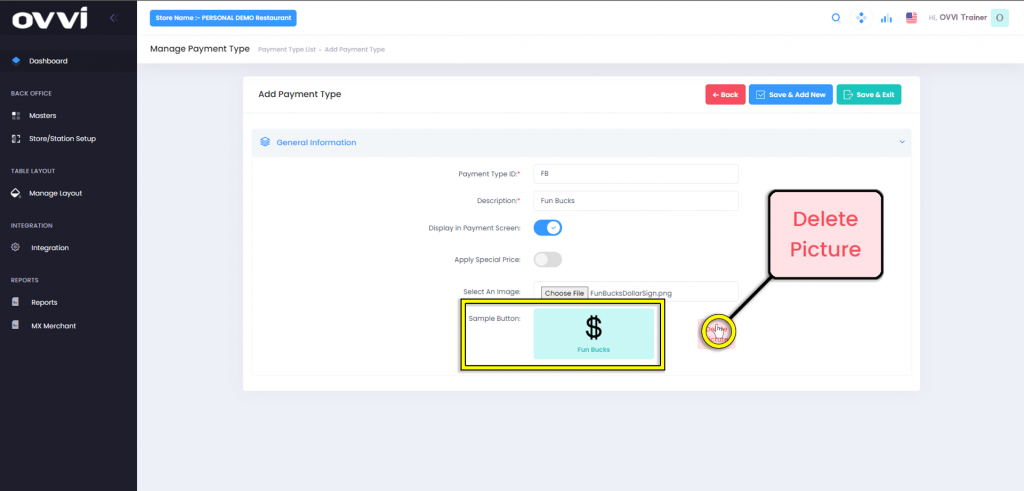
8. The option to add an image can be done by clicking the ‘Choose File’ button, located in the box labeled ‘Select an Image:’
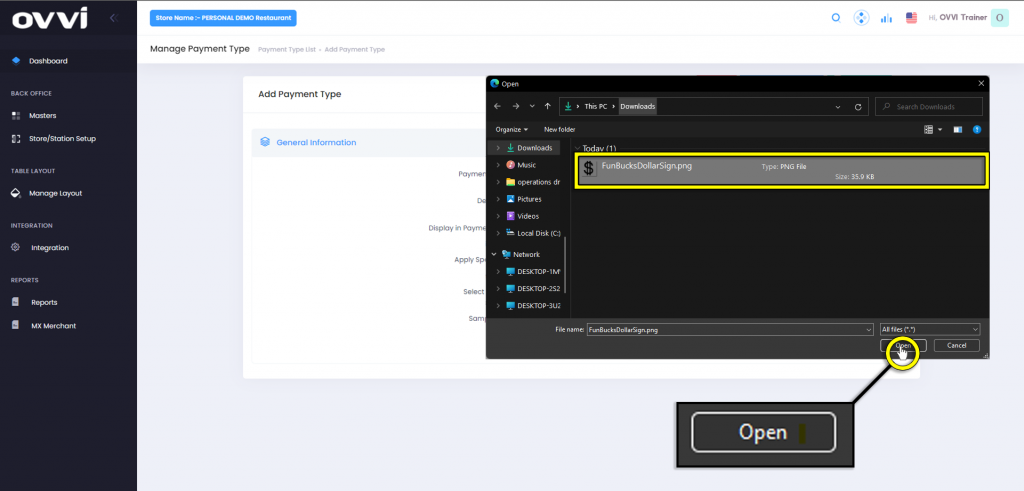
9. Select the file from its location and click ‘Open’ to add it.
10. To delete the image, click the option ‘Delete Picture’. This will remove the image and only display the text in the sample button.
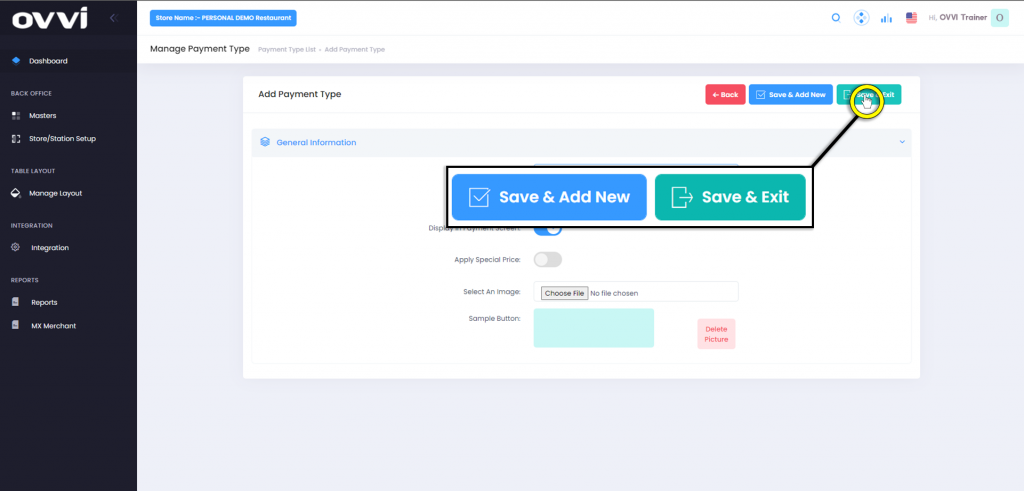
11. When done creating payment type, click the ‘Save & Add New’ button to continue creating new payment types or the ‘Save & Exit’ to go back to the ‘Manage Payment Type’ Page.
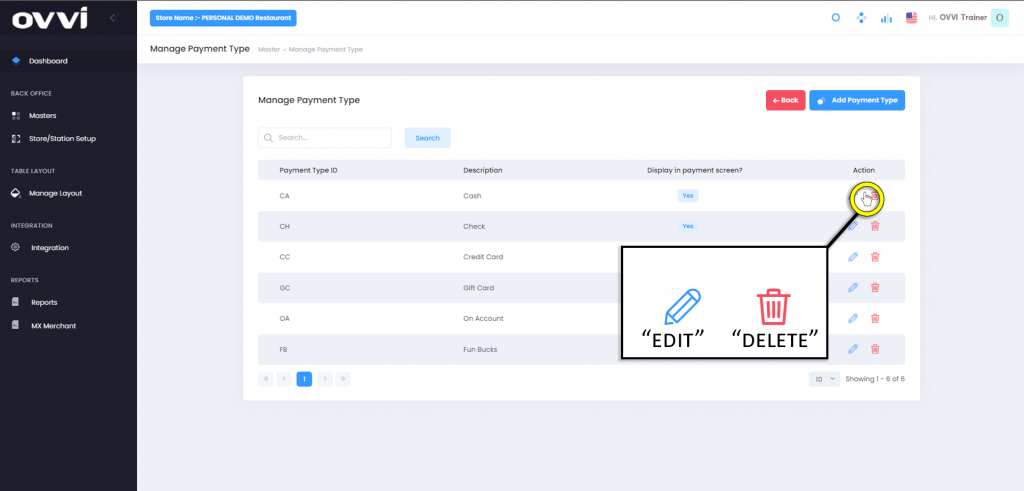
12. To edit or delete any payment type, click on the ‘Pencil’ icon to edit or the ‘Trash Can’ icon to delete it permanently.
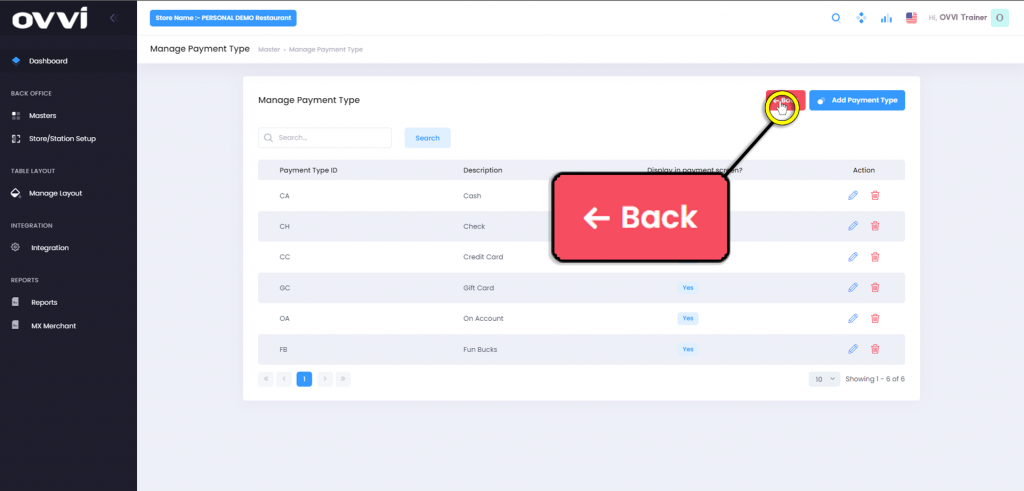
13. When done with payment types, click the ‘Back’ located in the upper right corner of the page to go back to the ‘Masters’ page.
14. This concludes the guide to adding and editing payment types.