How To Setup Vendors (BOH)
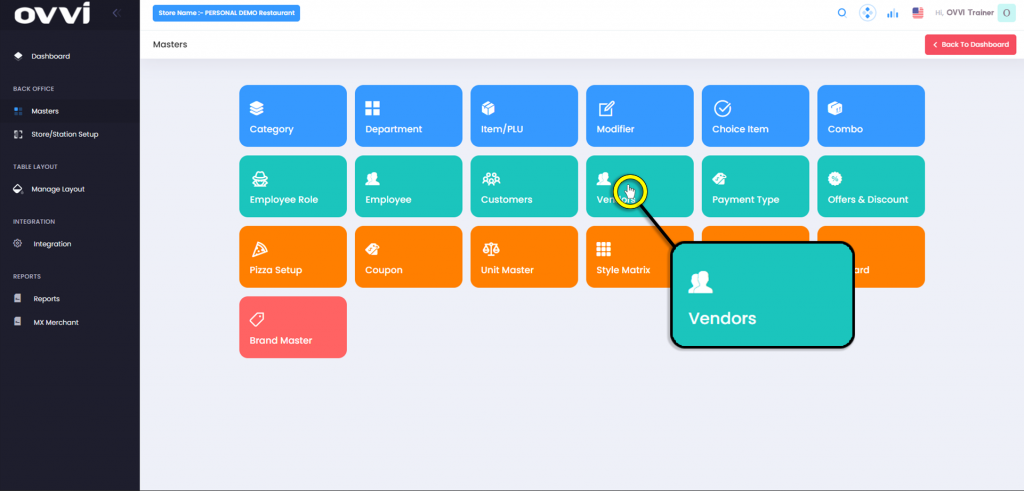
2. From the main dashboard navigate to the panel located on the left side of the site and click on the options ‘Masters’.
3. From the ‘Masters’ page, locate and click on the ‘Vendors’ button.
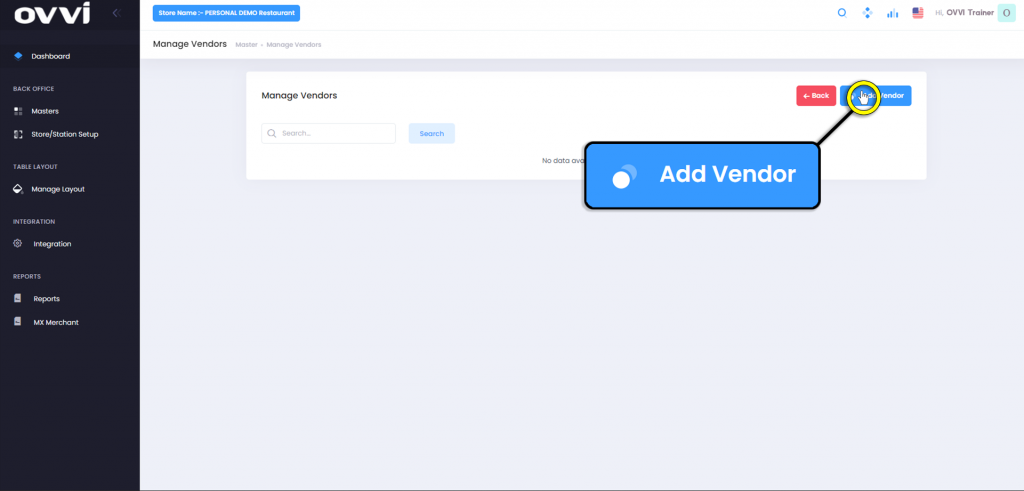
4. Click the ‘Add Vendor’ button.
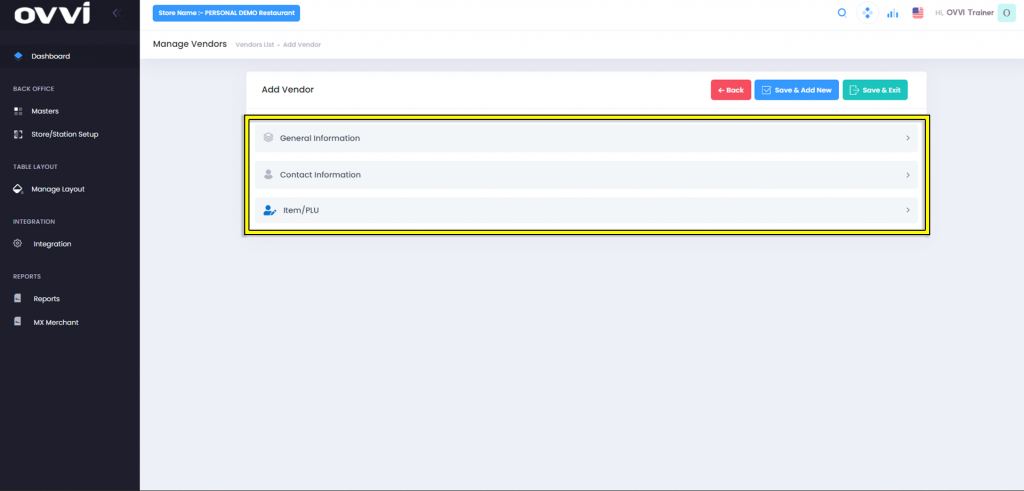
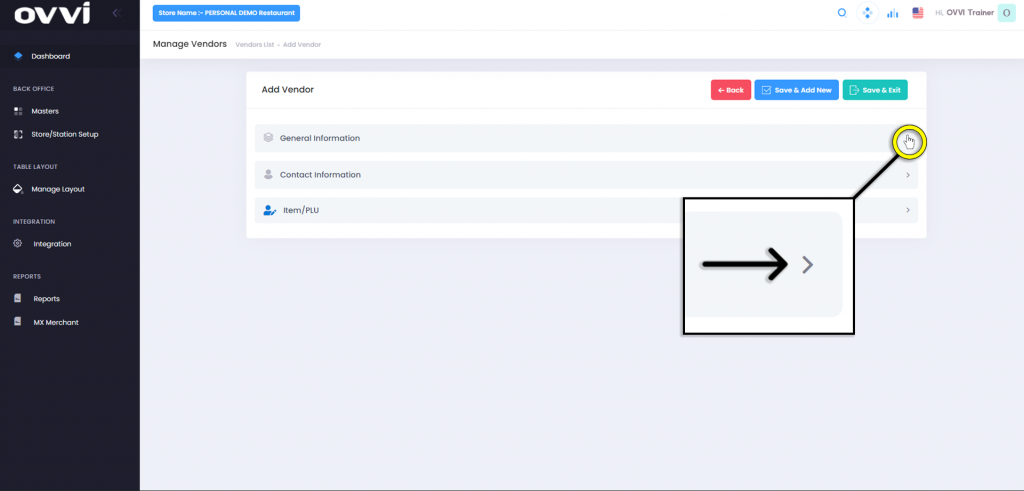
5. In the ‘Add Vendor’ page there are 3 sections, ‘General Information’, ‘Contact Information’, and ‘Item/PLU’.
6. Expand the ‘General Information’ section.
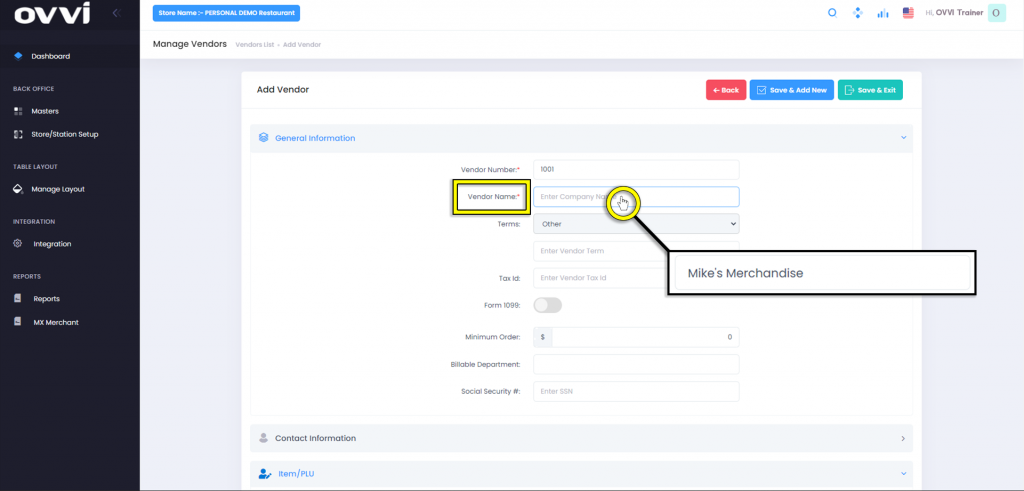
7. Click in the box labeled ‘Vendor Name:’ and input the name of the vendor’s company name.
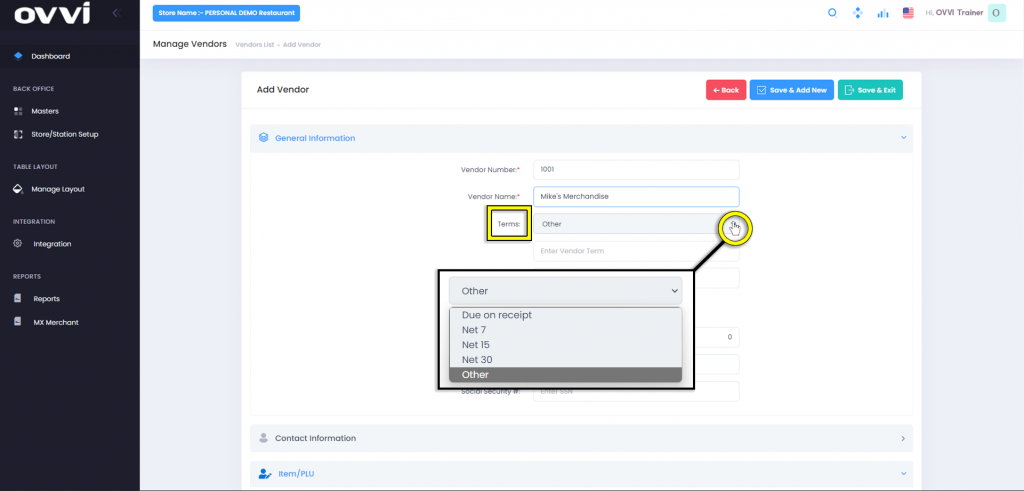
8. Click the drop-down menu labeled ‘Terms:’ and select the term type.
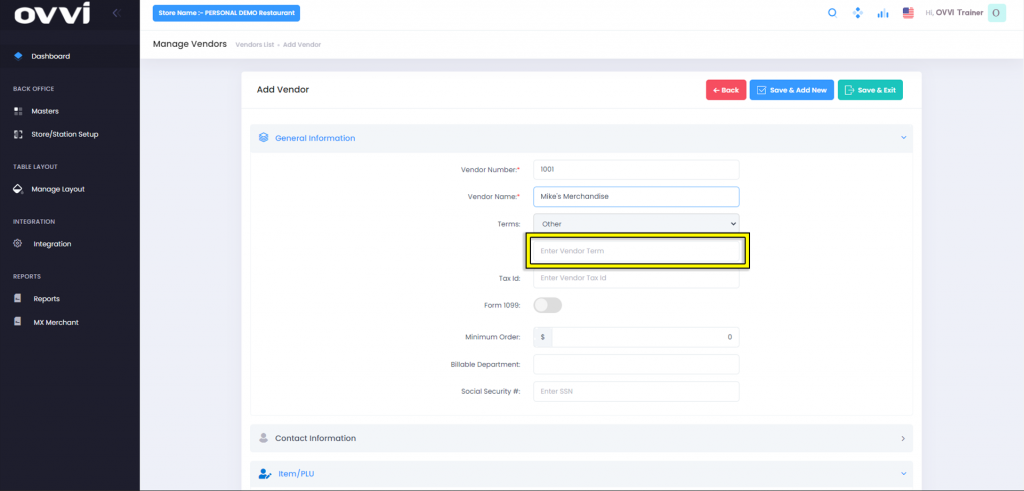
9. Option to input the term is in the text box labeled ‘Enter Vendor Term’.
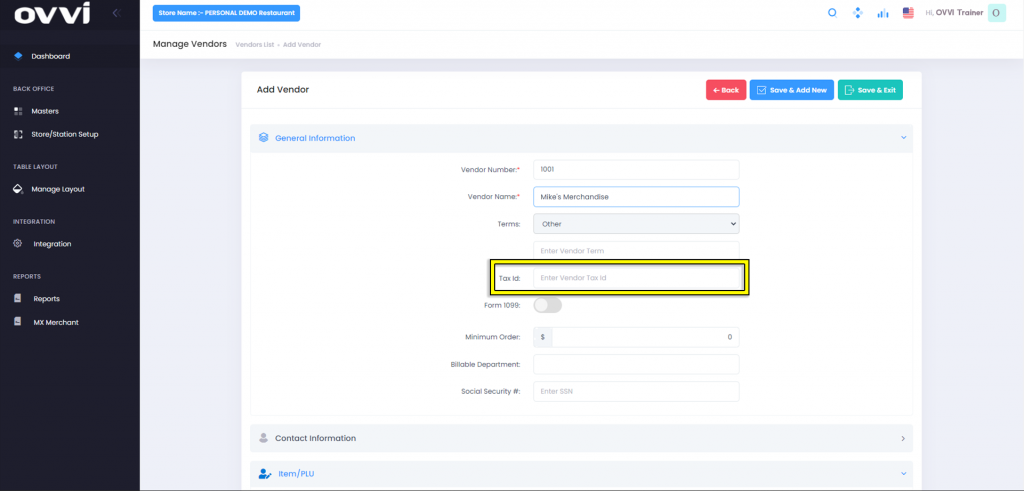
10. If the vendor has a Tax Identification Number, then input it in the text box labeled ‘Tax ID:’
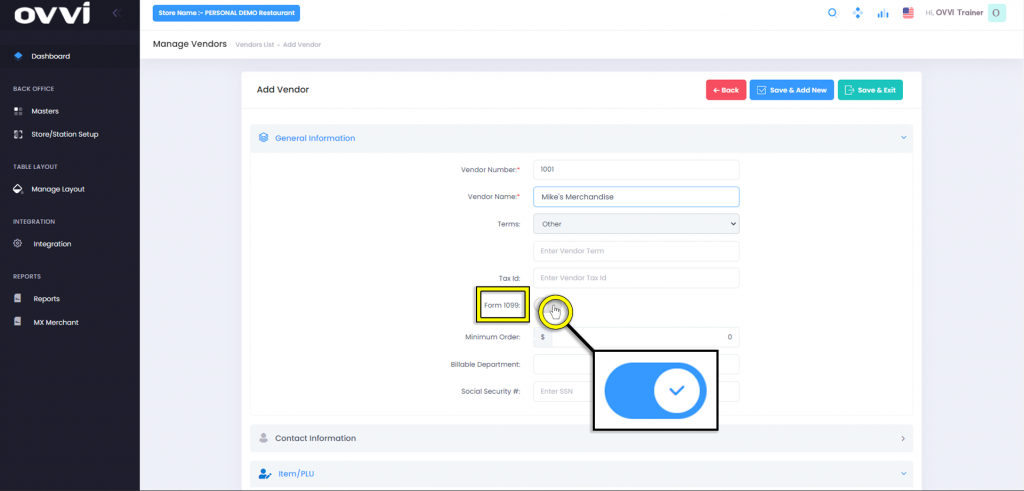
11. If the vendor is under a 1099 then toggle the ‘Form 1099:’ switch.
11. Then input the desired number of tables that you wish to populate in the sections labeled ‘Number of Table:’.
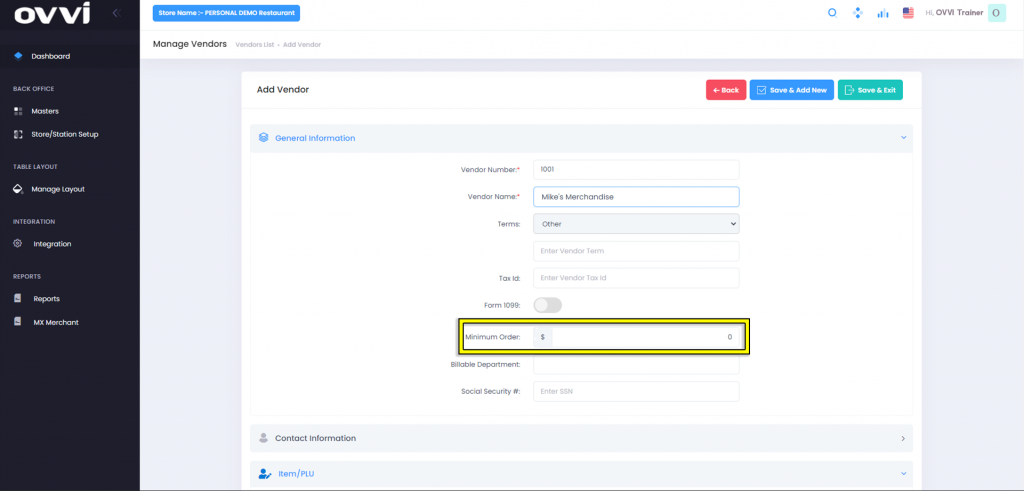
12. The text box labeled ‘Minimum Order:’ to input the minimum order cost.
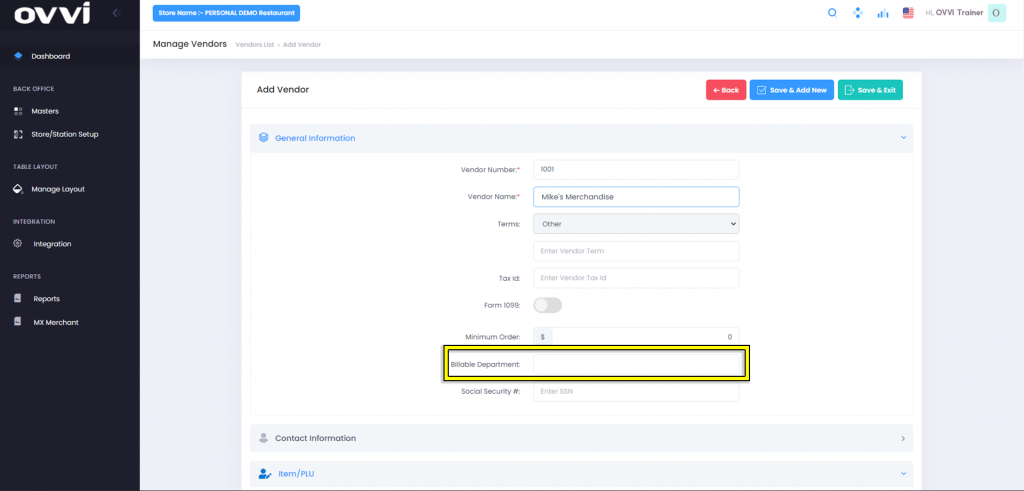
13. Input name of vendors billing in the text box labeled ‘Billable Department’
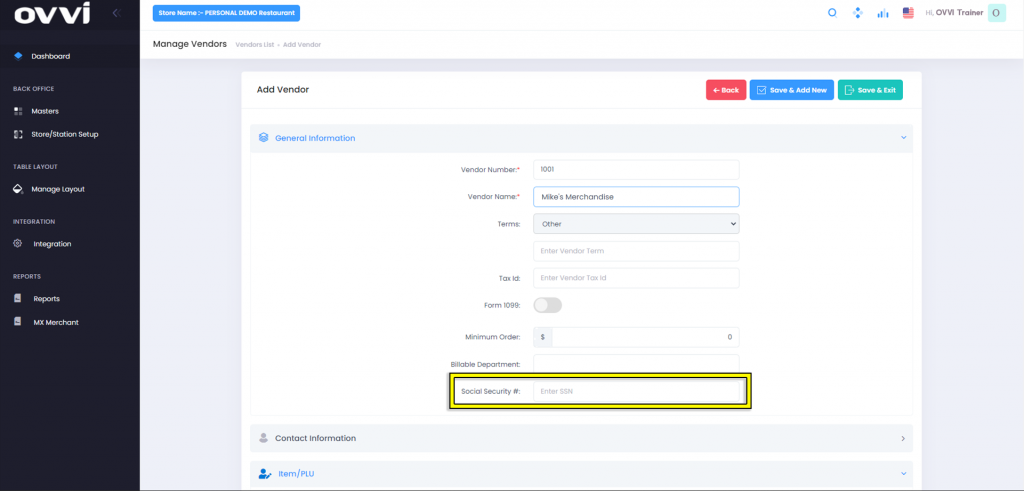
14. If required or available, input the vendor’s SSN in the text box labeled ‘Social Security #:’.
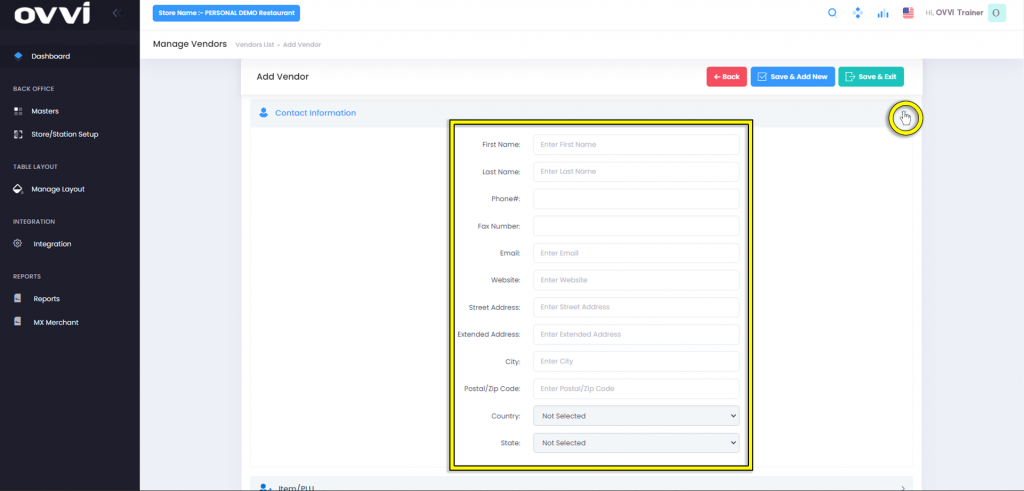
15. Click on the section labeled ‘Contact Information’ to input information such as ‘First Name’, ‘Phone#’, and ‘Email:’, among any other available contact information for the vendor.
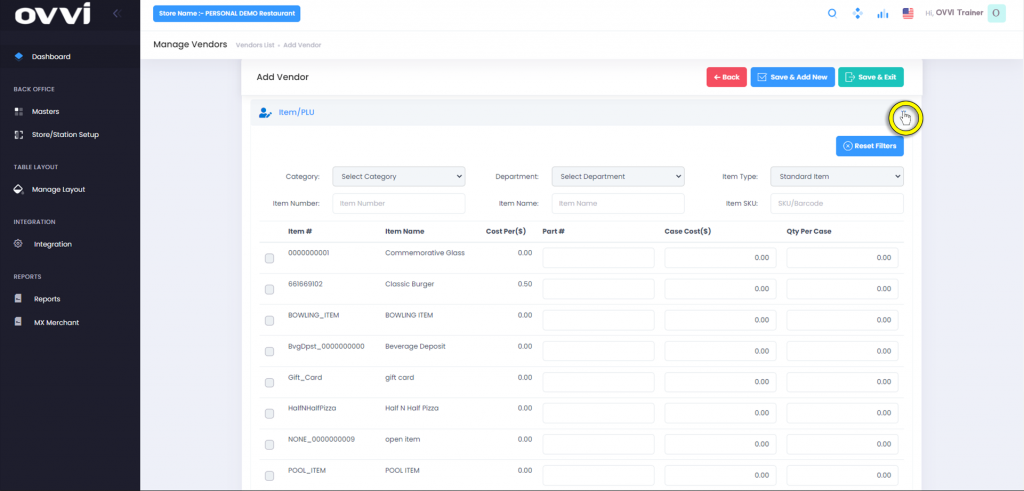
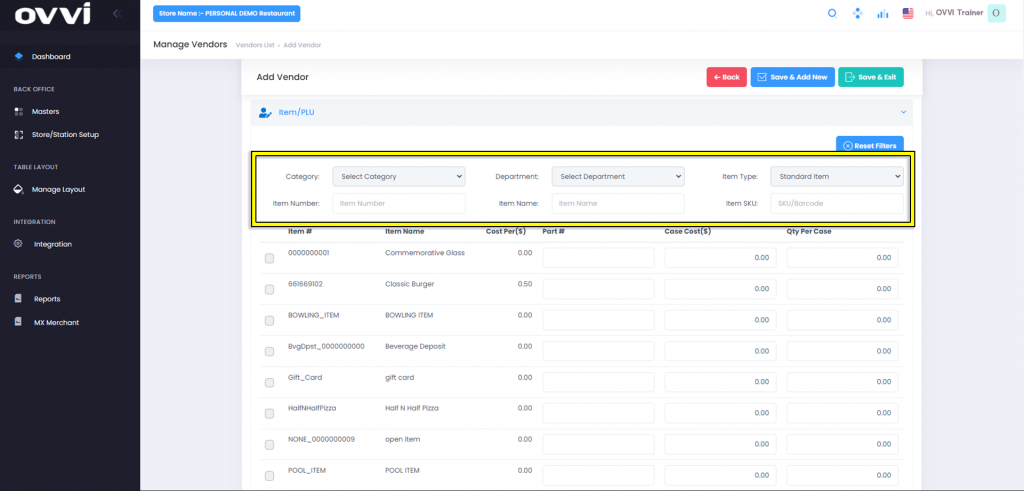
16. Expanding the last section labeled ‘Item/PLU’ allows users to assign specific items to the vendor.
17. Users can search for specific items by using the filters such as, ‘Department:’, ‘Item Name:’, and ‘Item SKU:’.
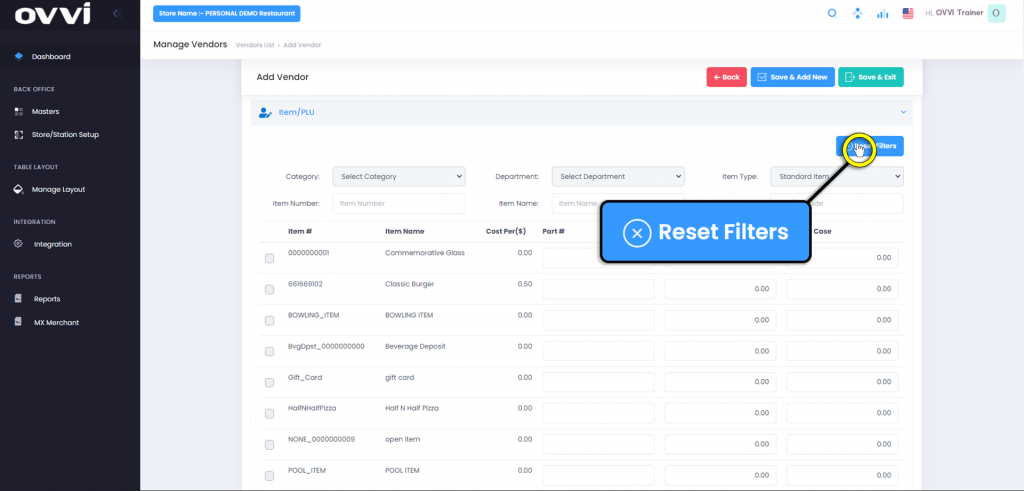
18. Clicking the ‘Reset Filters’ button will clear search criteria allowing to redefine a search for any specific item(s).
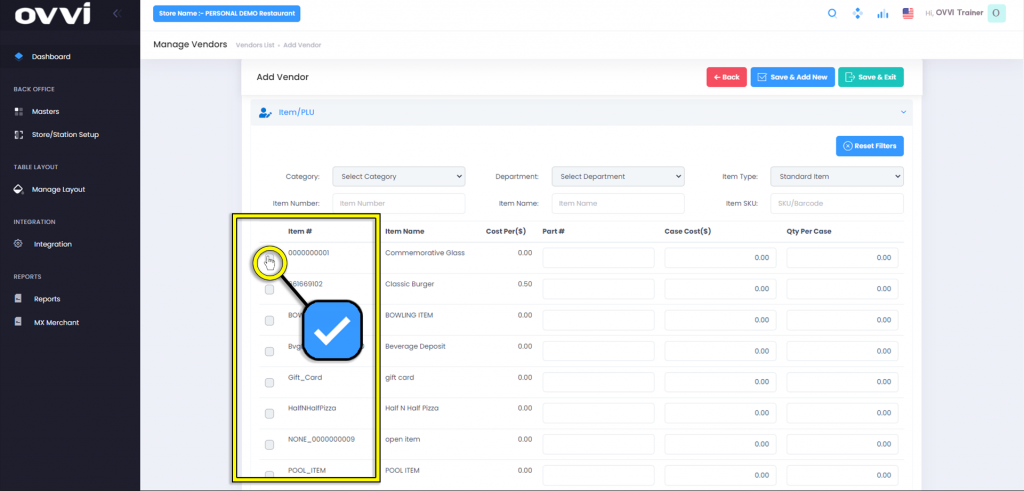
19. Click on any grey box under the ‘Item #’ section to select the desired items to associate with the vendor.
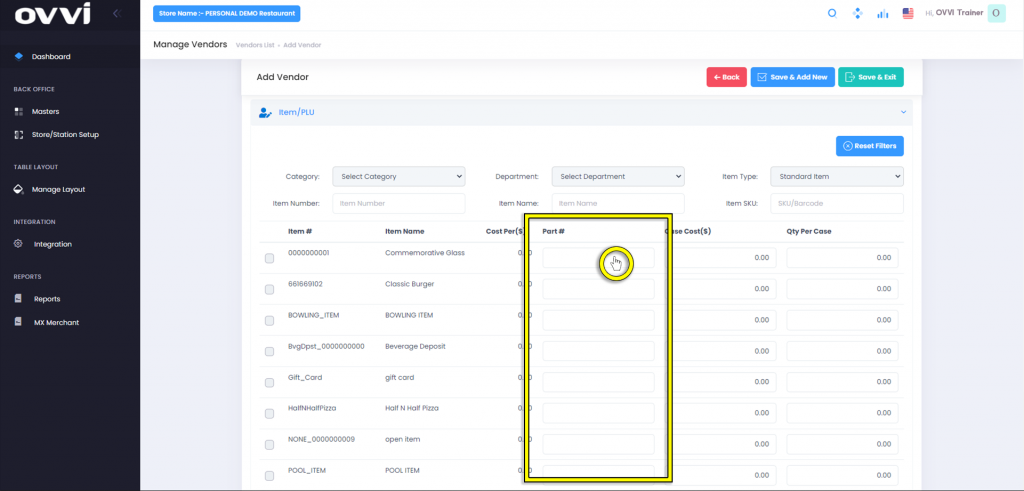
20. If there are part numbers associated with the item, you can input this information under the section labeled ‘Part #’.
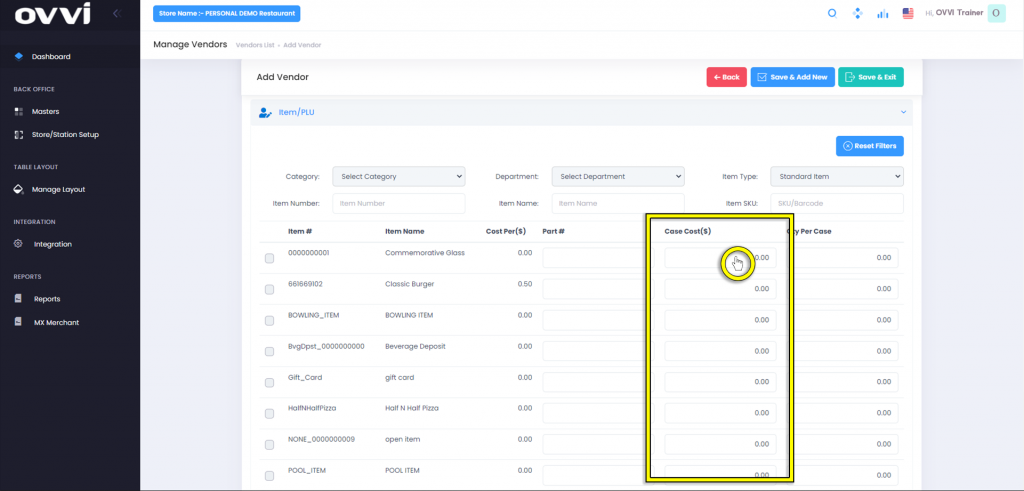
21. Cost per Case for an item can be inputted in the section labeled ‘Case Cost ($)’.
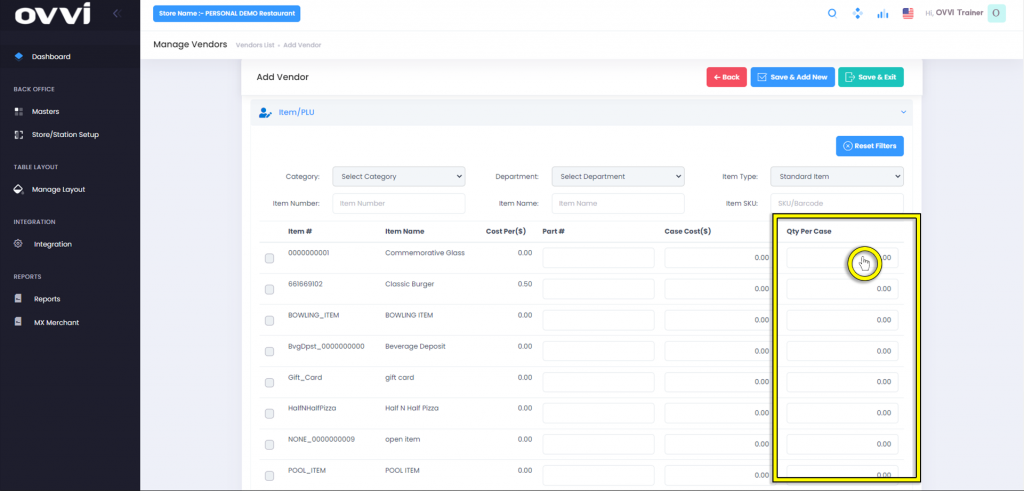
22. Quantity per case can be inputted in the section labeled ‘Qty Per Case’.
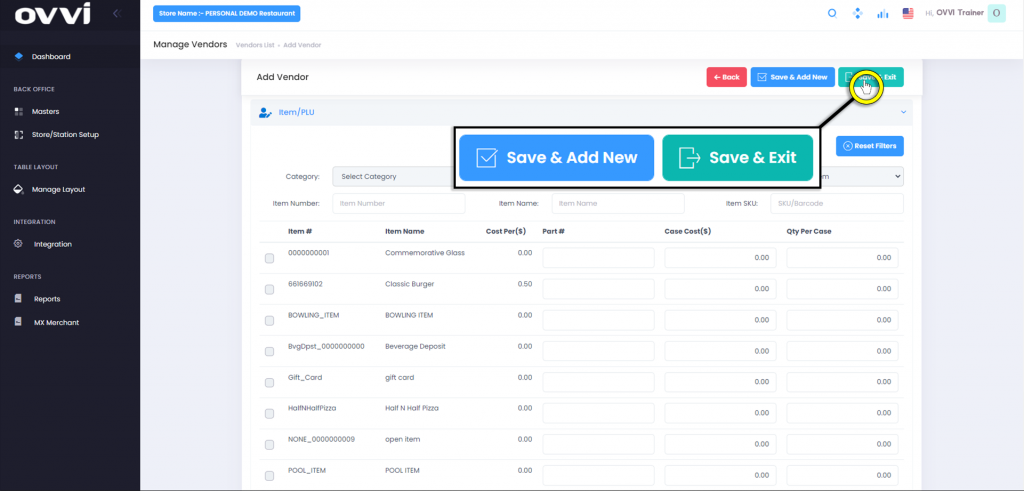
23. When done editing the vendor information, click the ‘Save & Add New’ button to continue adding new vendors, or the ‘Save & Exit’ to go back to the ‘Manage Vendors’ Page.
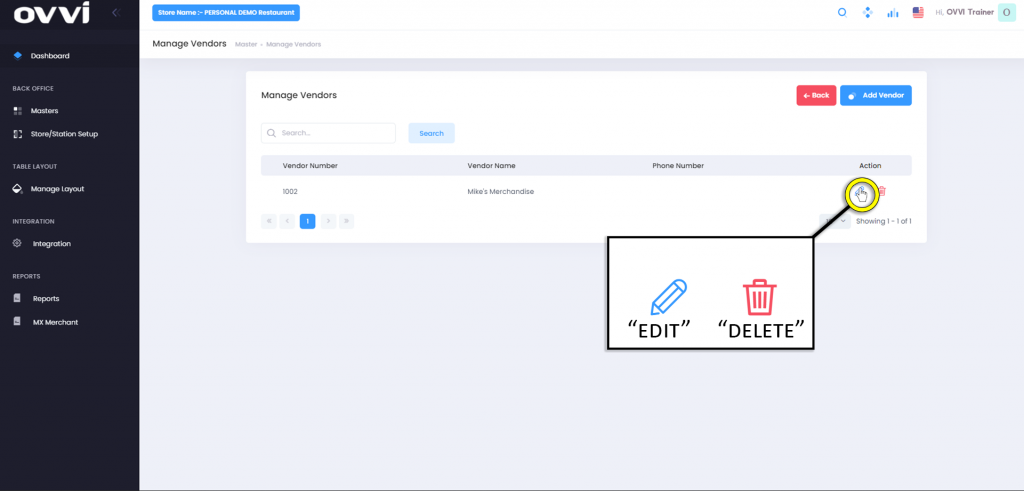
24. To edit or delete any vendor, click on the ‘Pencil’ icon to edit or the ‘Trash Can’ icon to delete it permanently.
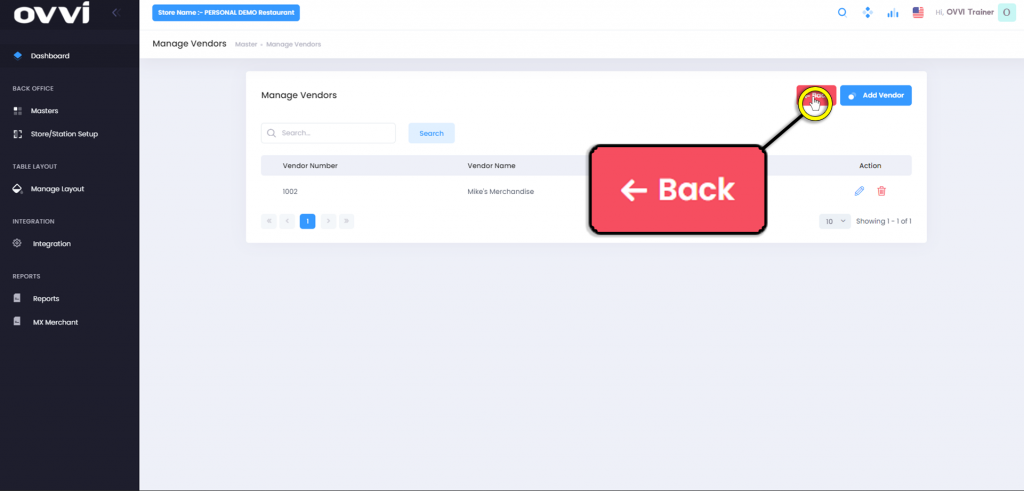
25. When done with Managing Vendors, click the ‘Back’ located in the upper right corner of the page to go back to the ‘Masters’ page.
26. This concludes the guide on How To Setup Vendors within the Back of House (BOH).