- OVVI POS
Initial Setup to Start/End Shift.
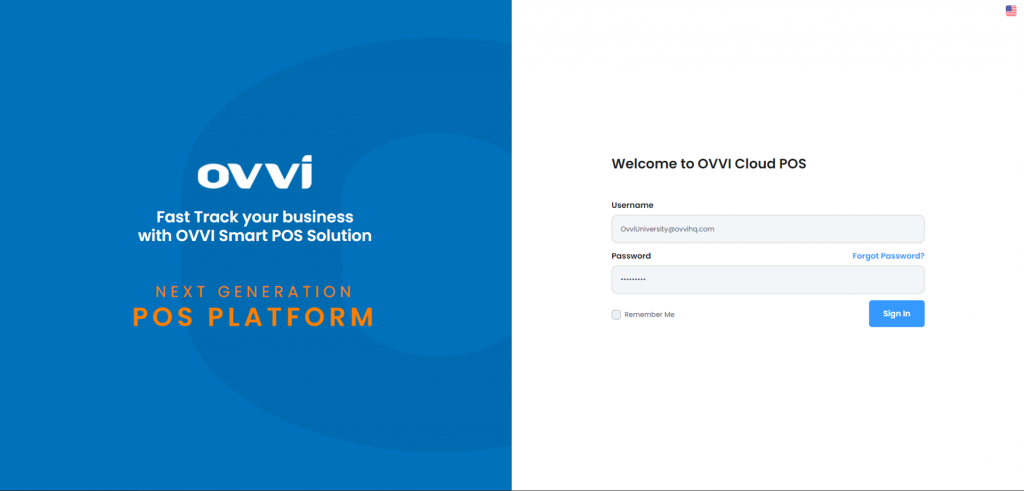
1. Go to cloud.ovvihq.com and login using your merchant username and password.
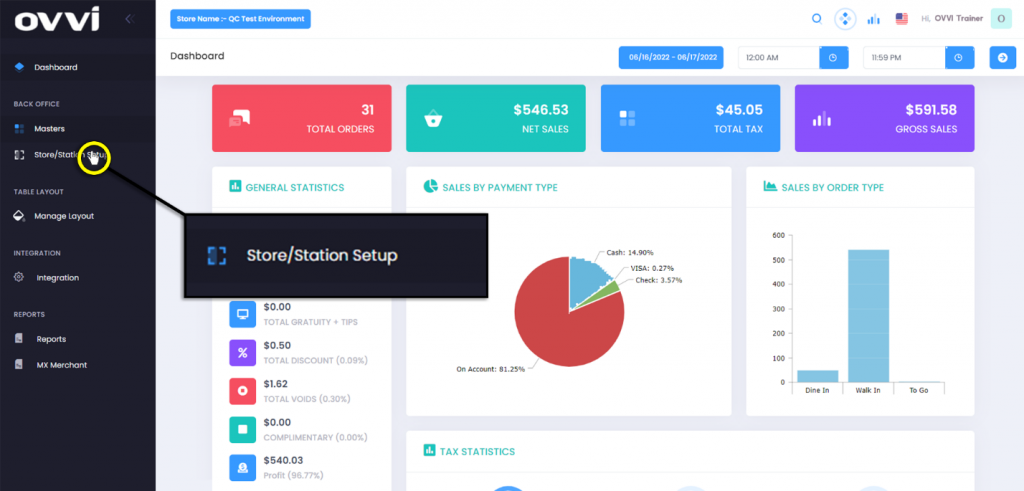
2. From the main dashboard navigate to the panel located on the left side of the site and click on the options ‘Store/Station Setup’.
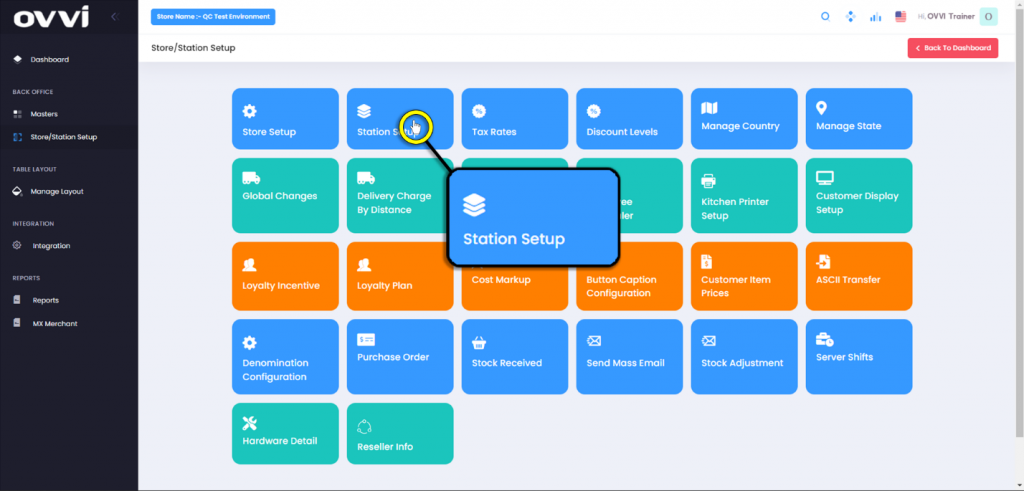
3. In the ‘Store/Station Setup’ Page locate and click on the tile labeled ‘Station Setup’.
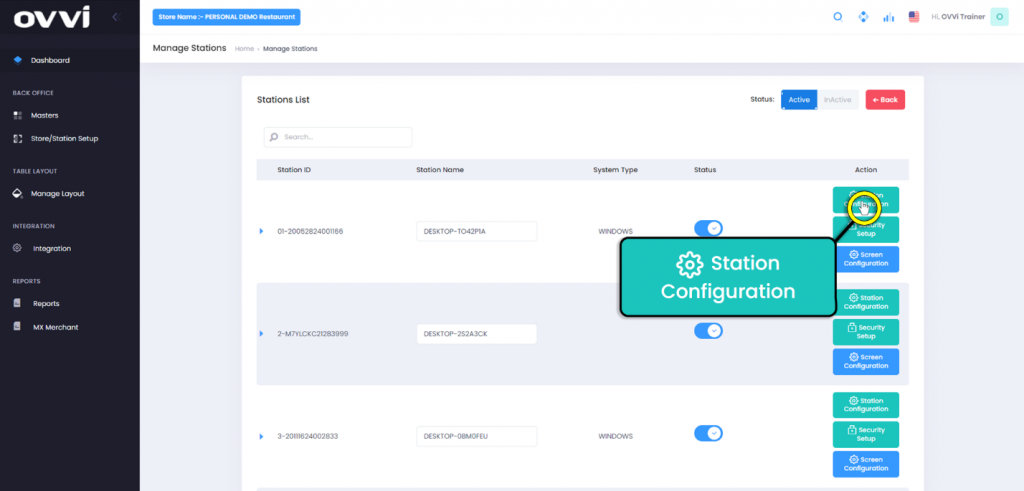
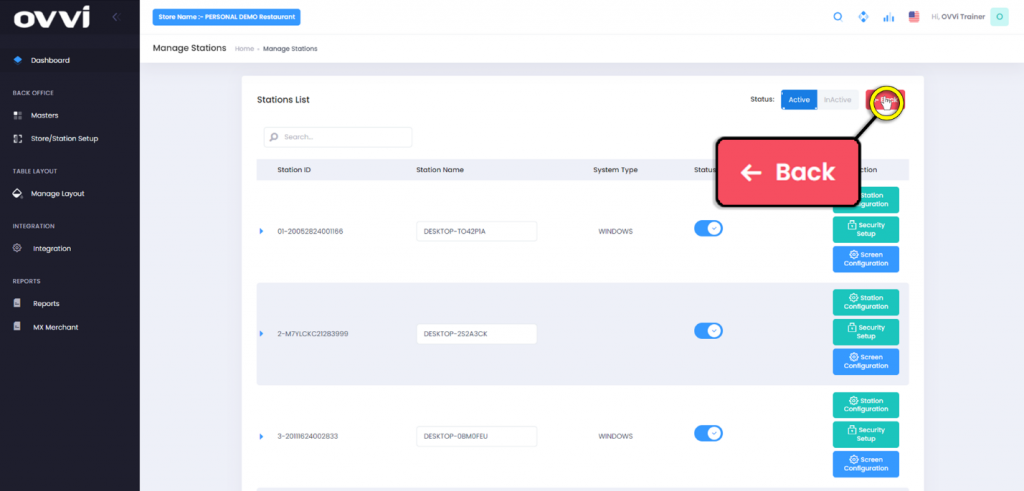
4. This will load the ‘Stations List’ page and click on the button titled ‘Station Configuration’ located to the right of the station you wish to add your dynamic button for.
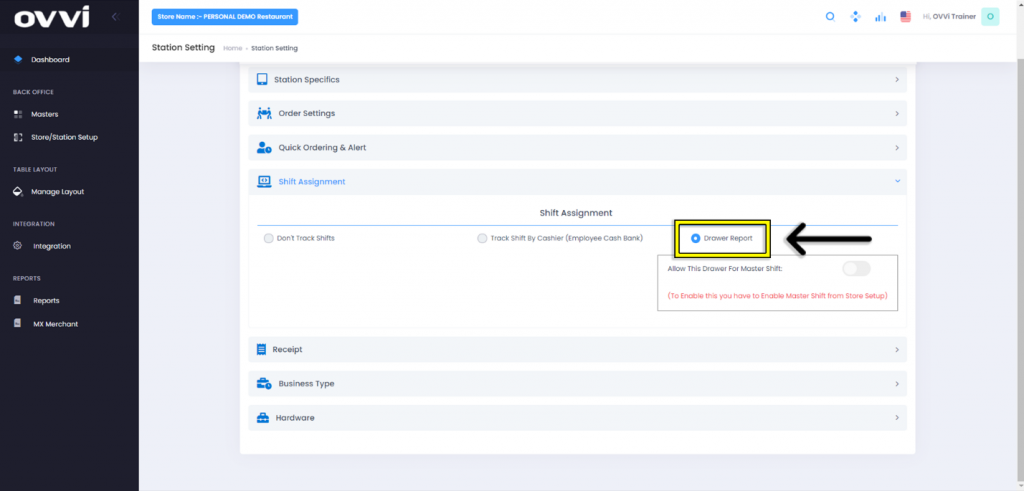
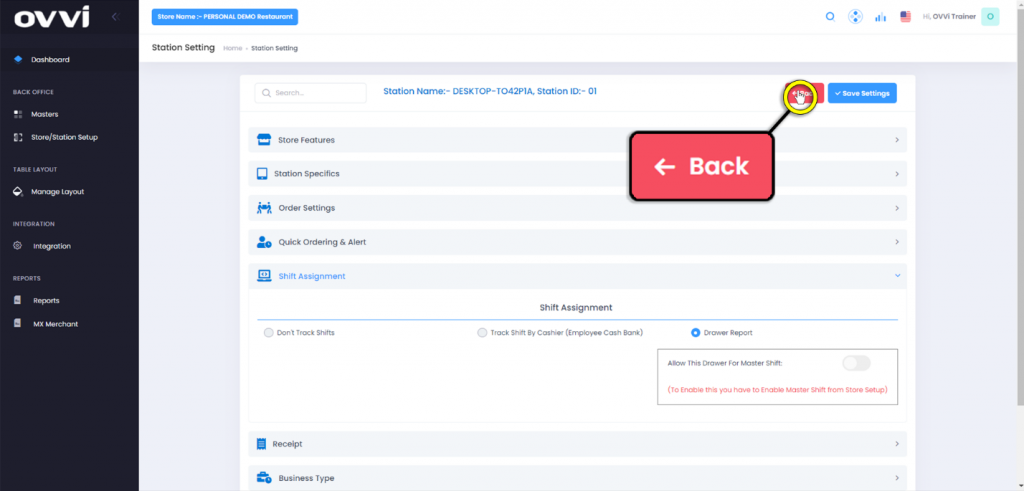
5. Expand the ‘Shift Assignment’ section.

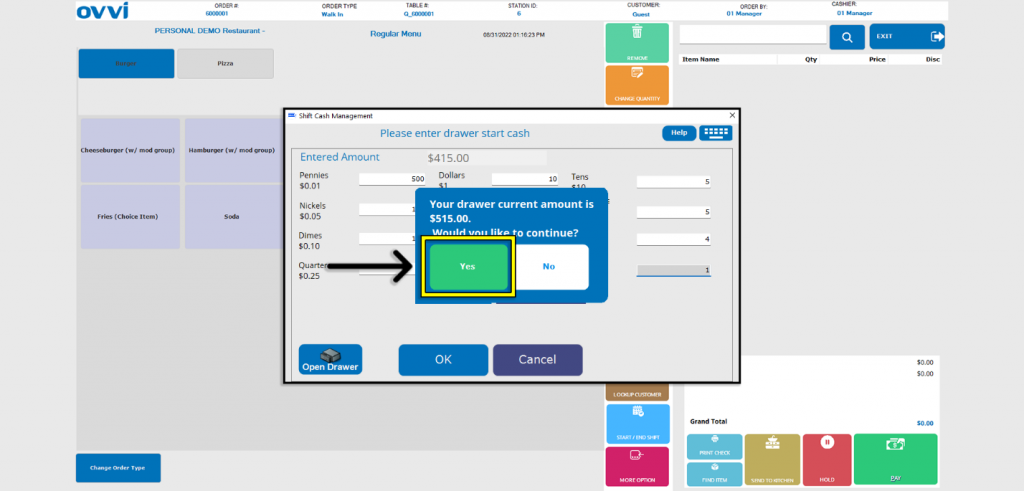
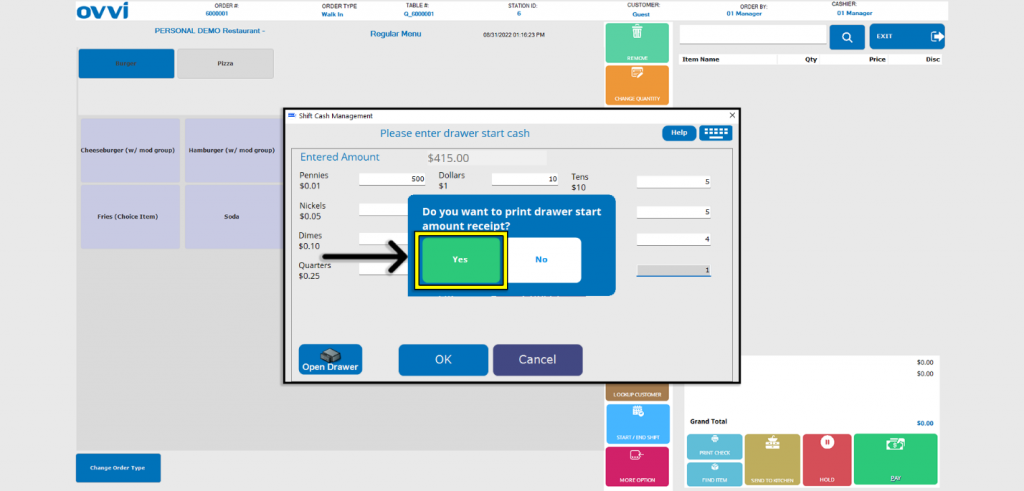
6. By default, the ‘Don’t Track Shifts’ option will be selected. When this is on, employees will not be prompted to report start/end drawer counts.

7. Users have the option to allow ‘Track Shift By Cashier’ but is not required unless the business practices Cash Bank.
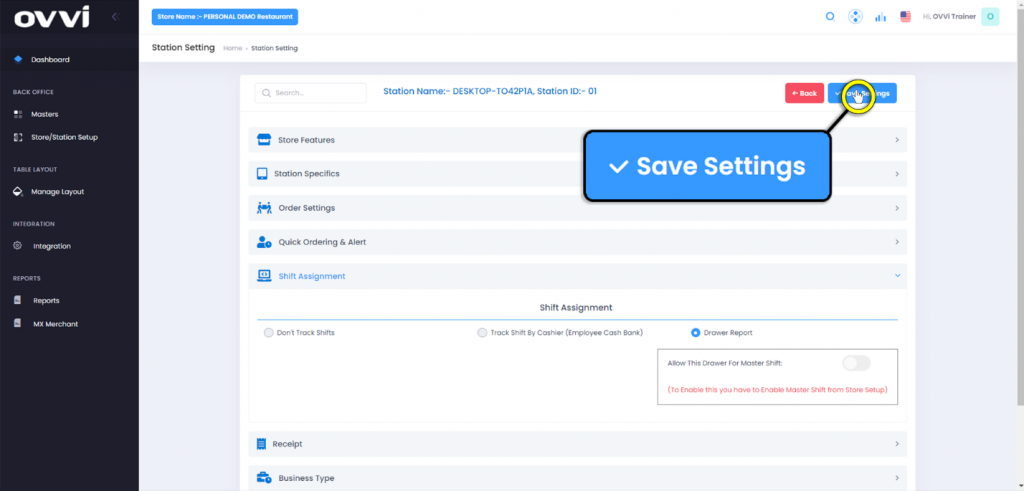
8. To guarantee that a specific station prompts to track shift reports, click on ‘Drawer Report’.
9. Users have the option to set the drawer to allow for ‘Master Shift’.
10. Once configurations have been set to users’ preferences, scroll to the top and click the ‘Save Settings’ button.
11. Click the ‘Back’ button to return to the ‘Manage Station’ page.
12. Once the configuration has been completed, click the ‘Back’ button to return to the ‘Store/Station Setup’ page.
13. This Concludes the Initial Setup guide for Start/End Shift for Back Office.
Was this article helpful?
YesNo
Related Articles: