- Manage Layout
How To Create/Manage Table Layout
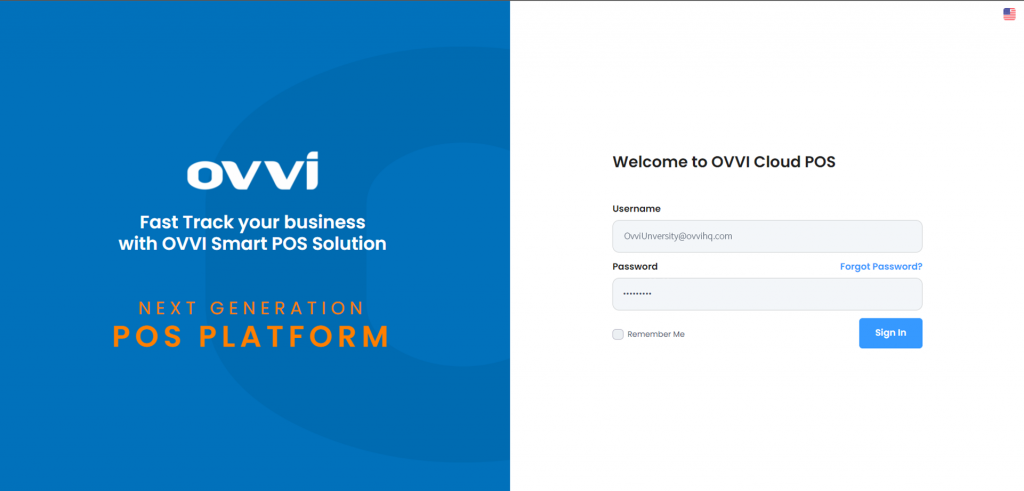
1. Go to cloud.ovvihq.com and Login using your merchant username and password.
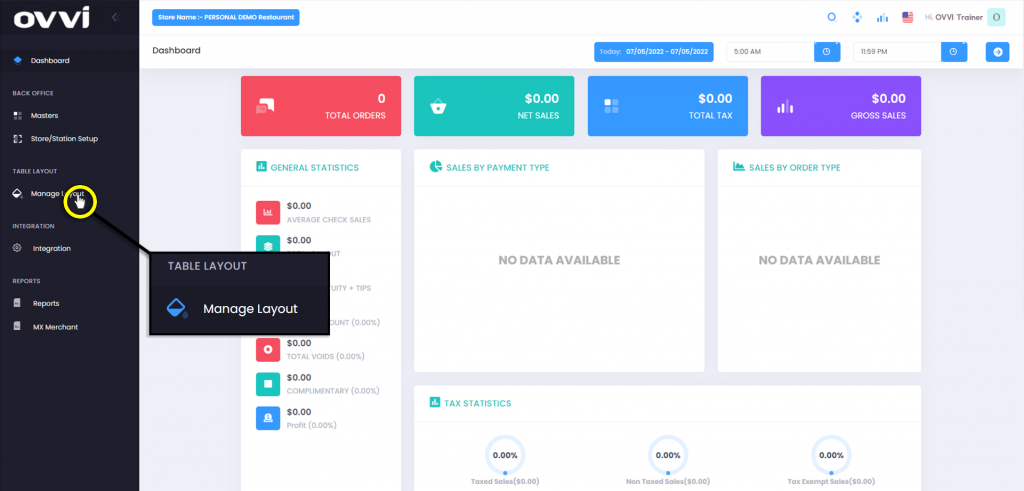
2. Click on ‘Manage Layout’ located on the left panel of the page.
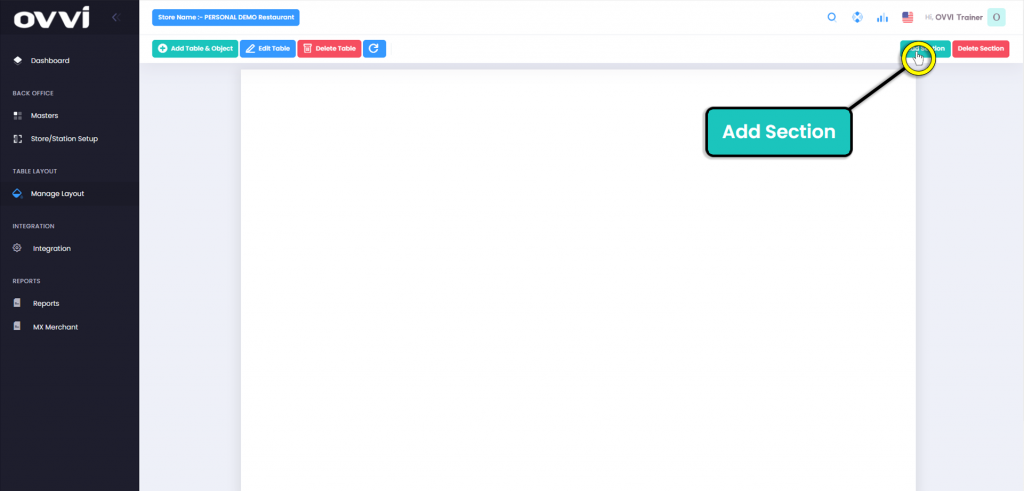
3. Click the ‘Add Section’ button in the upper right.
4. Input the desired title of the section in the box labeled ‘Section Name:’


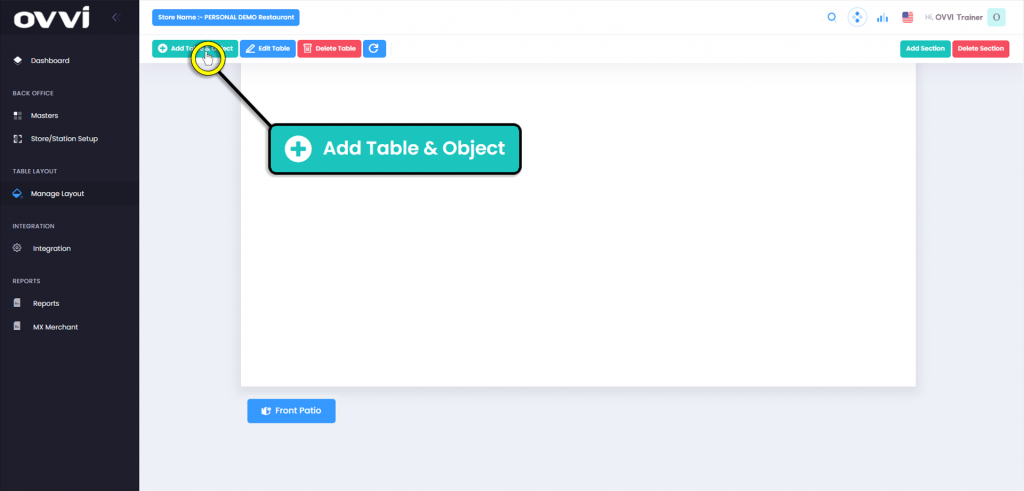
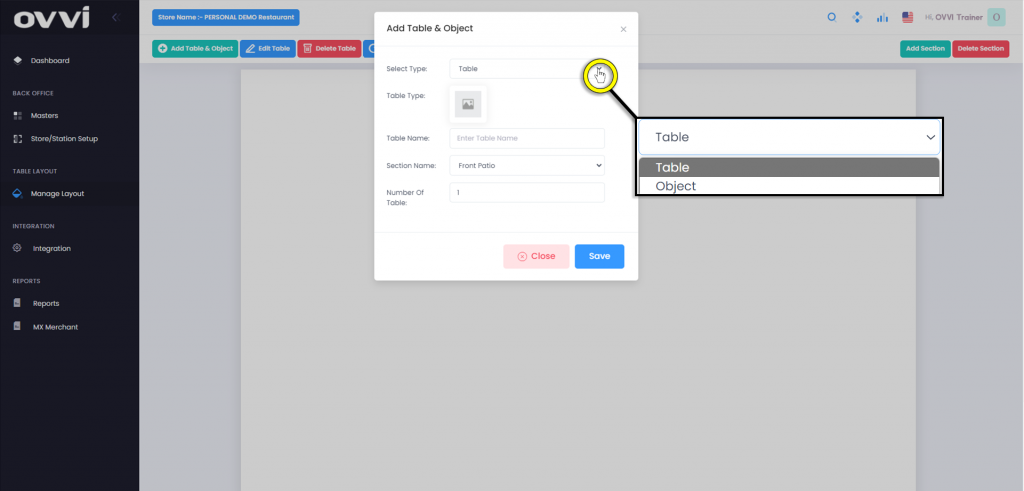
5. Click on the button in the upper left labeled ‘Add Table & Object’.
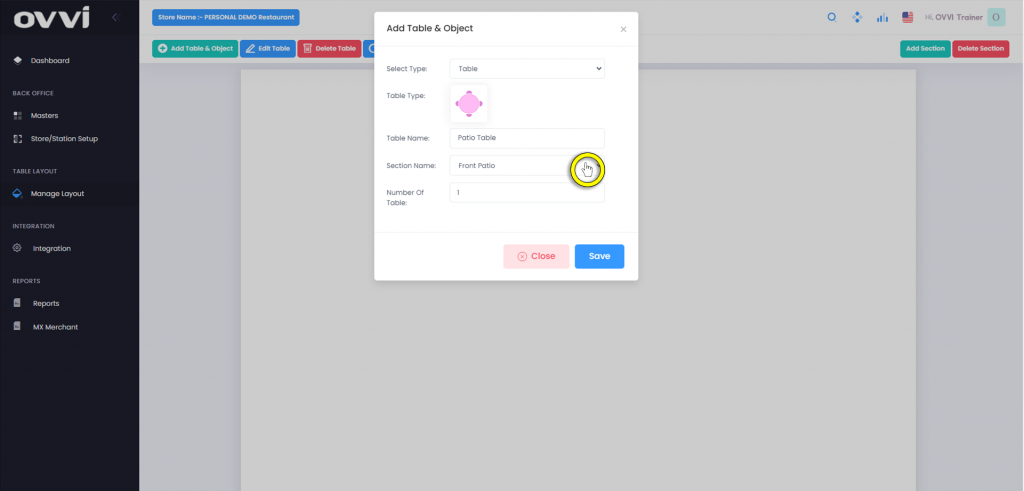
6. In the pop-up, click the drop down for ‘Select Type’ to choose between Table or Object.
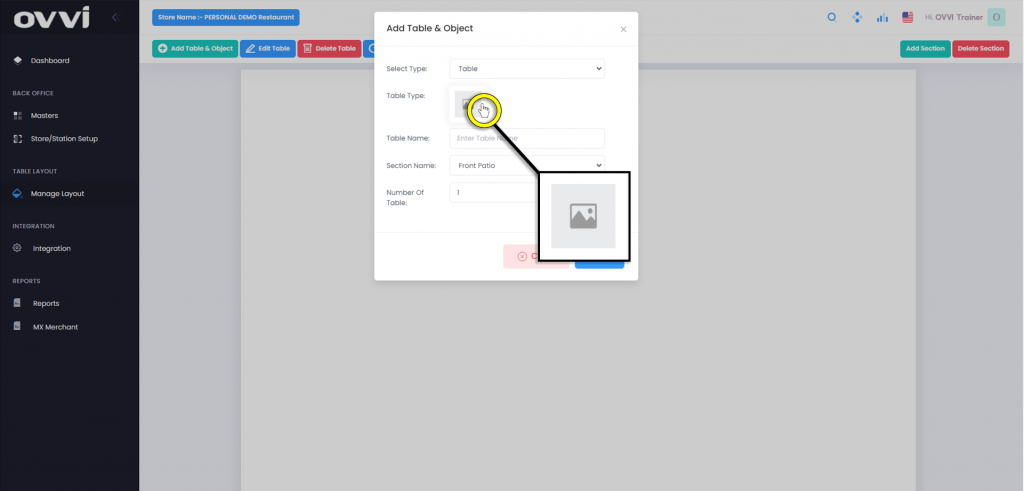
7. Click the image button labeled ‘Table Type’.
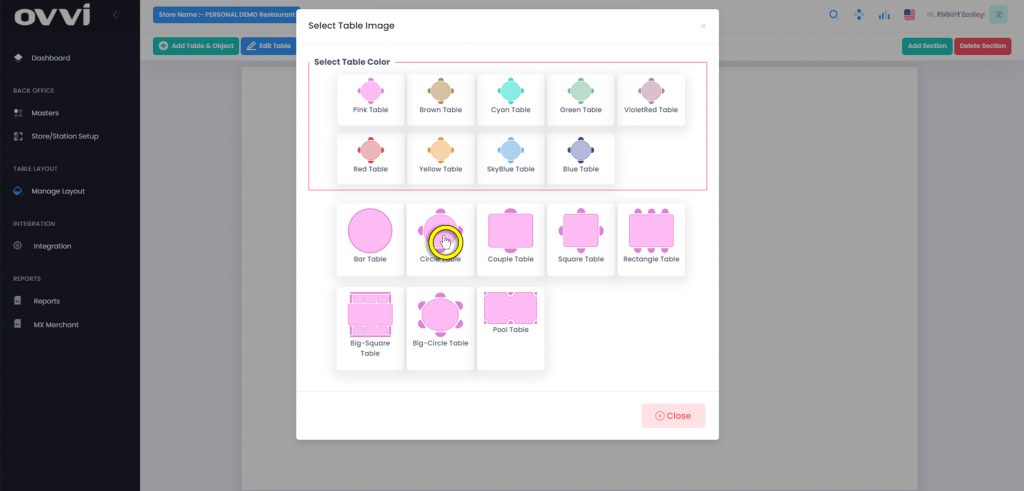
8. Next, select the color and desired table type.
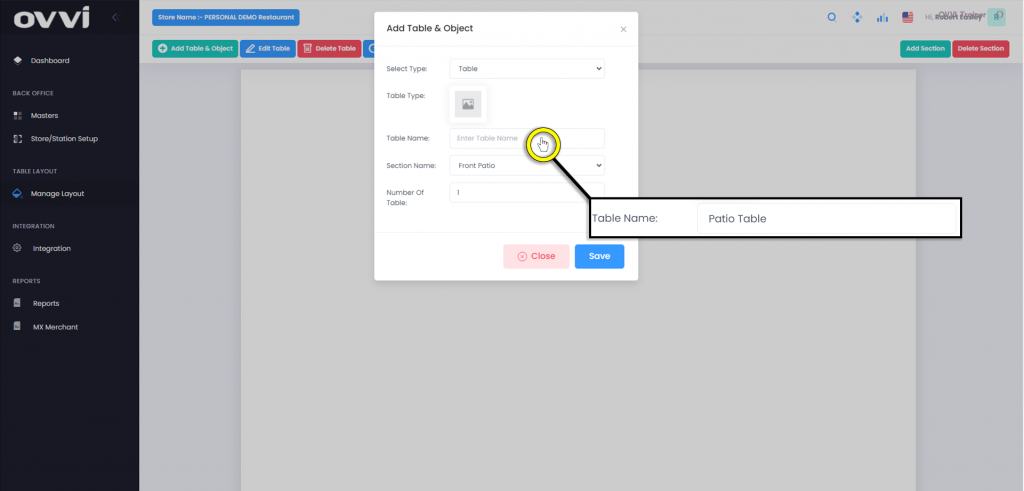
9. Input the Name of the tables in the section’s labels ‘Table Name:’.
10. Click the drop-down menu for ‘Section name:’ to assign the table to a desired section.
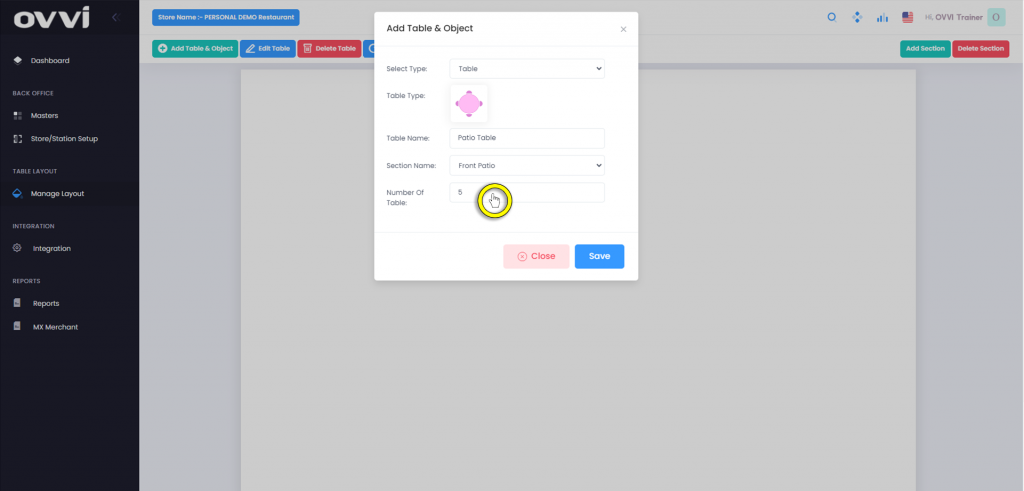
11. Then input the desired number of tables that you wish to populate in the sections labeled ‘Number of Table:’.
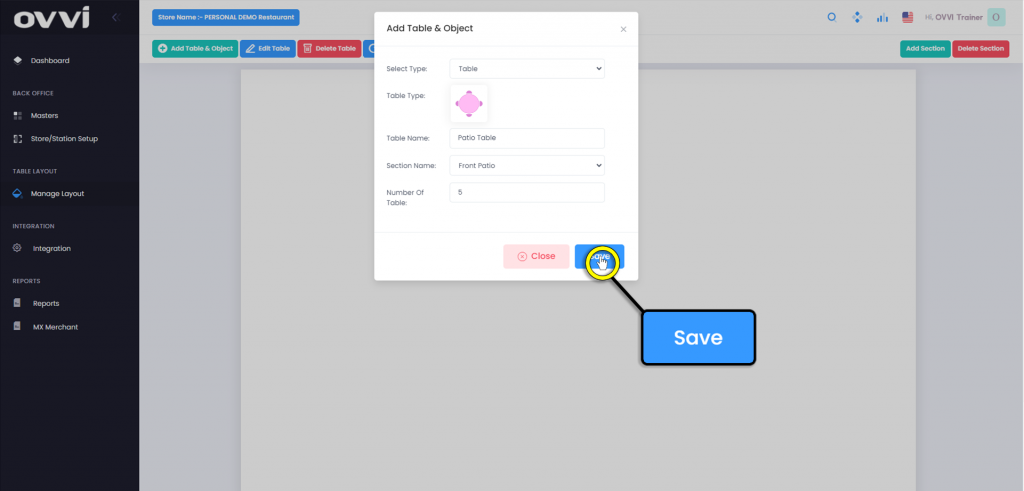
12. Click the ‘Save’ button.
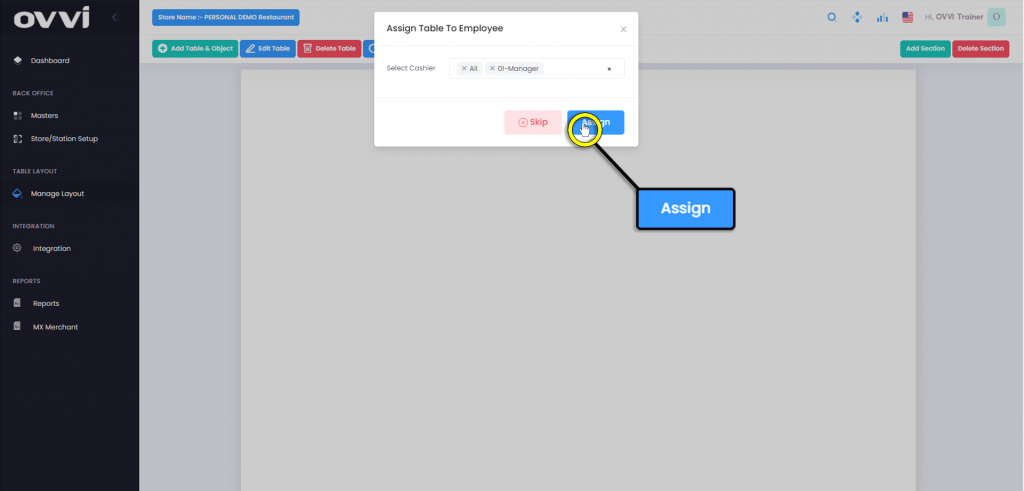
13. A pop up titled ‘Assign Table to employee’ will appear. Click in the box labeled ‘Select Cashier’ to assign employees to the created table.

14. Click the ‘Assign’ button to save changes.
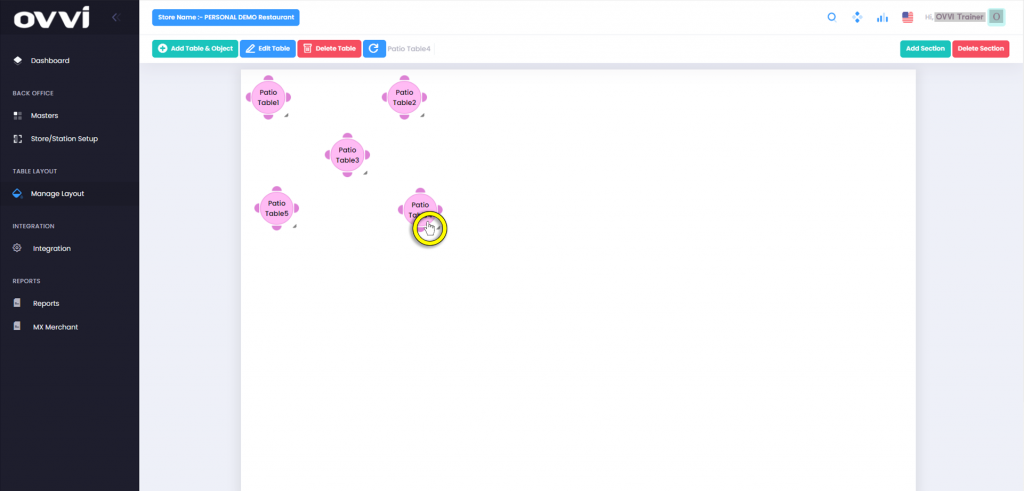
15. The tables will now appear the page stacked on top of each other if multiple tables are generated.

16. Click and drag the tables to separate them and arrange them in the desired order.
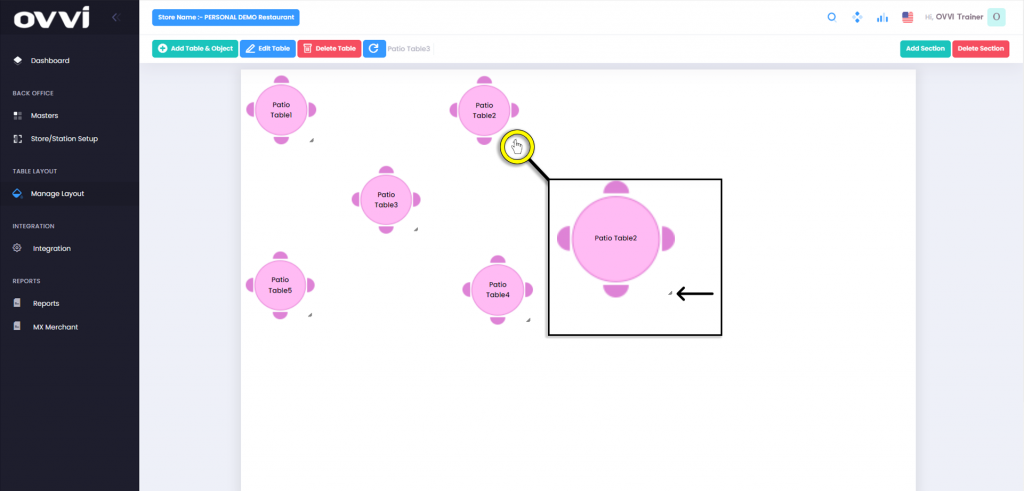
17. To edit a tables detail, click on the table to select it, then click the ‘Edit Table’ button.

18. A pop up titled ‘Update Table & Object’ will appear and allows to edit ‘Table Name:’, ‘Number of Chairs:’, and ‘Table Image:’.

19. Click the ‘Ok’ button to save changes.
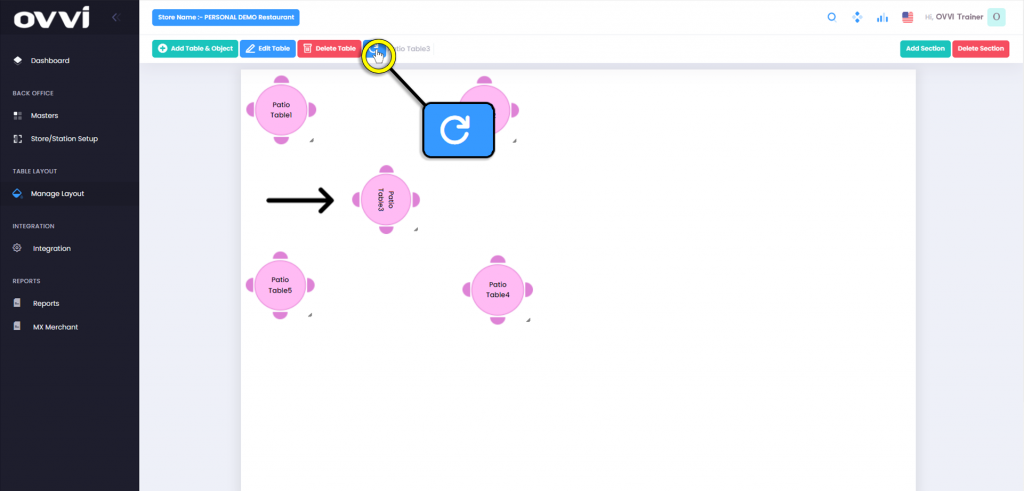
20. To rotate an object or table click on the item to select then click the ‘Rotate’ icon located next to the Delete button located in the upper left. This will rotate the item a quarter turn to the right.
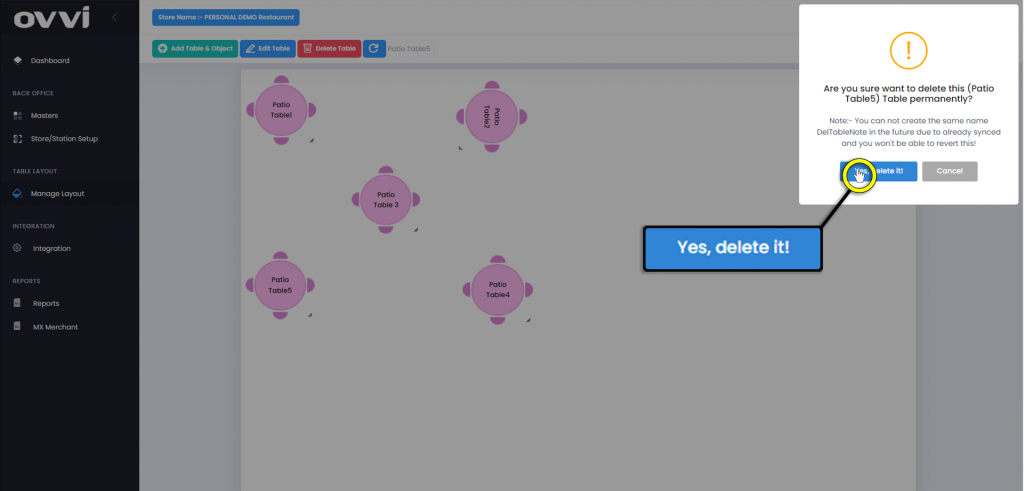
21. To delete an item, click on the table or object to select it then clickthe ‘Delete Table’ button located in the upper left corner.
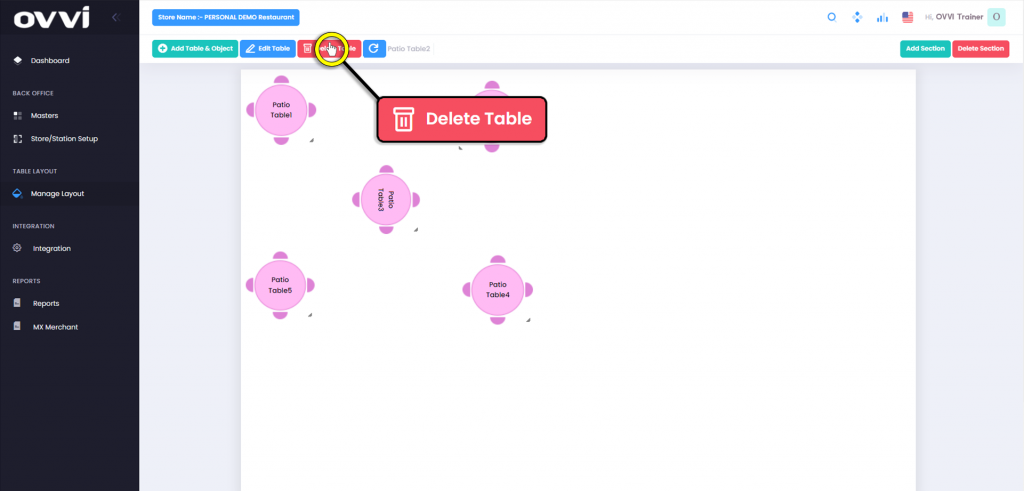
22. A pop up will appear in the upper right corner of the page, to confirm deletion of the object, click the ‘Yes, Delete it!’.
23. To delete a section, scroll down the page and click on the section you wish to delete. Then click the ‘Delete Section’ button in the upper right corner of the page.
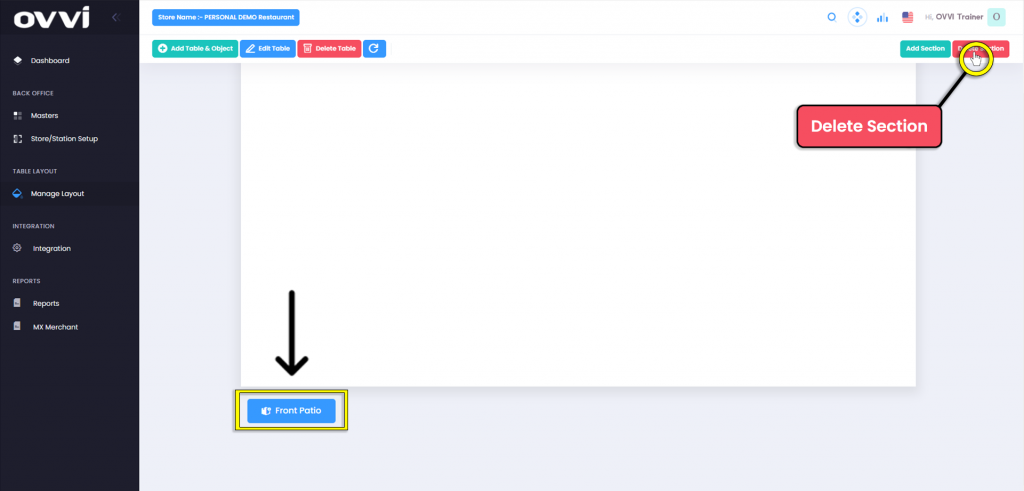
24. A pop up will appear in the upper right corner of the page, to confirm deletion of the object, click the ‘Yes, Delete it!’.

25. This concludes the guide to Creating and Managing Table Layout.
Was this article helpful?
YesNo