- OVVI BOH
Guide To Managing Account Preferences.
Section 1: Adding New Users
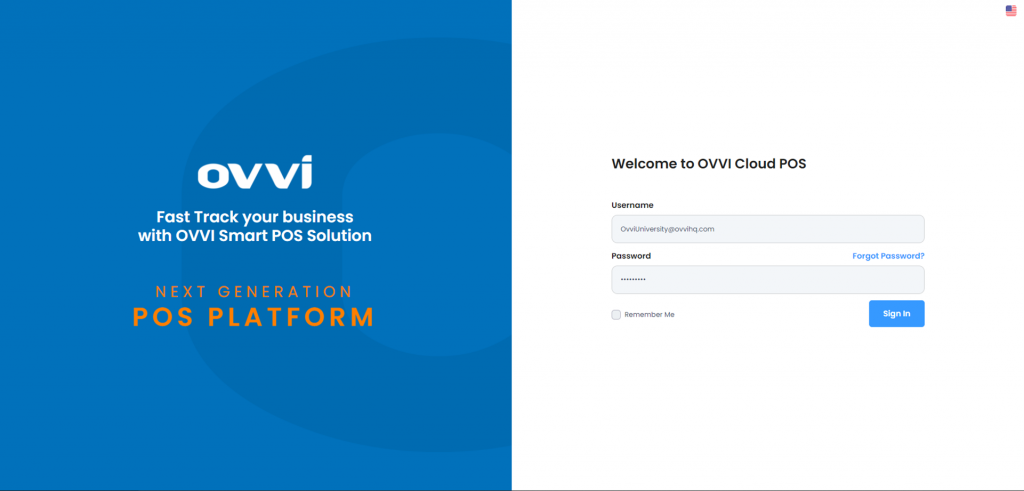
1. Go to cloud.ovvihq.com and login using your merchant username and password.

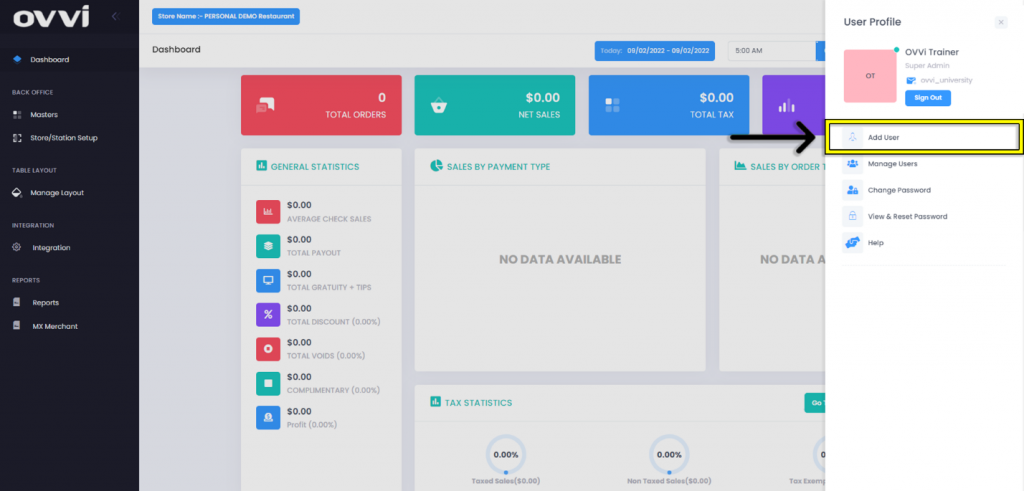
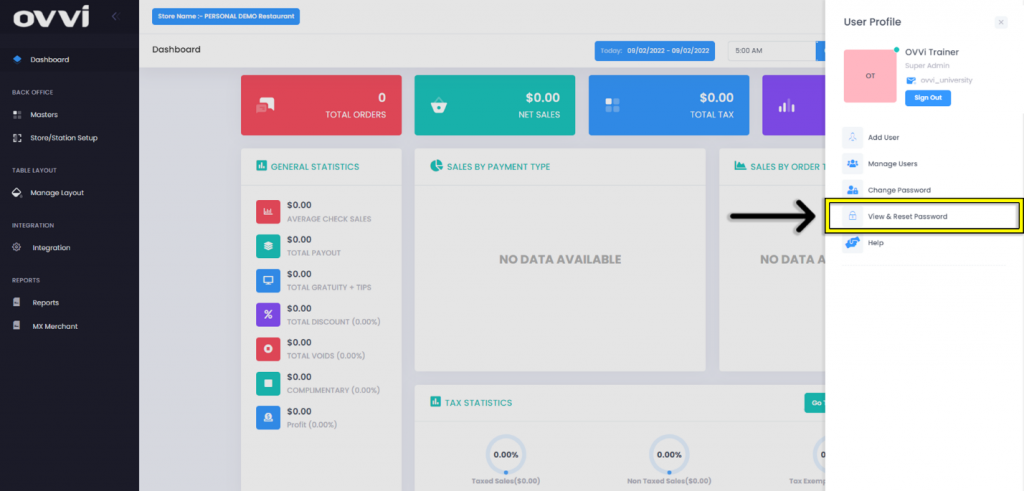
2. Once logged into the ‘Dashboard’ page, Click on the username in the upper right corner of the page.

3. Click on the ‘Add User’ option to add authorized users to have access to the Back Office.
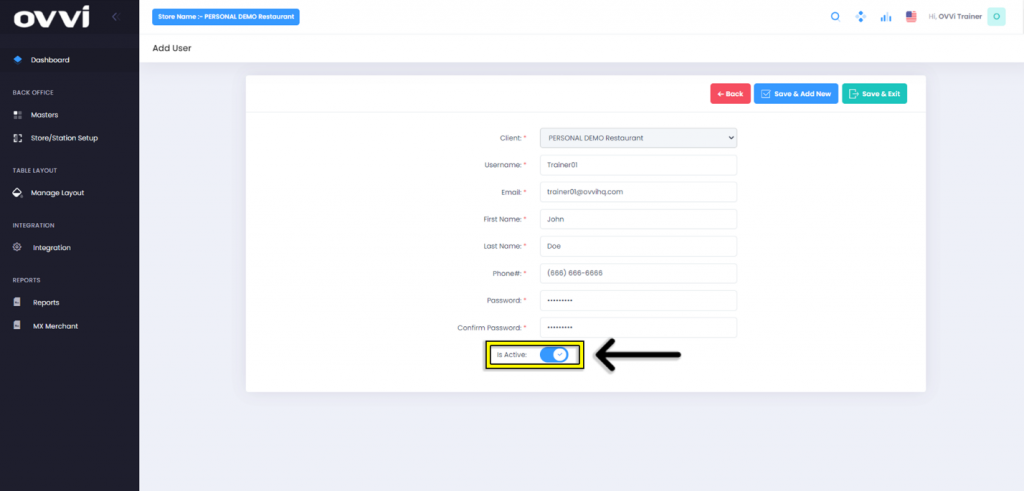
4. In the ‘Add User’ page, input all required information with the * symbol for the new user.

5. Verify that the ‘Is Active’ is toggled to the ON position.
6. when either click the ‘Save & Add New’ button to continue creating additional Users or the ‘Save & Exit’ to be taken to the ‘Manage Users’ page.
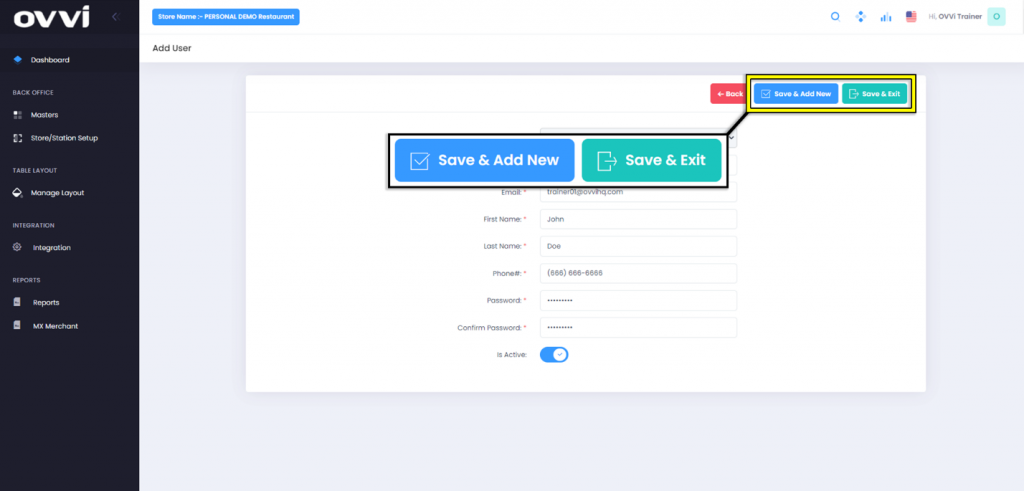
7. Clicking the ‘Back’ button will return the administrator back to the dashboard.

8. This concludes the Guide to Managing Account Preferences: Adding Users.
Section 2: Managing Users
1. Go to cloud.ovvihq.com and login using your merchant username and password.

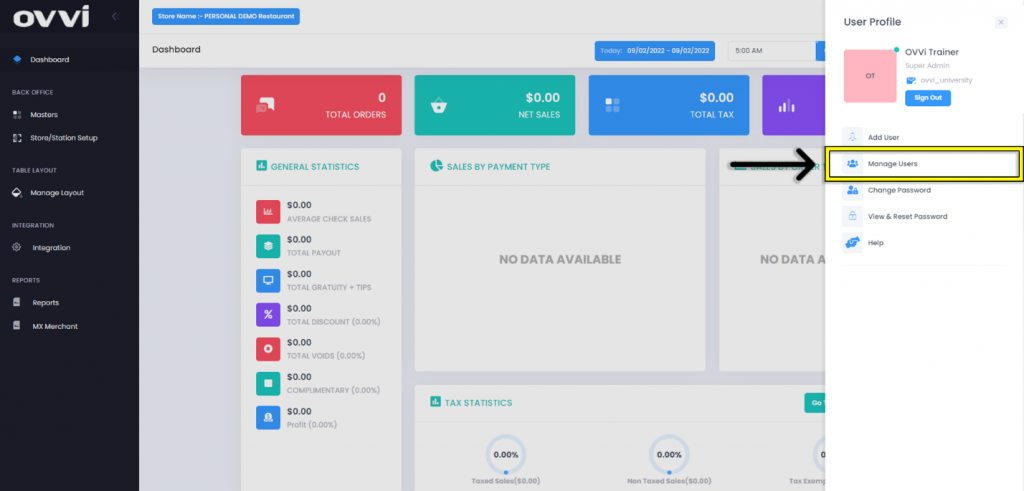
2. Click on the ‘User Profile’.
3. Click the ‘Manage Users’ option.
4. Admins can search for specific users to manage by utilizing the ‘Search…’ text box.

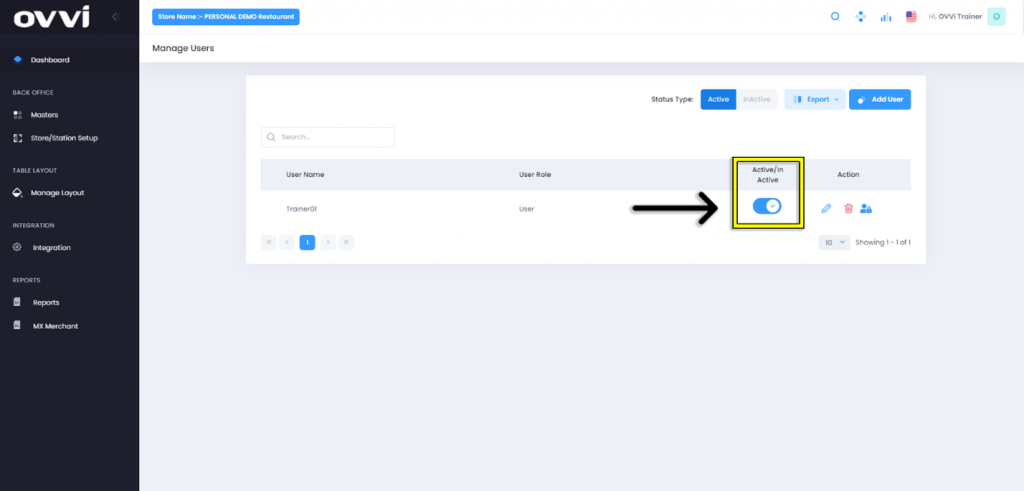
5. Clicking either ‘Active’ or ‘InActive’ will filter users by ‘Status Type’.

6. Admins can change a user’s status type by clicking on the ‘Active/InActive’ toggle.
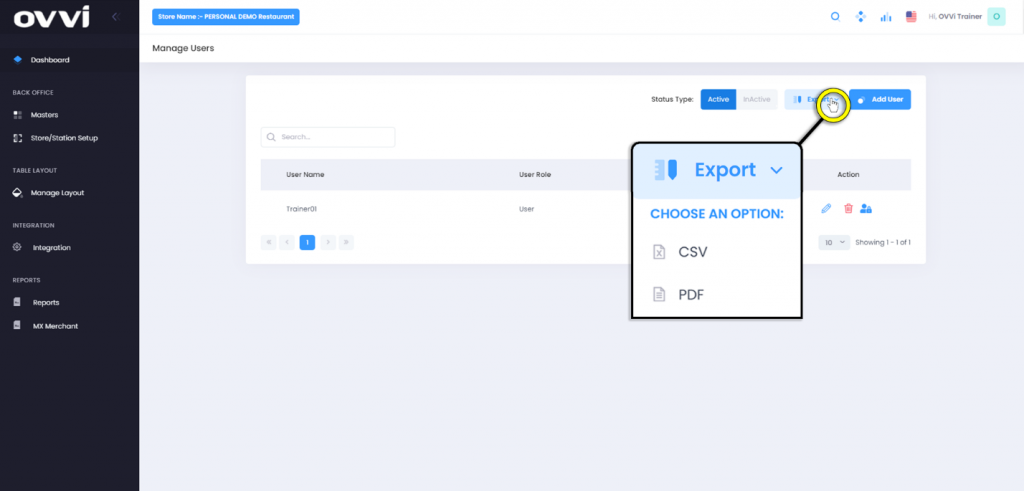
7. Click the ‘Export’ button to download either a ‘PDF’ or ‘CSV’ document that will display users, Status type, and user passwords.
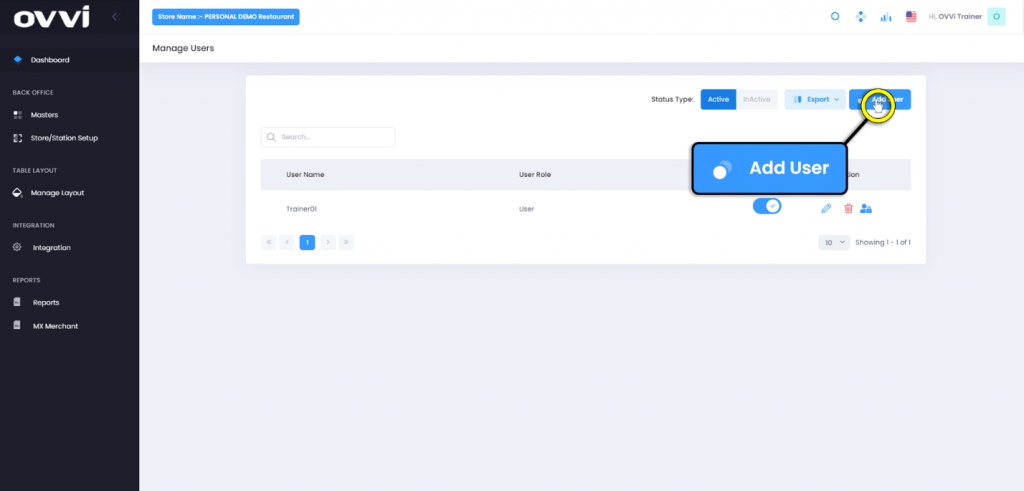
8. Clicking the ‘Add User’ button will navigate to the ‘Add User’ page.
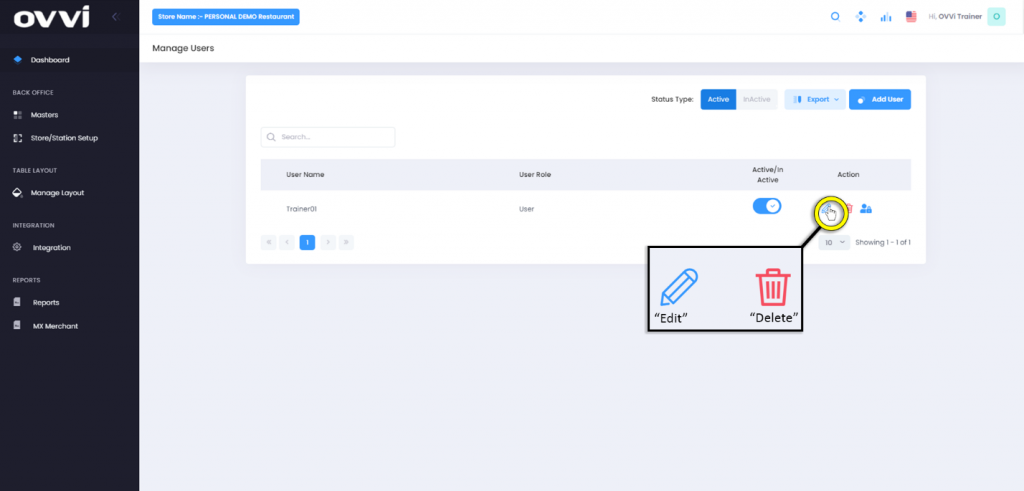
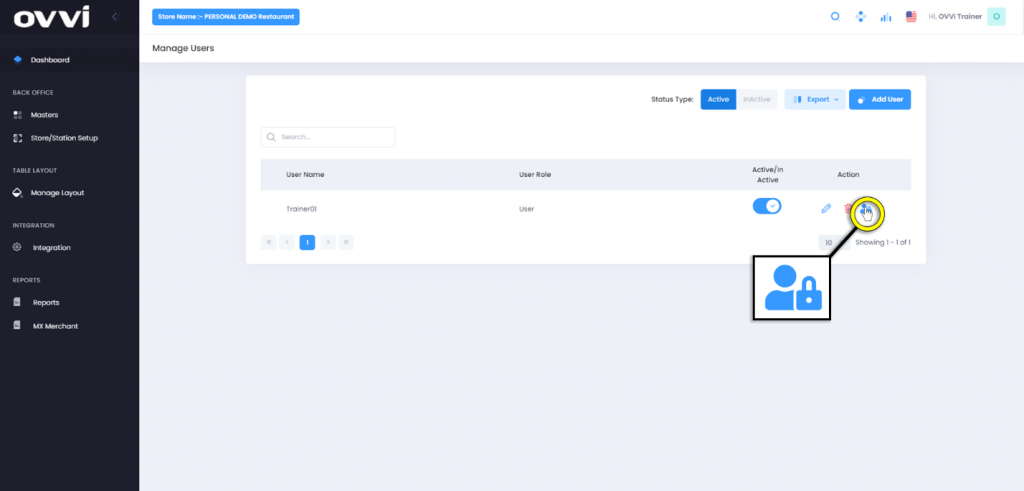
9. To edit or remove a user, Click on either the ‘Pencil’ or ‘Trash Can’ action icons.
10. To edit a user’s access permissions, click on the ‘User Access’ action icon.
11. Admins can search for specific pages accessible to users by utilizing the ‘Search…’ text box.
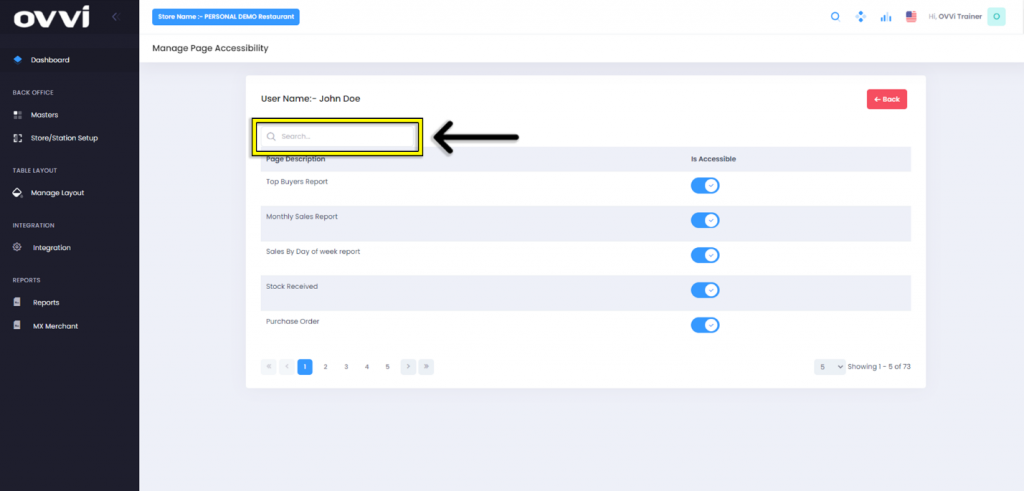
12. Click on any toggle located under the ‘Is Accessible’ section to grant access or deny access to those specific pages.
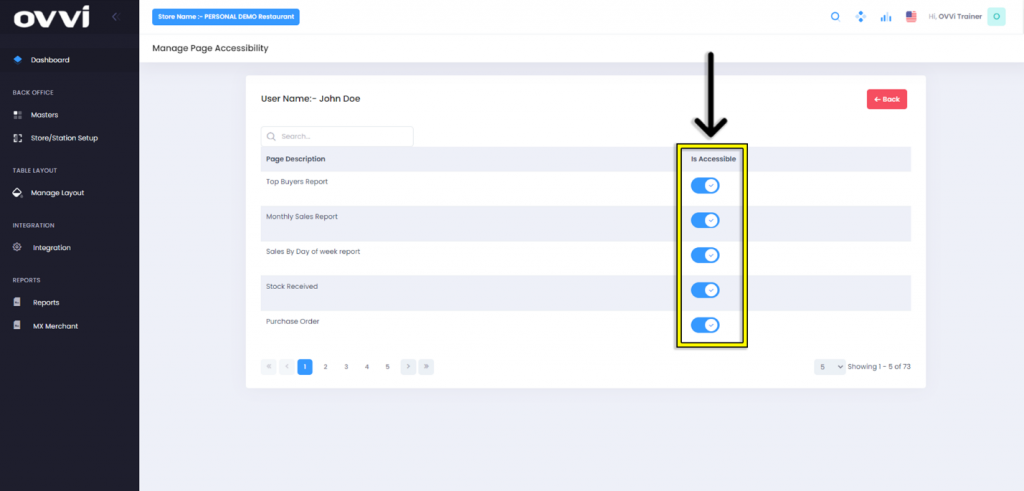
13. Click the ‘Back’ button to save and return to the ‘Manage Users’ page.

14. This concludes the Guide to Managing Account Preferences: Managing Users.
Section 3: Changing Password
1. Go to cloud.ovvihq.com and login using your merchant username and password.
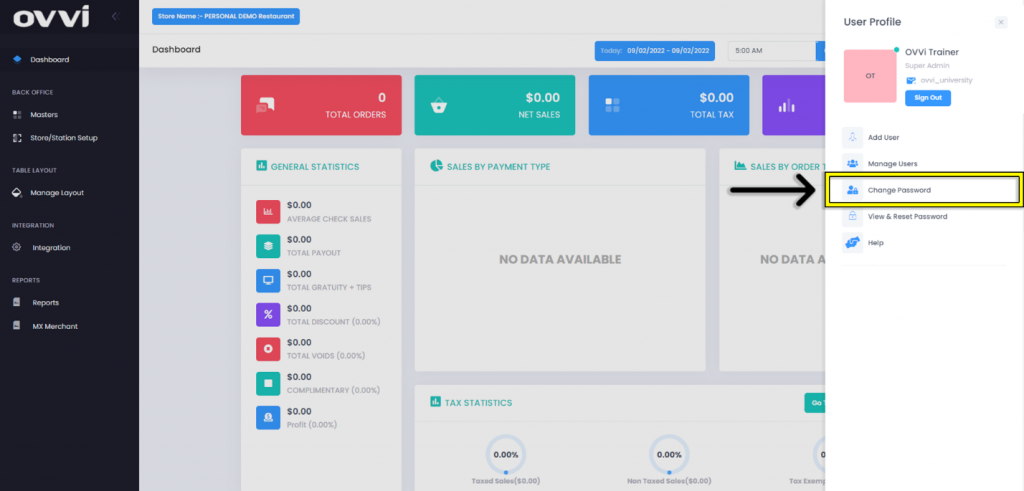
2. Click on the ‘User Profile’.
3. Click the ‘Change Password’ option.
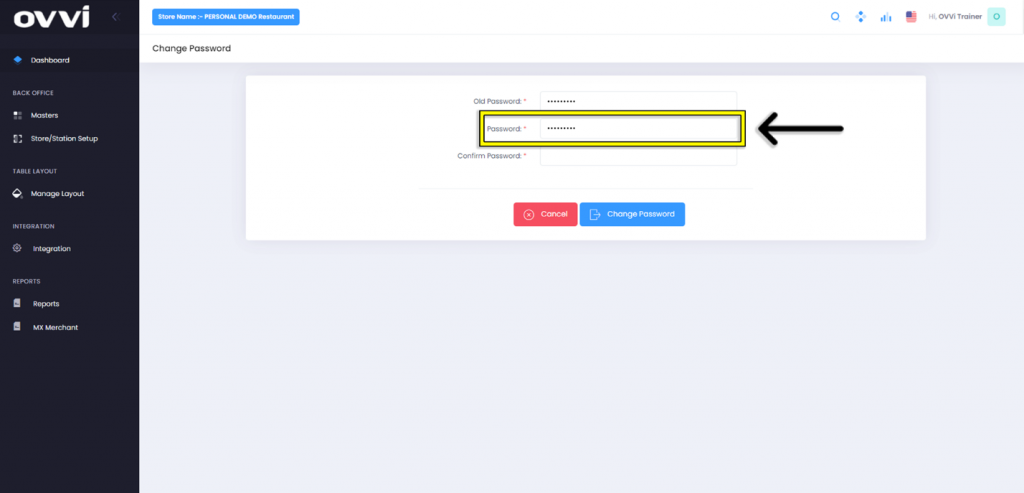
4. Input the original password in the ‘Old Password’ text box.

5. Next Input the new desired password in the ‘Password’ text box.
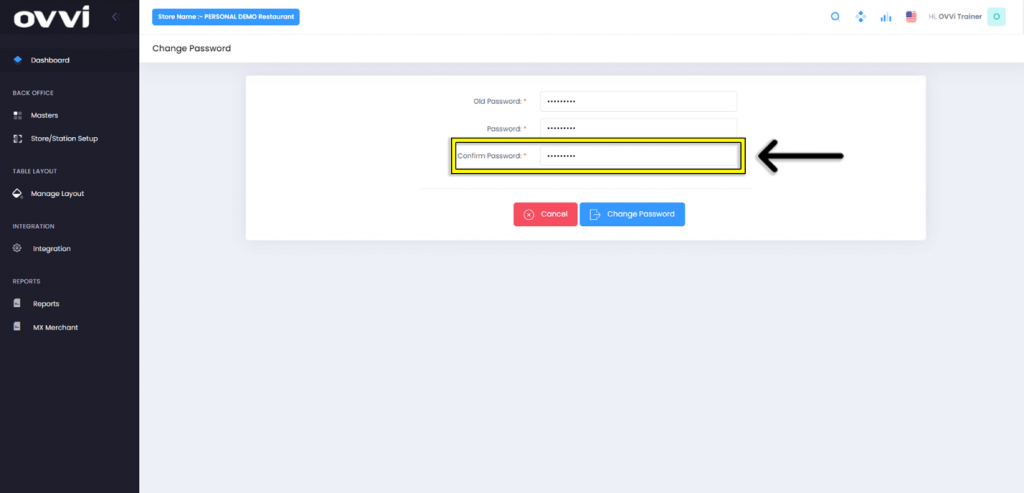
6. Reinput the new password in the ‘Confirm Password’ text box.
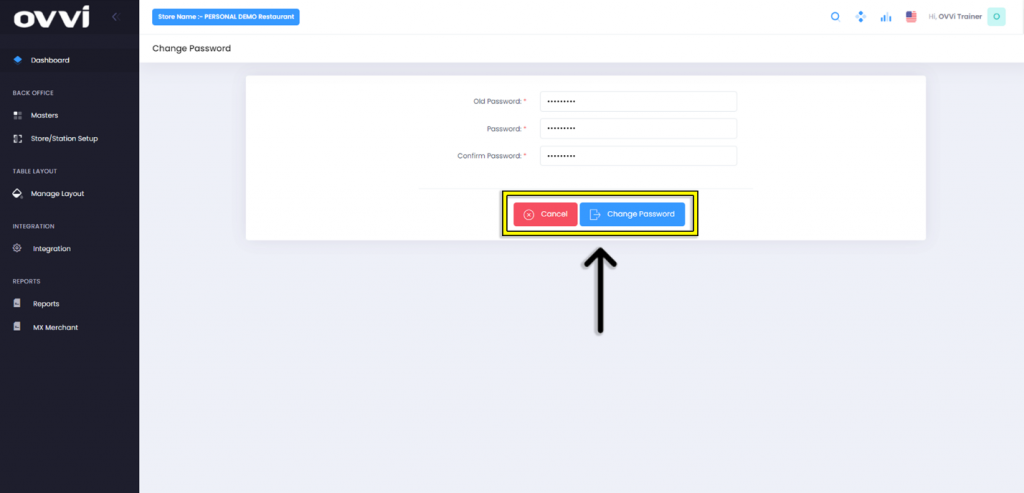
7. Click the ‘Change Password’ to save the new password or the ‘Cancel’ option to return to the ‘Dashboard’ page without saving.
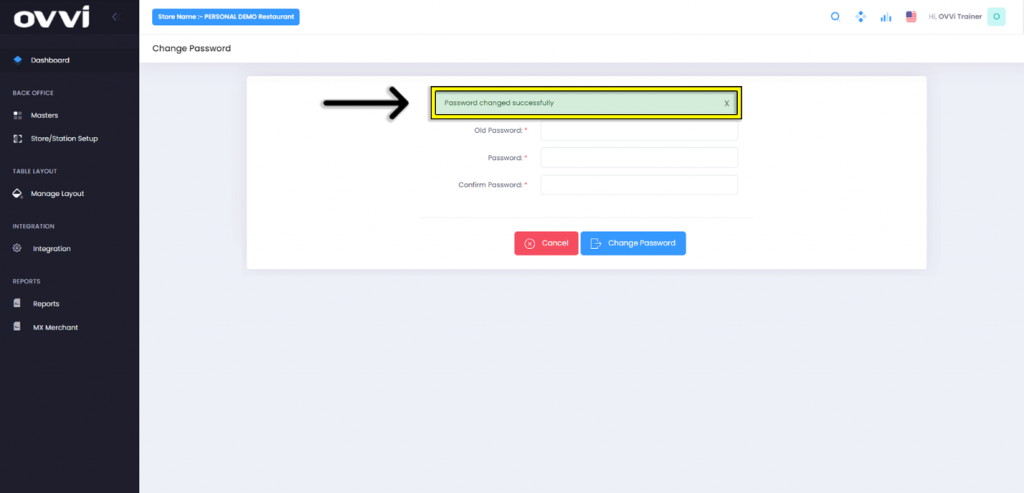
8. Once the password has been saved, a ‘Password Changed Successfully’ prompt will appear at the top of the page.
9. This concludes the Guide to Managing Account Preferences: Changing Password.
Section 4: Setting Preference
1. Go to cloud.ovvihq.com and login using your merchant username and password.
2. Click on the ‘User Profile’.
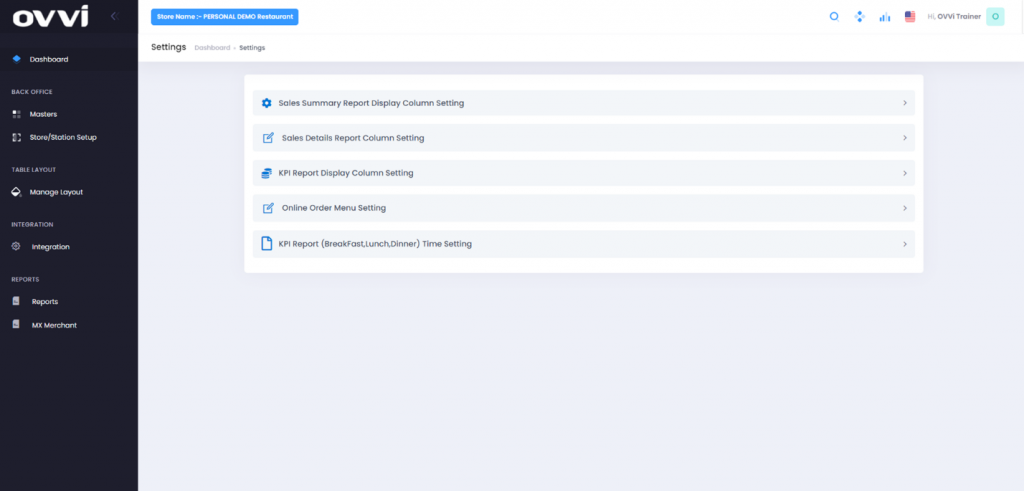
3. Click on the ‘Settings’ option.
4. In the ‘Settings’ page, admins will have the ability to customize the Back Office Dashboard to display or hide various reports and information.
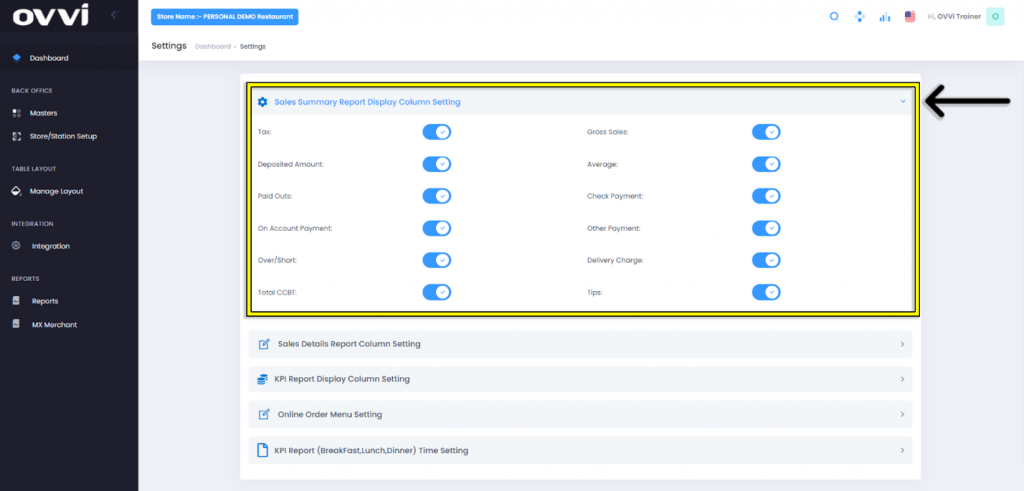
5. Expand the first section to toggle any of the options that would Appear under ‘Sales Summary Report Display Column Settings’ to allow them to be viewable in the dashboard.
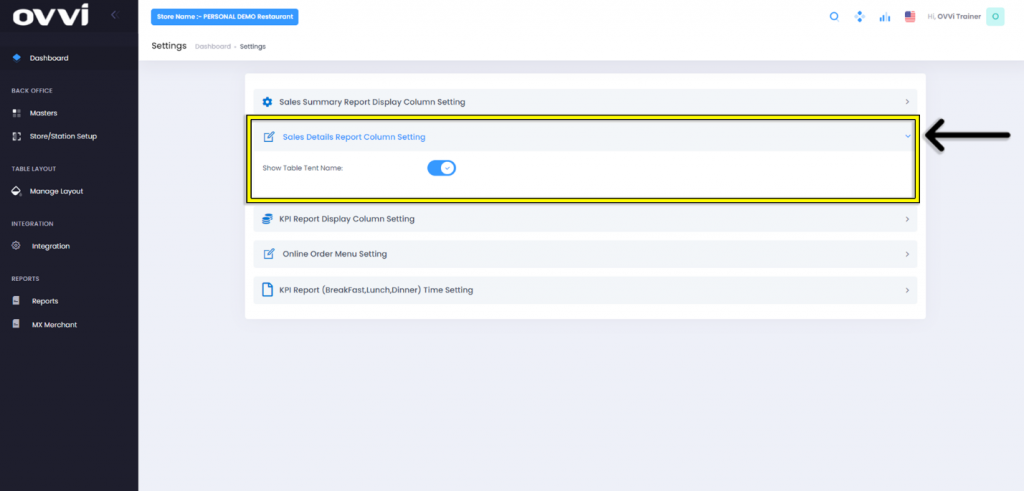
6. Expand the second section to toggle the ‘Show Table Tent Name’ option under ‘Sales Details Report Column Setting’ to allow it to be viewable in the dashboard.
7. Expand the third section to toggle any of the options that would Appear under ‘KPI Report Display Column Setting’ to allow them to be viewable in the dashboard.

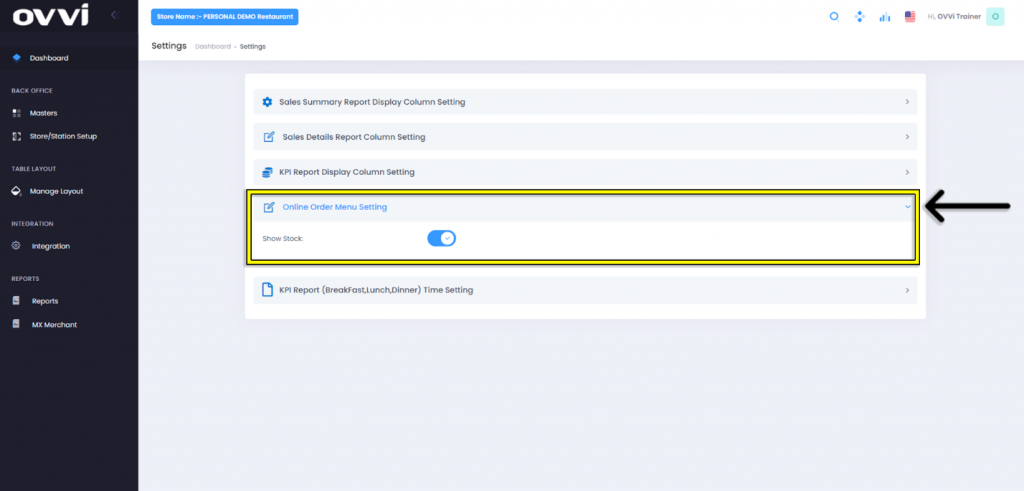
8. Expand the fourth section to toggle the ‘Show Stock’ option under ‘Online Order Menu Setting’ to allow it to be viewable in the dashboard.
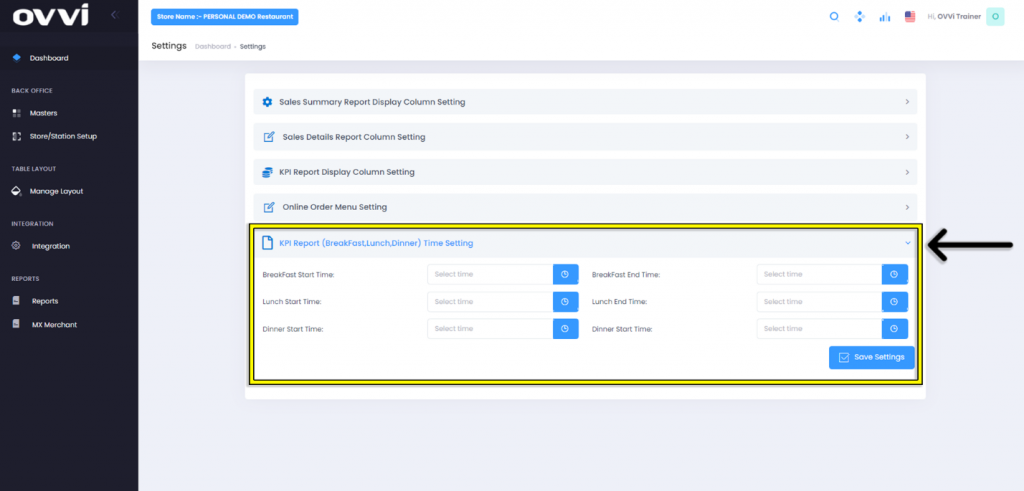
9. Expand the Final Section to set desired start and end times for ‘KPI Report (Breakfast, Lunch, Dinner) Time Setting’.
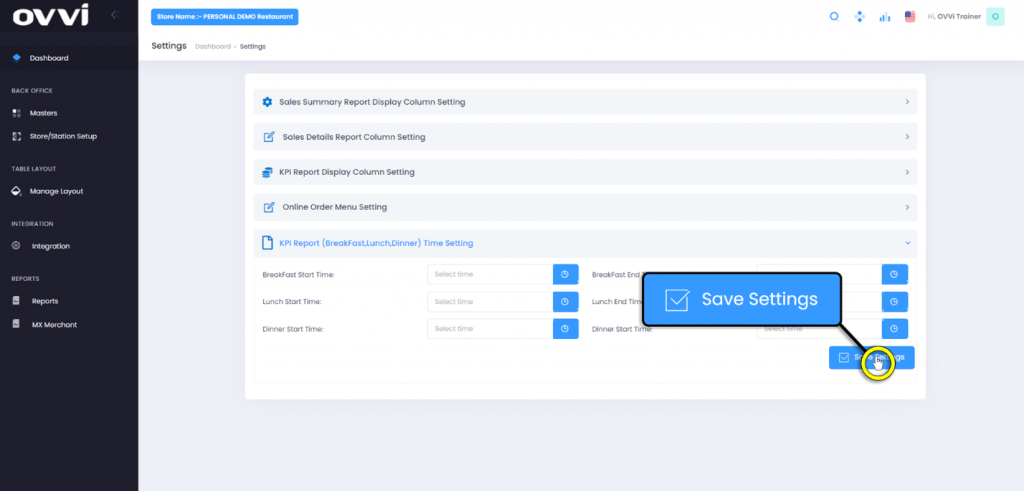
10. Once the configuration of settings is completed, click the ‘Save Settings’ button located under the ‘KPI Report (Breakfast, Lunch, Dinner) Time Setting’ section.
11. This concludes the Guide to Managing Account Preferences: Settings.
Section 5: Accessing Help Guide in BOH
1. Go to cloud.ovvihq.com and login using your merchant username and password.
2. Click on the ‘User Profile’.
4. On the ‘Help Document’ page, users will have access to multiple manuals to better assist in understanding various OVVI tools and Functions.
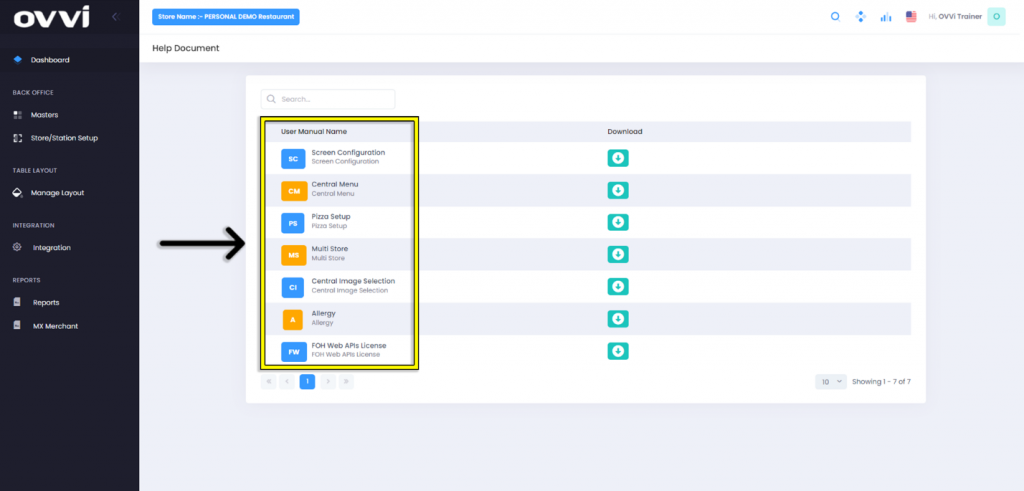
5. Click the ‘Download’ button to save and view the desired article.

6. If the article does not open immediately, check the systems ‘Downloads’ folder.

7. This concludes the Guide to Managing Account Preferences: Help Guides.
Was this article helpful?
YesNo
Related Articles: