- Hardware Setup
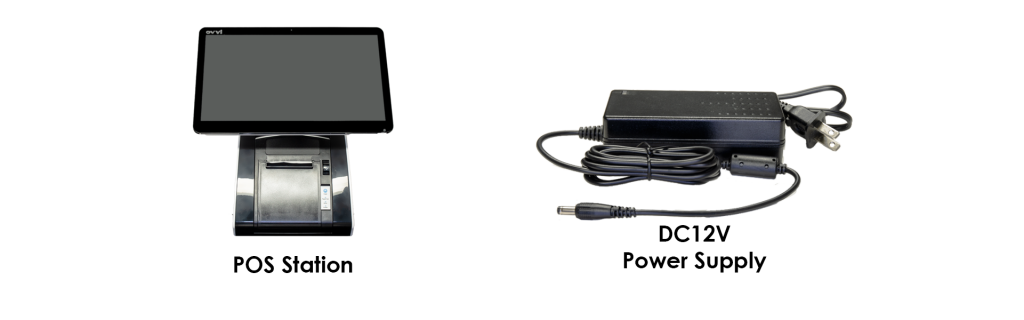
Initial OVVI All in One POS station.
1. Out of the Box should include the Ovvi All in One POS station and 12v power supply.
2. On the Back of the POS station, locate the port labeled ‘DC12V’.
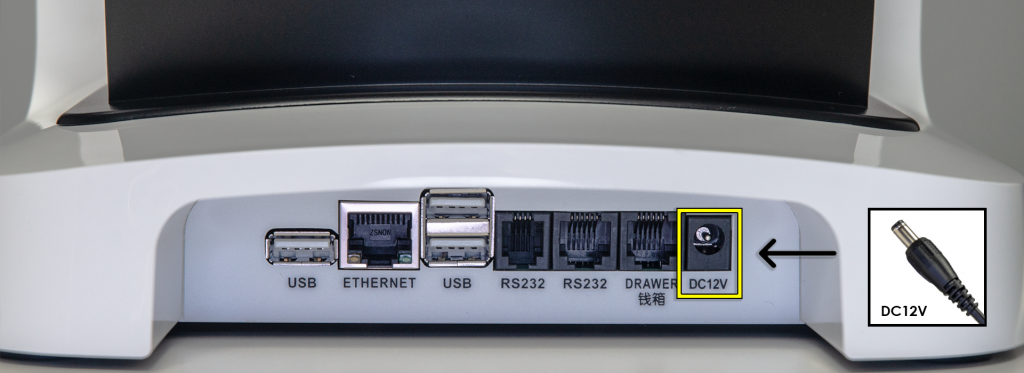
3. Connect the AC adapter to the ‘DC12V’ port.
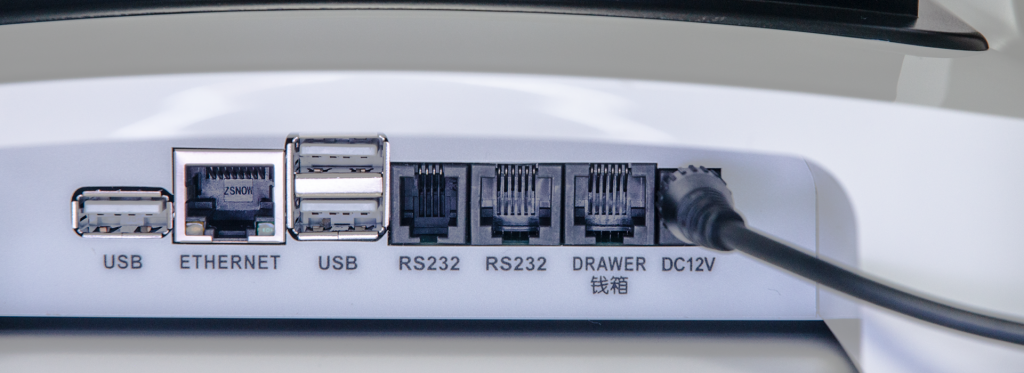
4. Once Power has been connected, locate the Ethernet port.
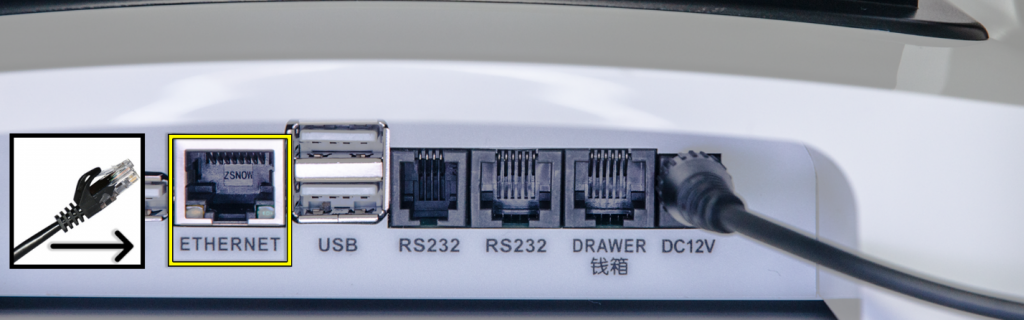
5. Connect Ethernet Cable to the ethernet port.

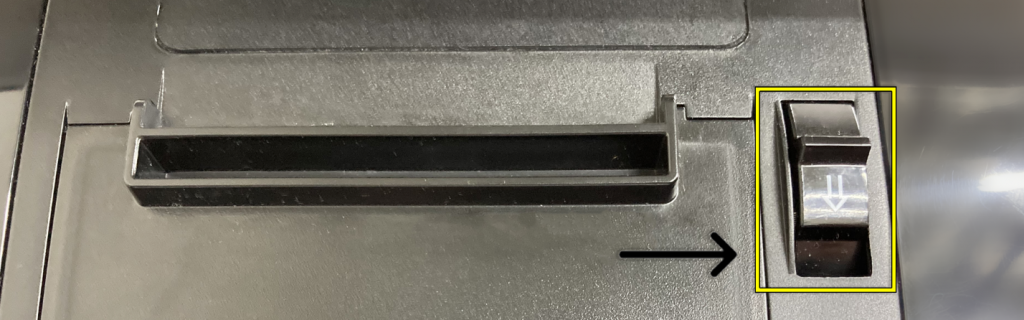
6. To load receipt paper, open the receipt paper housing by pressing the latch located on the front right side of the station.
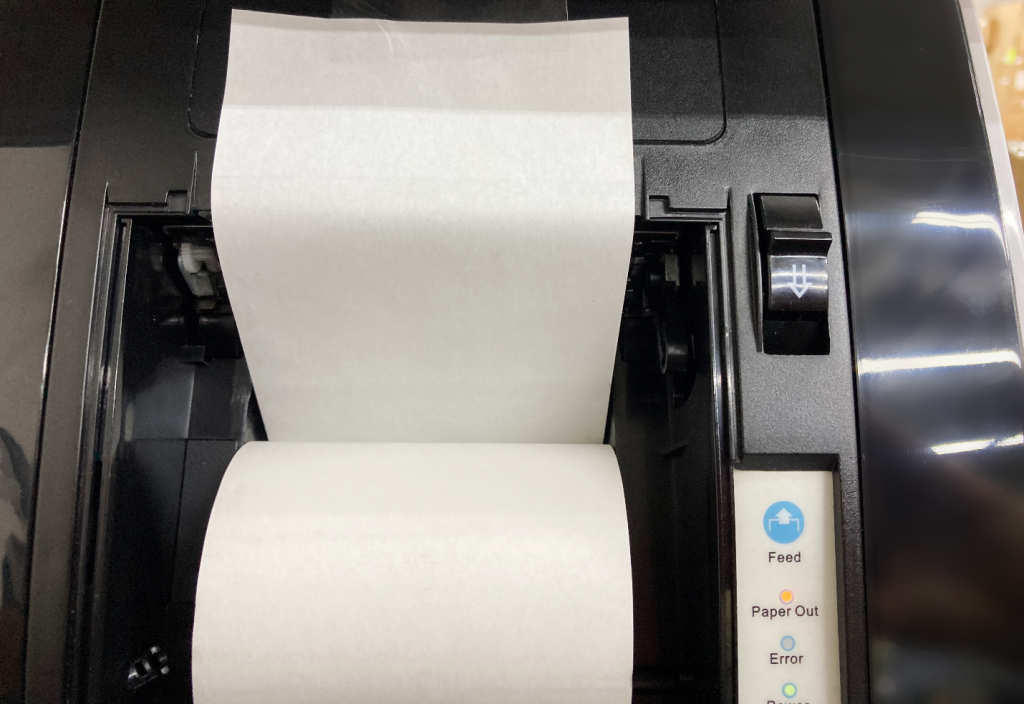
7. Once the hatch is opened, load the receipt paper in as seen below, then close the hatch.
8. Press the power button located in the lower right corner of the main display just below the icon.

9. The windows desktop should appear once Station has successfully powered on.
10. Verify system clock matches the time zone of the business. If it does not follow office Windows Documents on how to Configure System Clock settings.

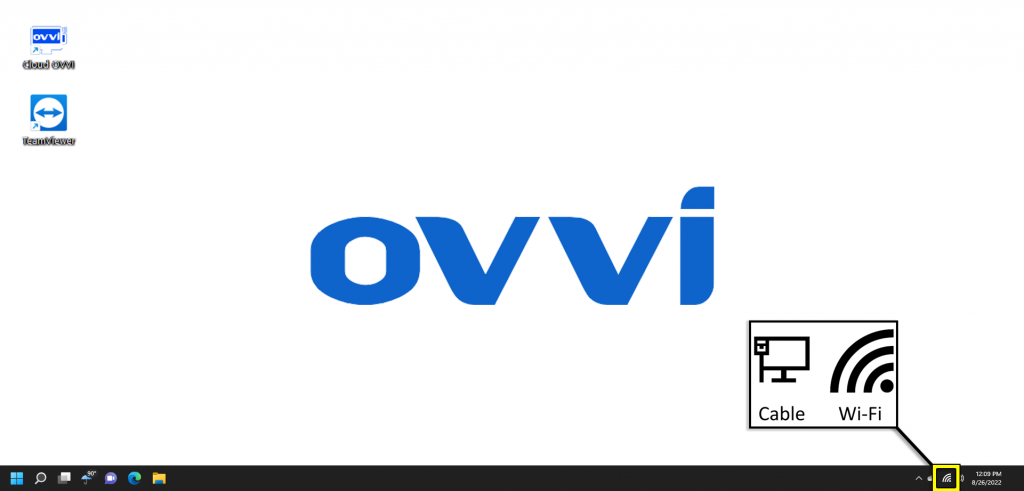
11. Users should verify that system is connected to their network.
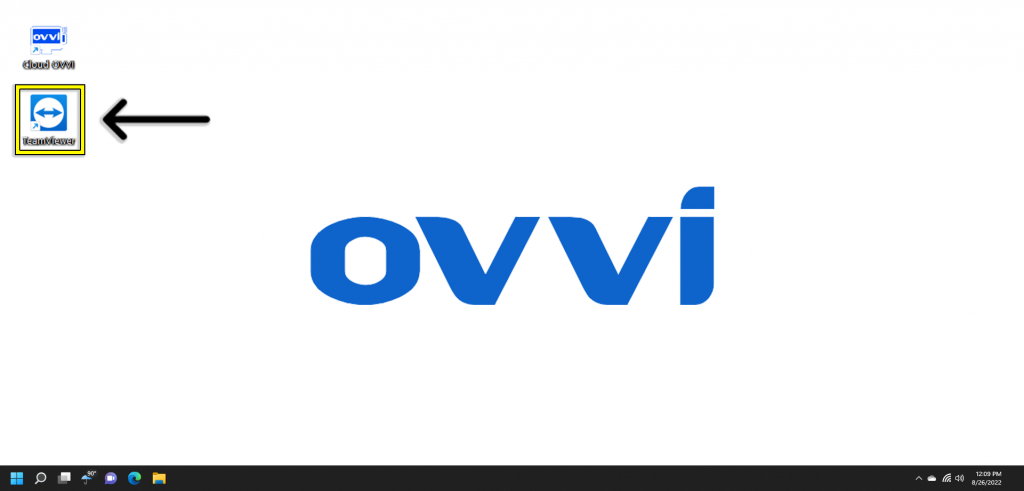
12. Next, verify ‘TeamViewer’ is installed and running. If it is not, download and install TeamViewer.
13. Next, Verify the ‘Cloud OVVI’ application has been installed. If it has not, please contact OVVI Support to install the latest version of ‘Cloud OVVI’.
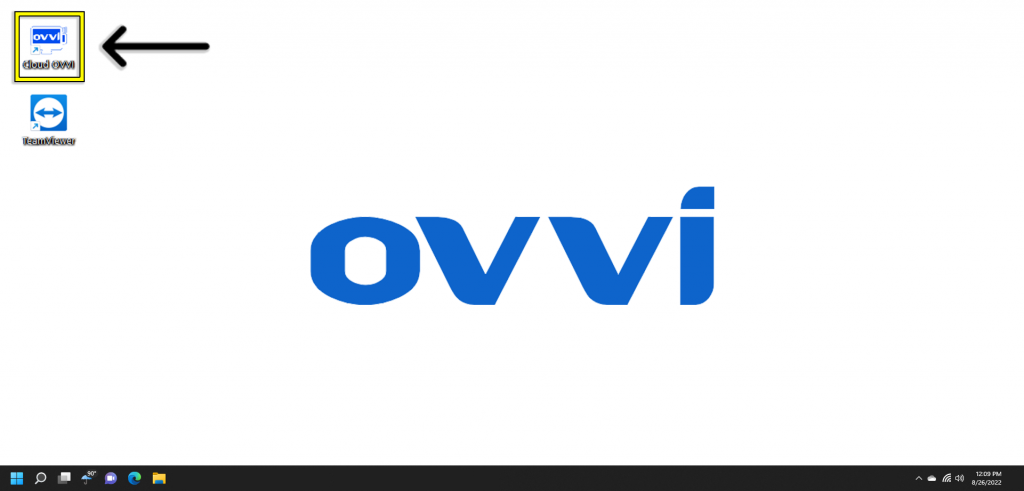
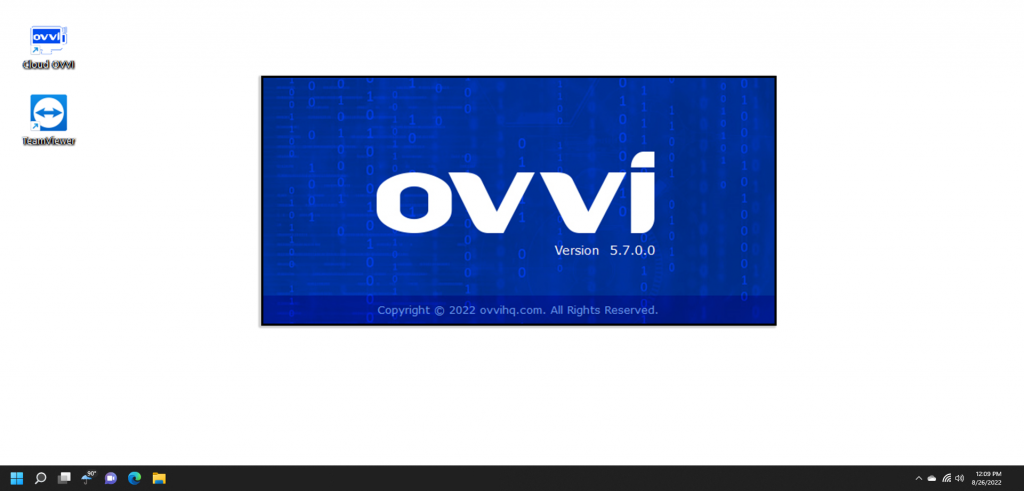
14. Double Tap/Click the ‘Cloud OVVI’ application to Launch the program.
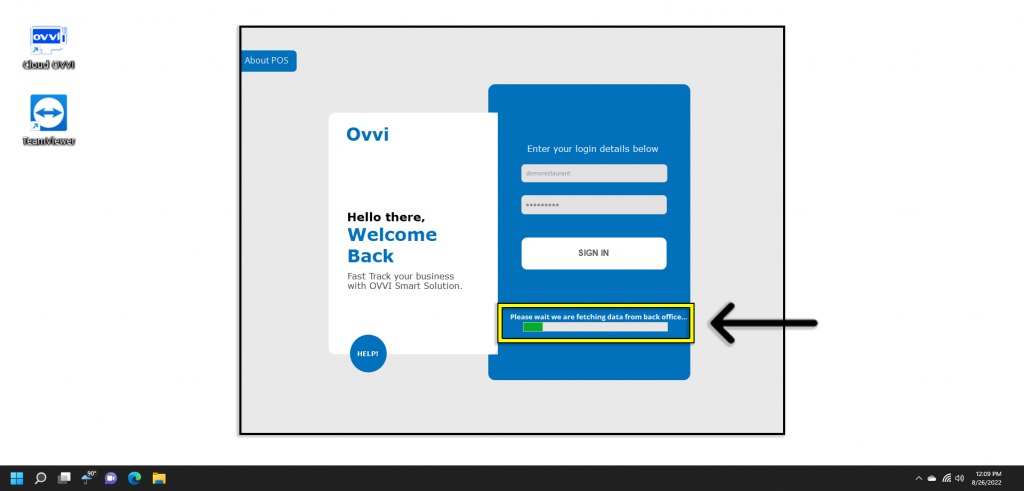
15. If prompted, Merchants may need to sign in using their OVVI Cloud Credentials and allow data to fetch from cloud servers on an initial.
16. Once Signed in, the User will then see the ‘Fetch Data’ progress bar.
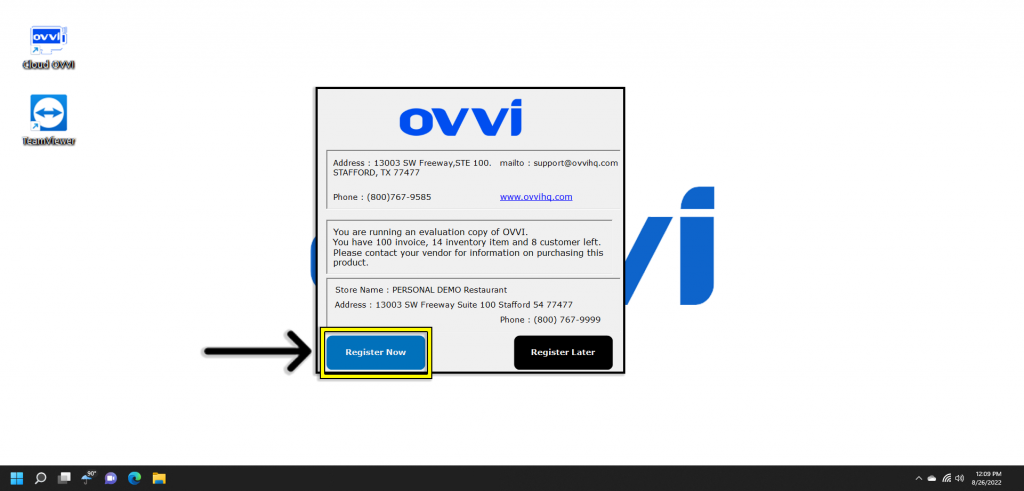
17. Additionally, Merchants may be prompted to register their Cloud OVVi. Tap the ‘Register Now’ to continue
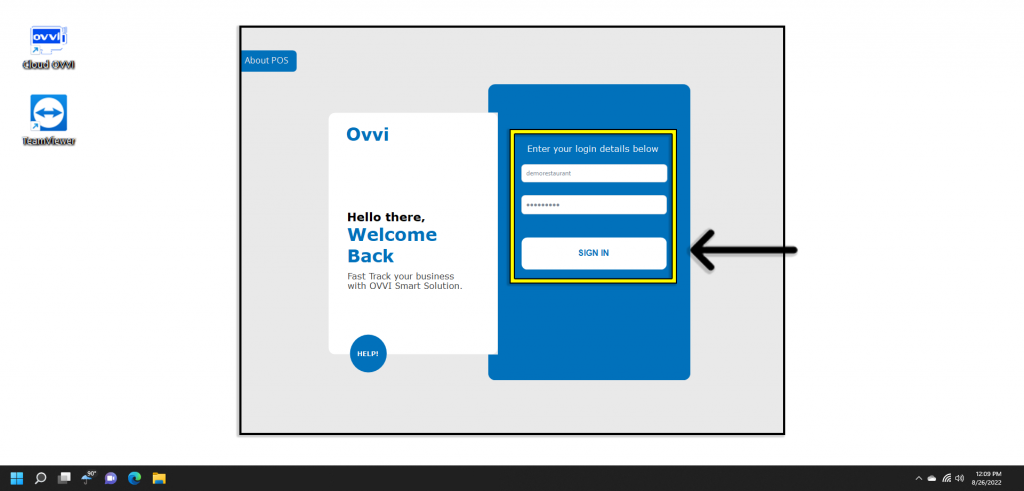
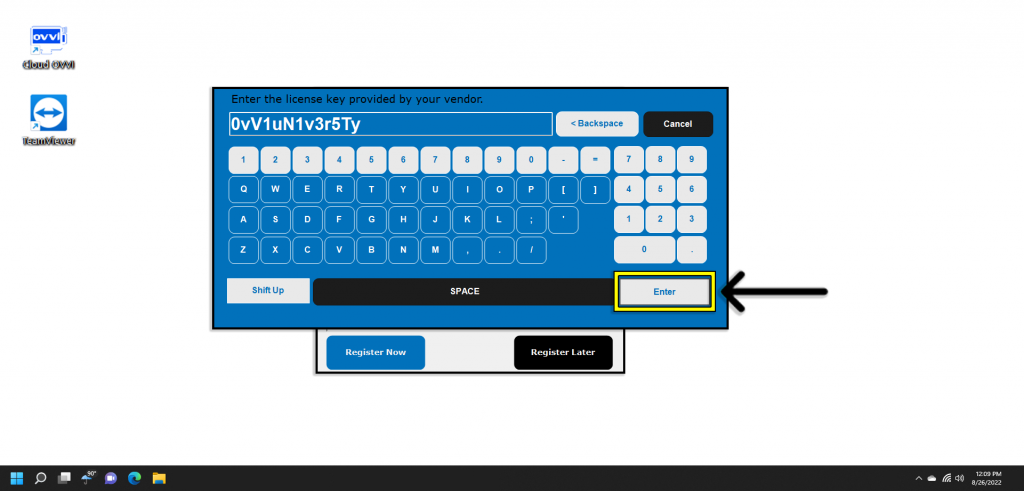
18. Merchant should input their license key and tap the ‘Enter’ button.
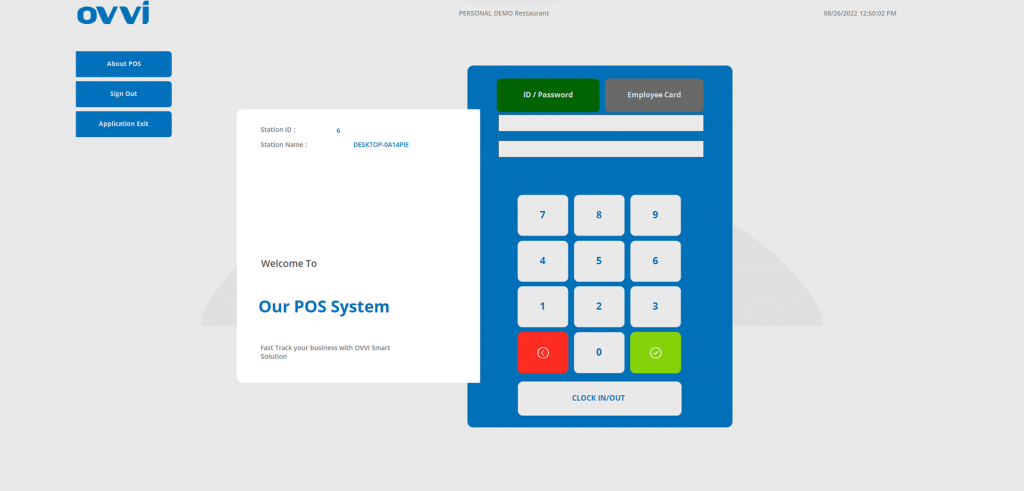
19. Once registration is completed the application will load and should now display the employee login screen.
20. This Concludes the guide on how to perform an initial setup for the Ovvi All in One POS station.
Was this article helpful?
YesNo
Related Articles: