Guide To Setting Up Kitchen Printers.
Important: the following steps are to take place after initial installation and all necessary printer drivers have been properly installed by OVVI or OVVI approved Resellers.
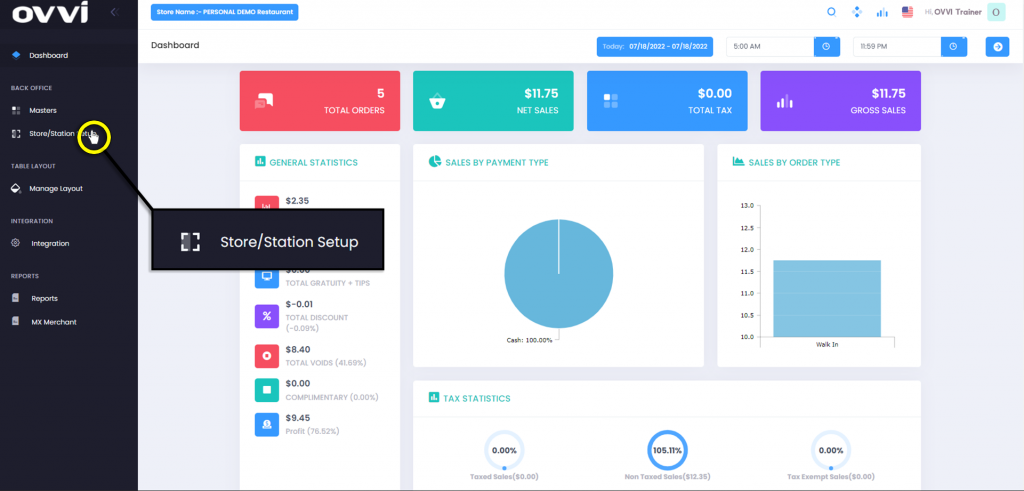
2. From the main dashboard, navigate to the panel located on the left side of the site and click on the option ‘Store/Station Setup’.
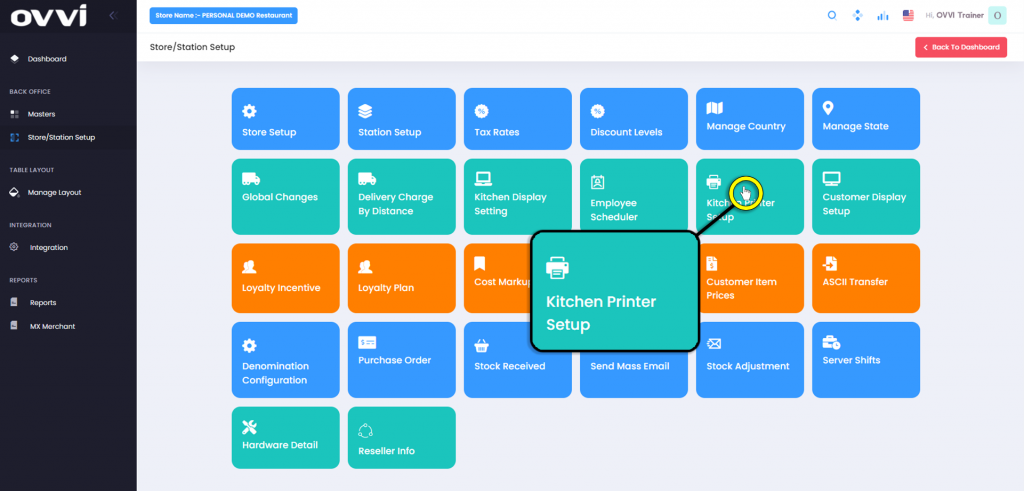
3. Locate and click on the ‘Kitchen Printer Setup’ Button.
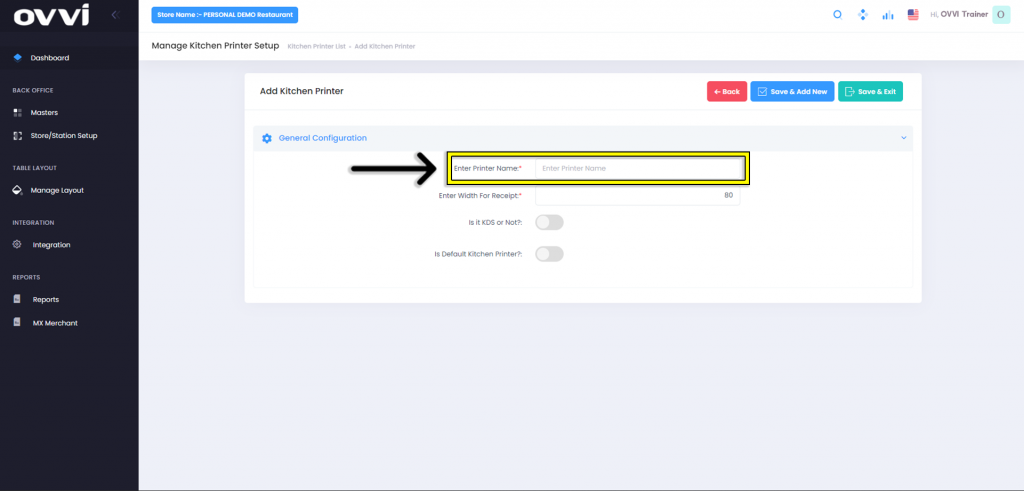
4. In the ‘Manage Kitchen Printers’ page locate and click the ‘Add Kitchen Printer’ button.
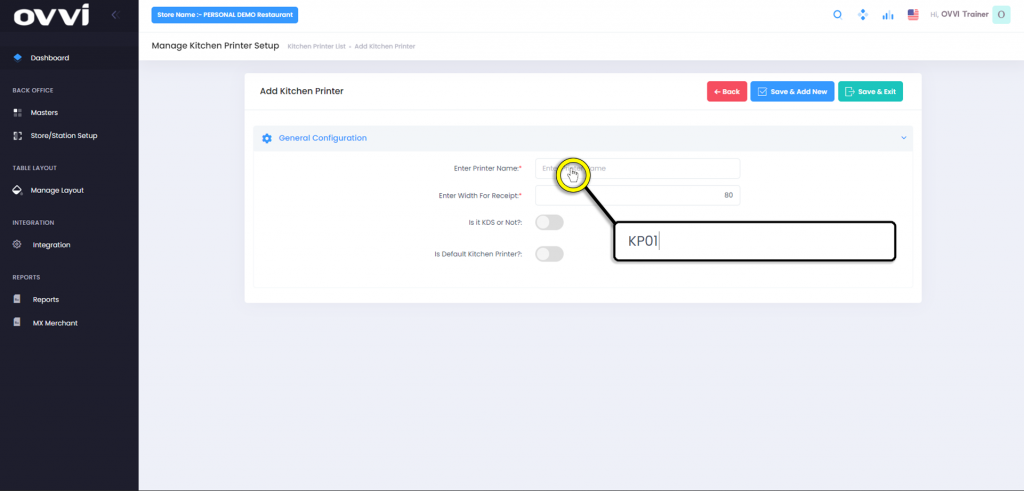
5. Under the General Configuration section Locate ‘Enter Printer Name’.
6. Click in the text box labeled ‘Enter Printer Name’ and input the Name of the printer.
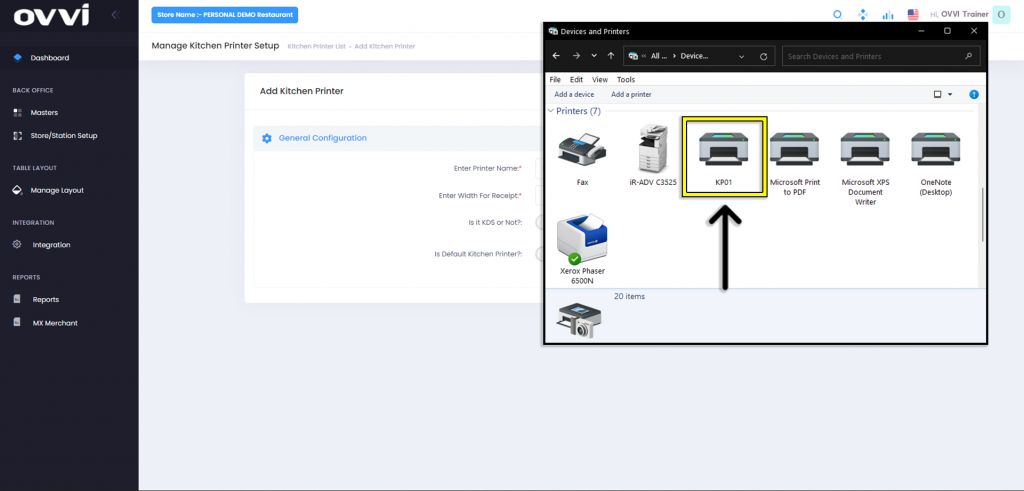
7. Check in ‘Devices and Printers’ in windows to verify that name entered in matches the name of the installed printer on windows.
Important:
it is highly recommended that the naming formats to be as follows:
Kitchen Printer(s) = KP01, KP02, KP03, ect.
Receipt Printer(s) = RP01, RP02, RP03, ect.
Bar Printer(s) = BP01, BP02, BP03, ect.
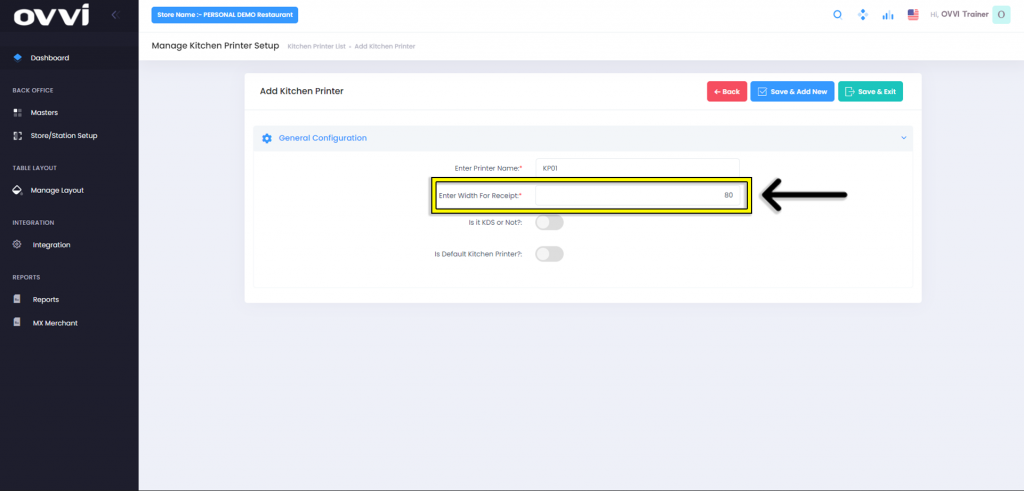
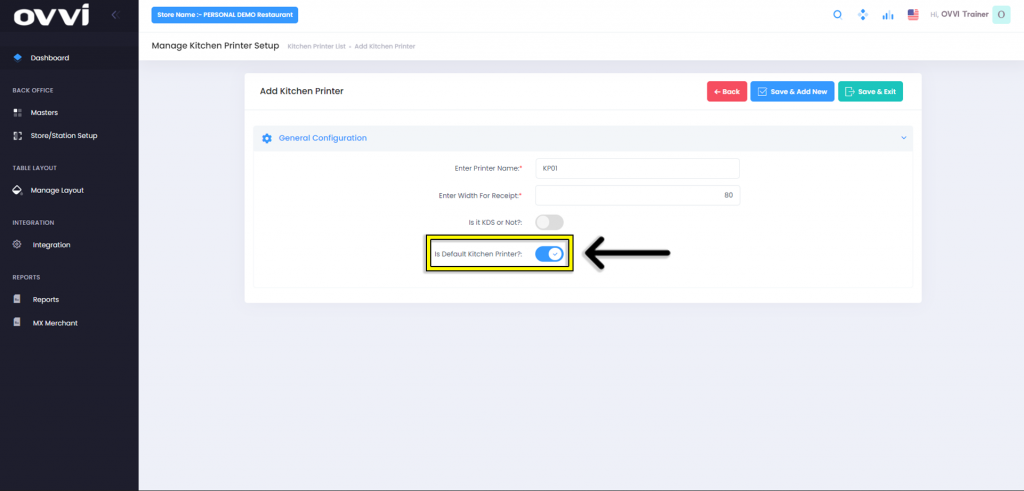
8. The Section labeled ‘Enter Width for Receipt’ is already set to 80 and should not require any change.
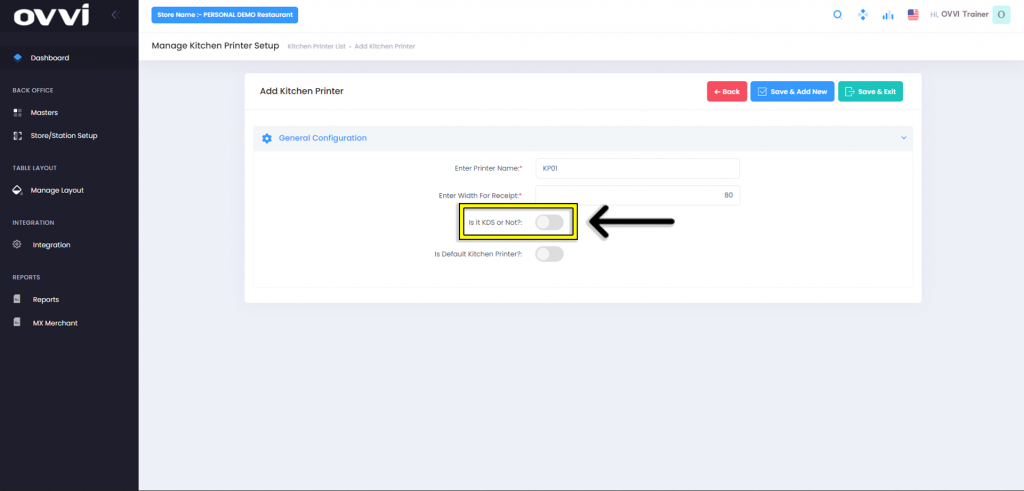
9. The section labeled ‘Is it KDS or Not?’ should remain in the OFF position for printers.
10. The Section labeled ‘Is Default Kitchen Printer?’ should be set to the ON position for the main Kitchen Printer.
Please Note: This option will remain off for all other printers.
11. When done, user can either click the ‘Update & Continue’ button to continue adding additional printers, the ‘Update & Exit’ button to go back to the ‘Manage Kitchen Printers’ Page, or the ‘Back’ button to cancel without saving.
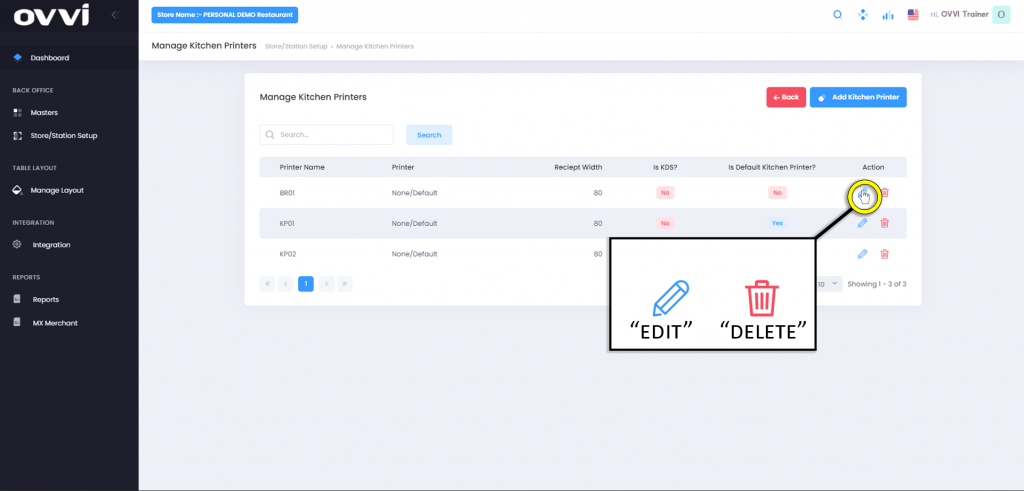
12. From the ‘Manage Kitchen Printers’ Page users will have the option to edit or delete any payment type. Click on the ‘Pencil’ icon to edit or the ‘Trash Can’ icon to delete it permanently.
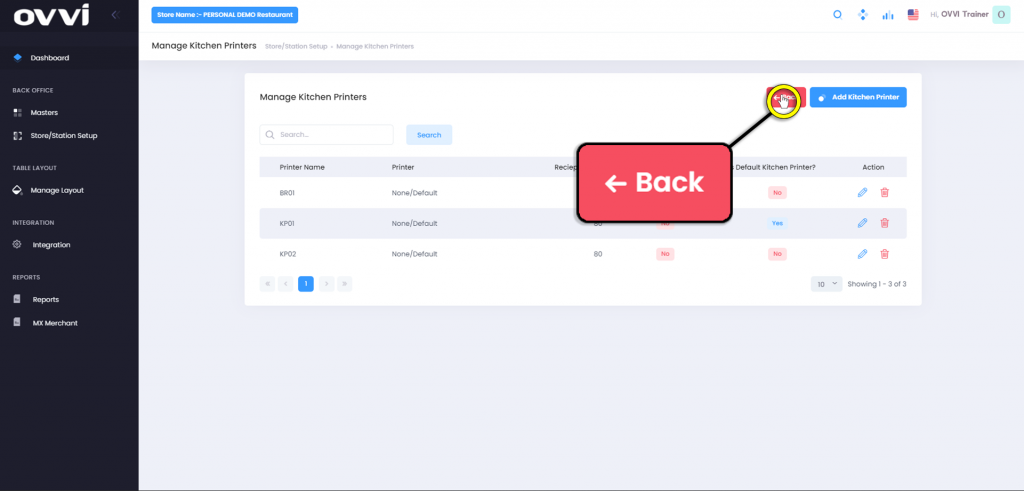
13. Click on the ‘Back’ button to return to the ‘Store/Station Setup’ page.
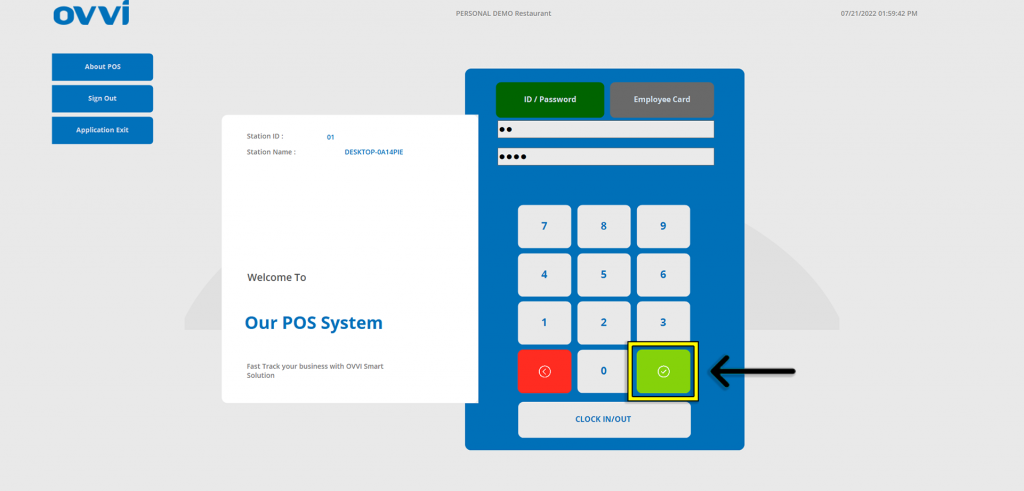
Please Note: Next steps will take place within the OVVI cloud application.
14. Login to the OVVI application with employee/manager credentials and tap the green button.
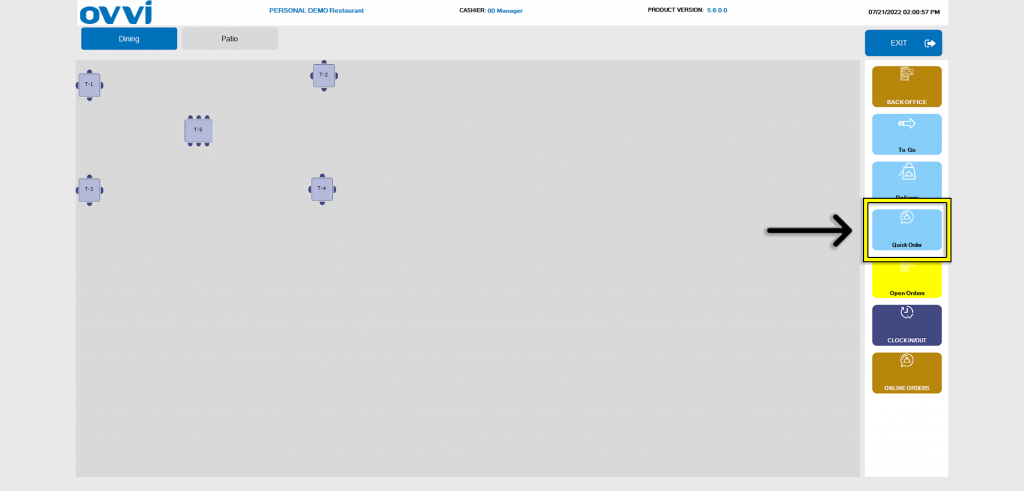
15. Tap on the ‘Quick Order’ button.
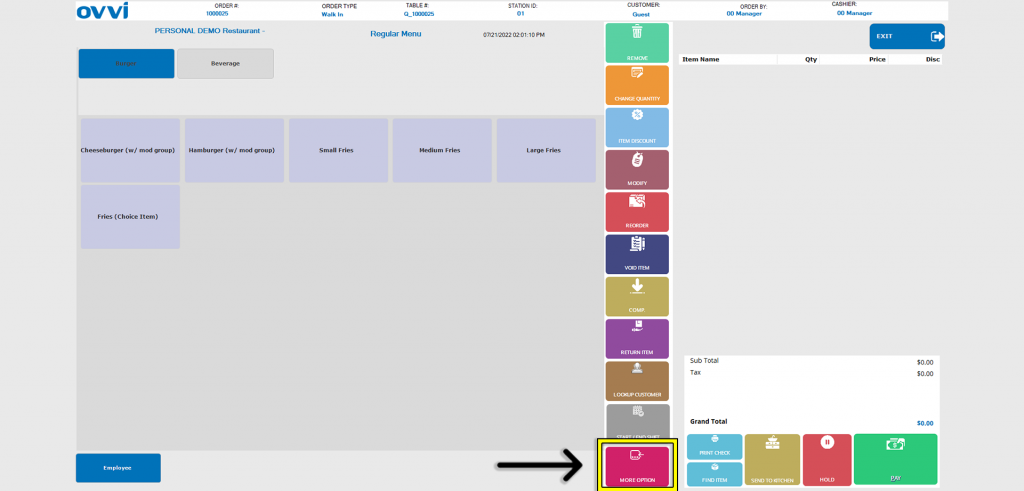
16. Tap on the ‘More Option’ button.
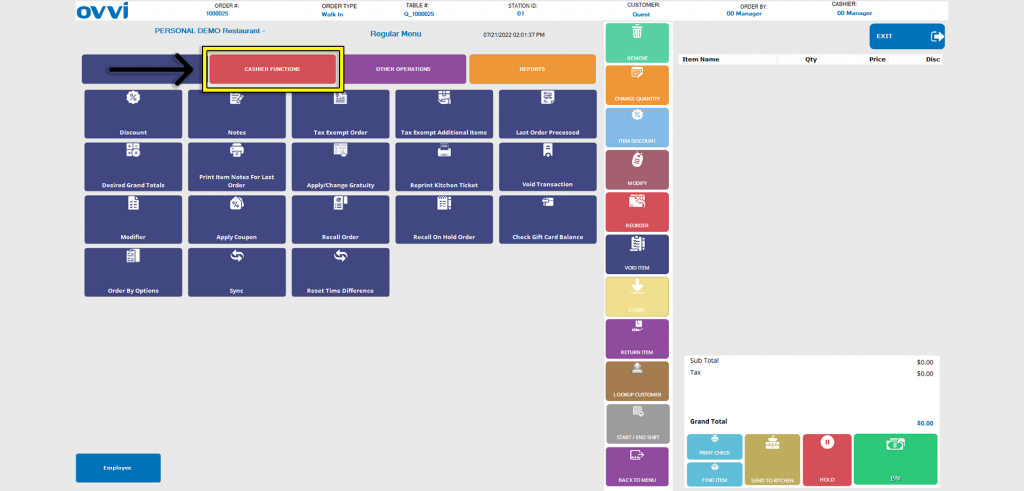
17. Tap on the ‘Cashier Functions’ tab.
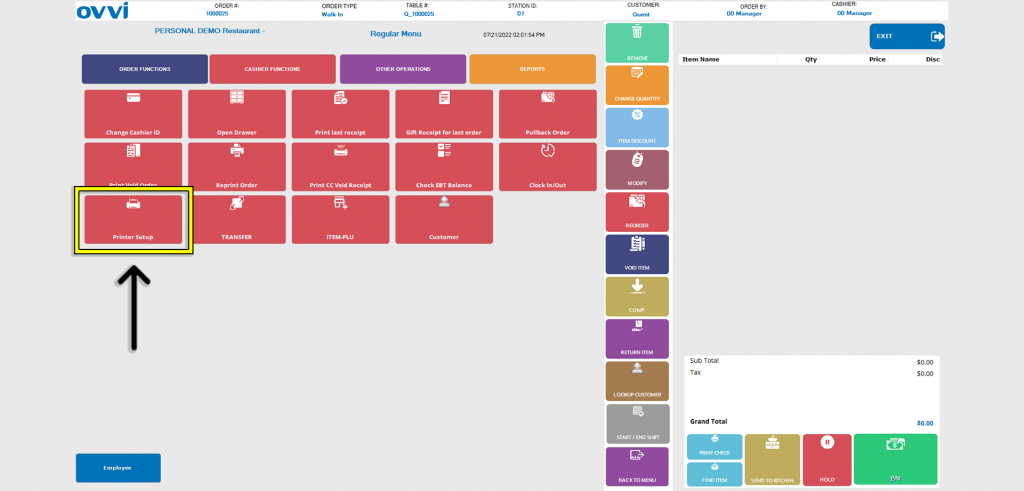
18. Tap on the ‘Printer Setup’ button.
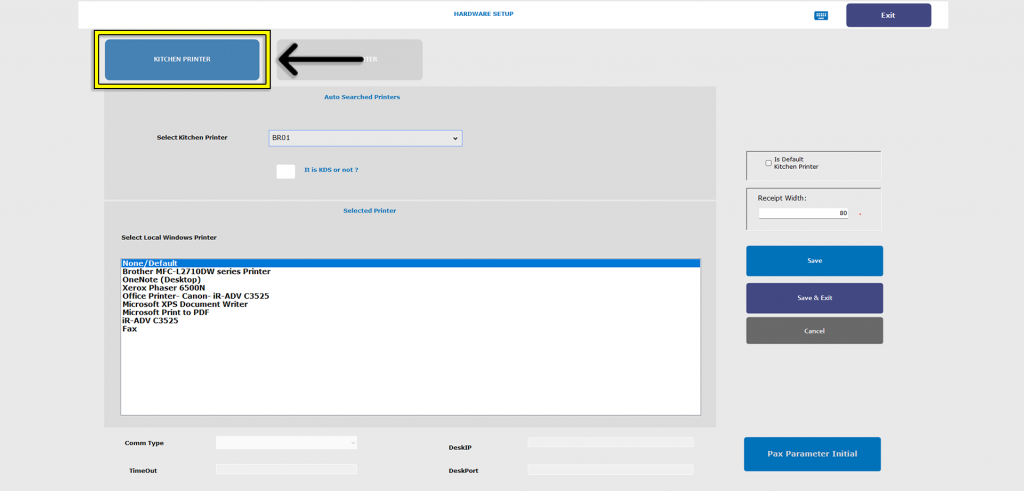
19. Verify that ‘Kitchen Printer’ selection is selected.
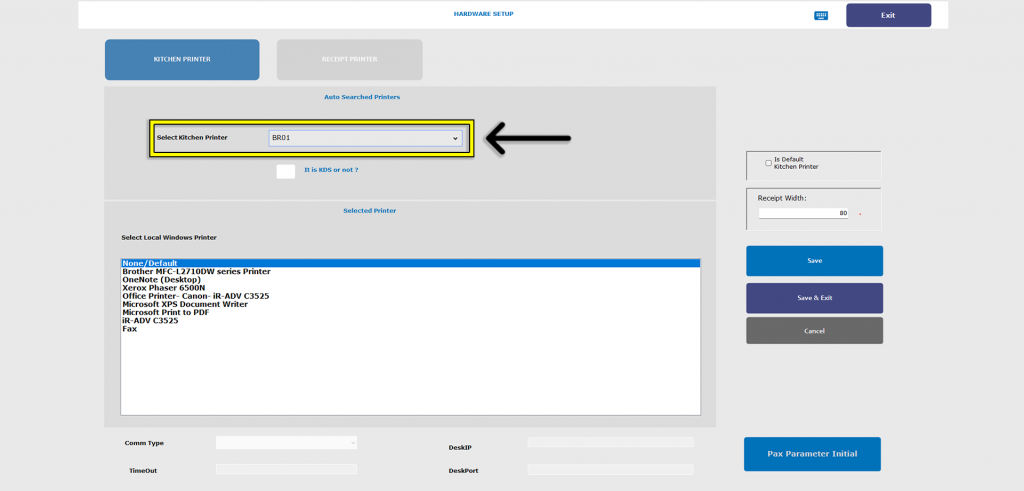
20. Locate the ‘Select Kitchen Printer’ and tap the drop-down menu.
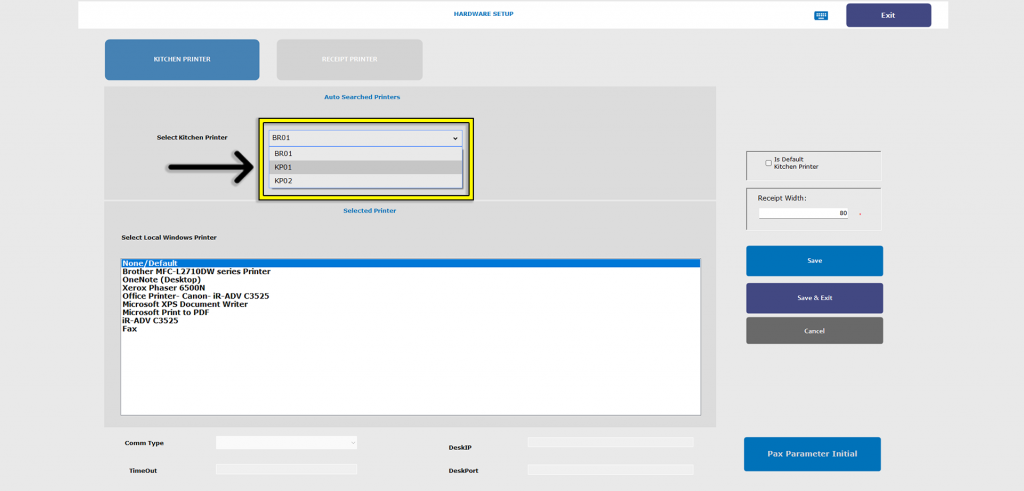
21. Select ‘KP01’ as this will be the default kitchen printer.
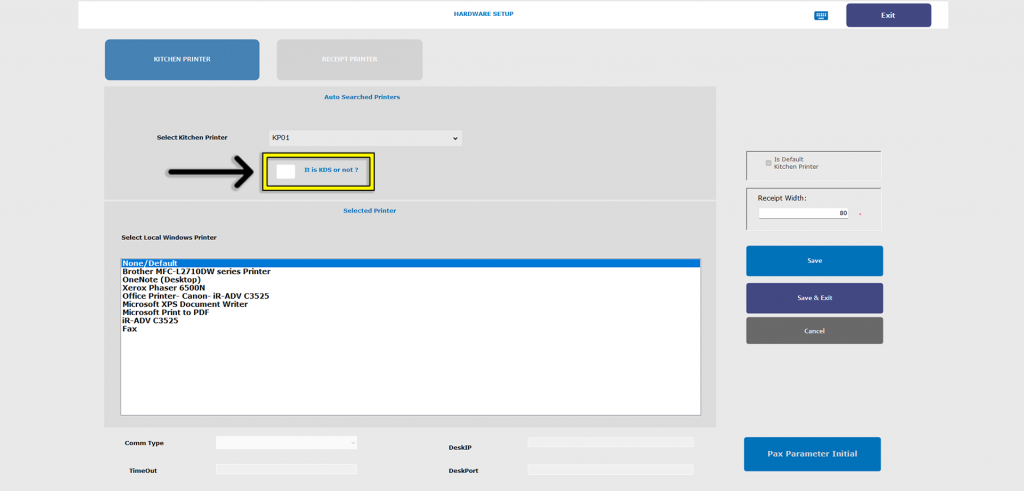
22. Leave the ‘It is KDS or not?’ box unchecked.
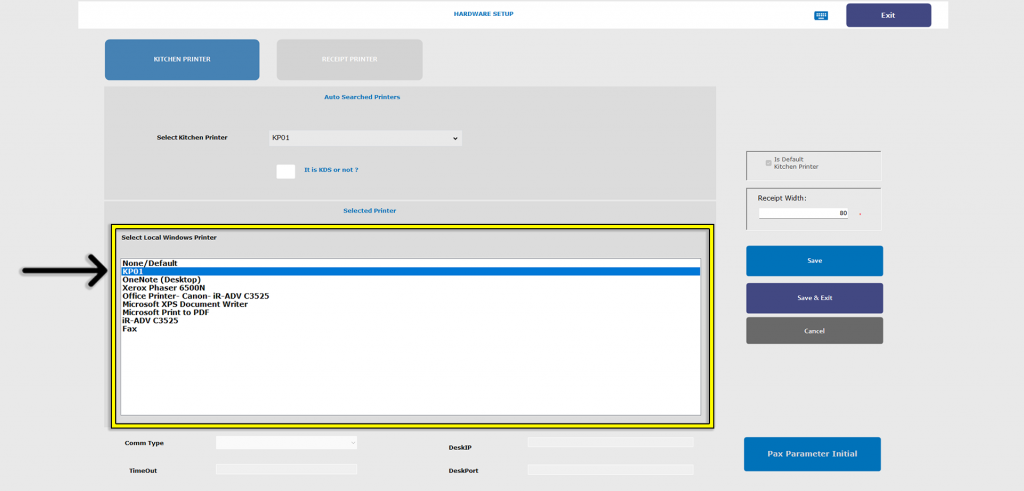
23. In the ‘Select Local Windows Printer’ section select the matching printer which will be ‘KP01’ for this example.
24. The box labeled ‘Is Default Printer’ should be checked and greyed out.
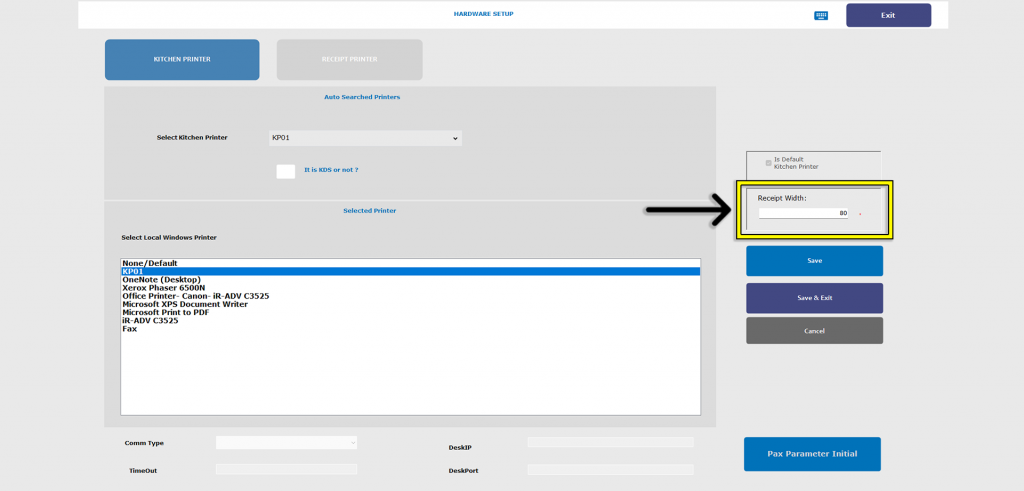
25. The box labeled ‘Receipt Width’ is already set to 80 and should not require any change.
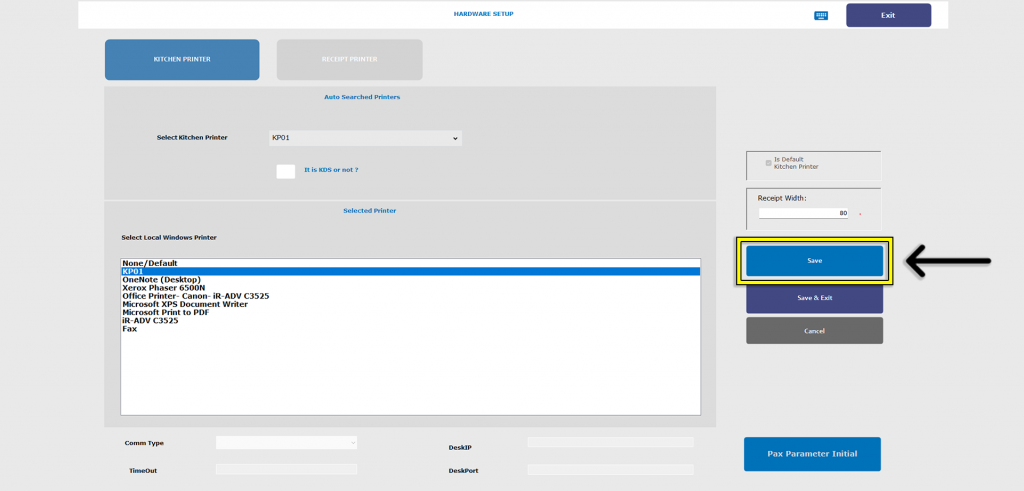
26. Tap the ‘Save’ button to save changes and continue assigning additional ‘Kitchen Printers’ to their matching ‘Local Windows Printer’.
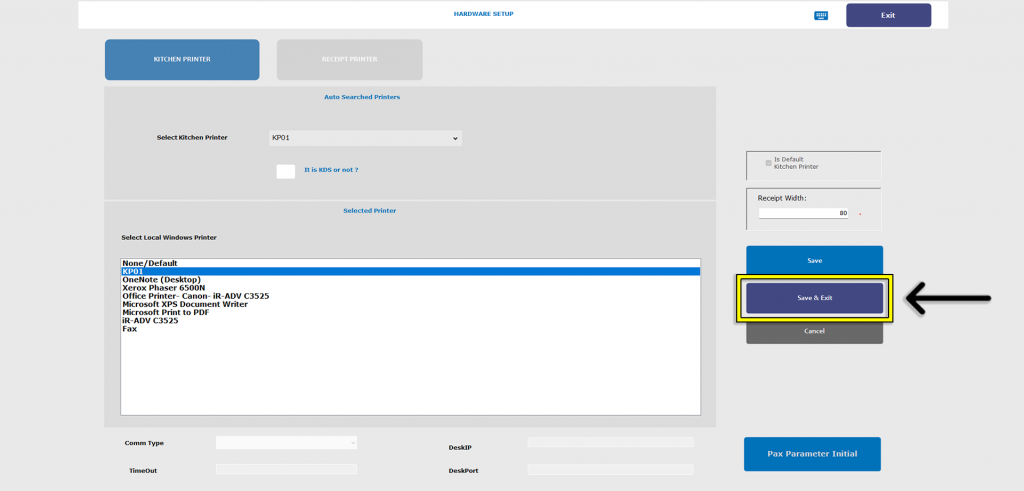
27. Tap the ‘Save & Exit’ button when done with configurations to return to the ‘Cashier Functions’ page.
28. This concludes the Guide to Setting Up Kitchen Printers.