- Offers & Discount
How to Setup Up Offers & Discount:
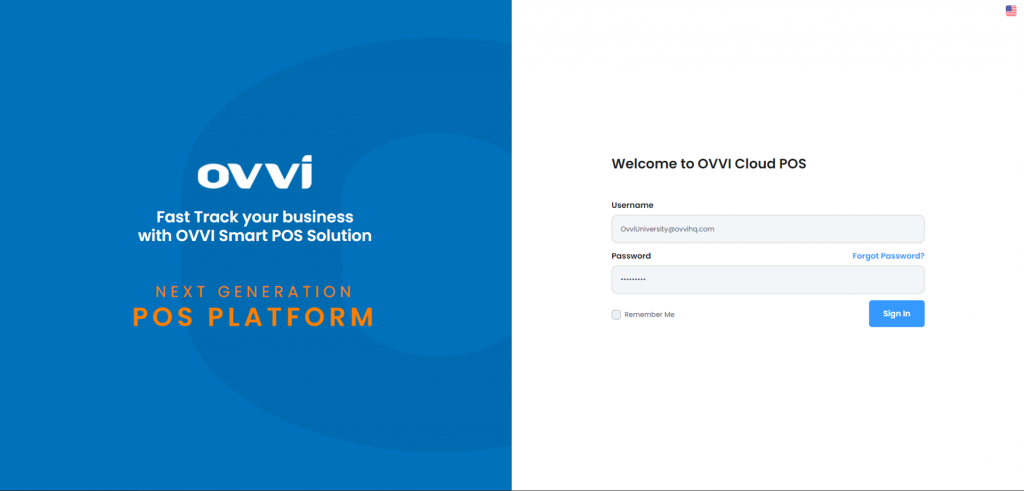
1. Go to cloud.ovvihq.com and login using your merchant username and password.
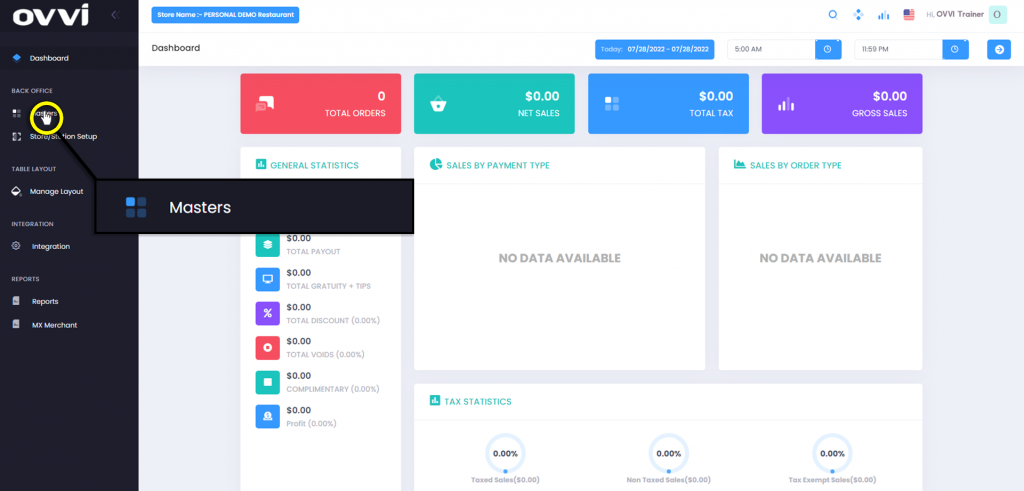
2. From the main dashboard navigate to the panel located on the left side of the site and click on the options ‘Masters’.
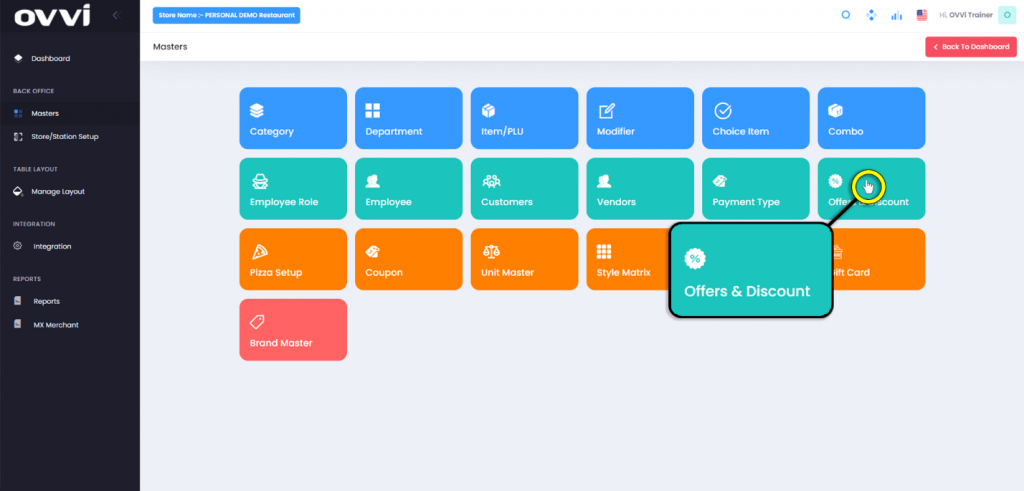
3. From the ‘Masters’ page, locate and click on the ‘Offers & Discount’ button.
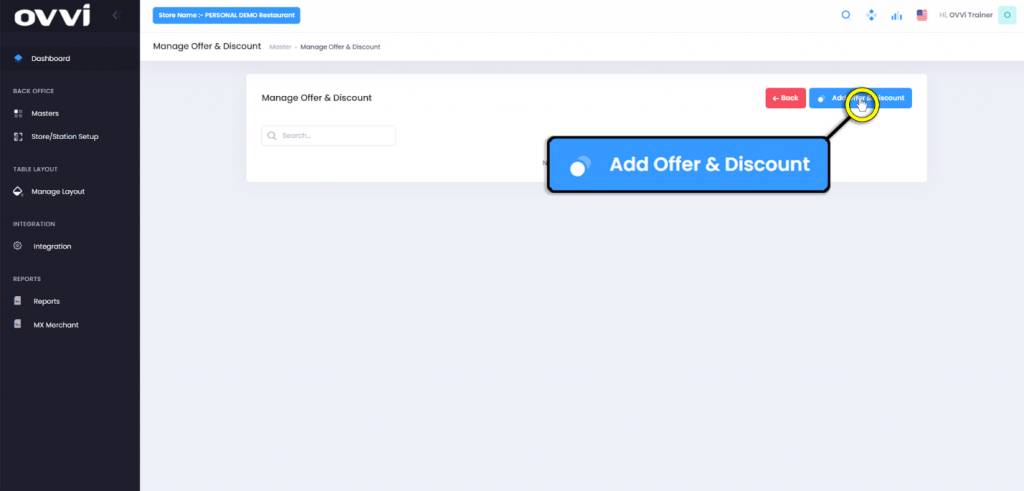
4. In the ‘Manage Offer & Discount Page’ and click the ‘Add Offer & Discount’ button.
5. In the ‘Add Offer & Discount’ Locate the section titled ‘Department’ and click on the drop-down to select the department the offer & discount will be associated with.

6. In the section titled ‘Price Group Number’ will display the automated assigned group number.
Please Note: This section can NOT be edited.

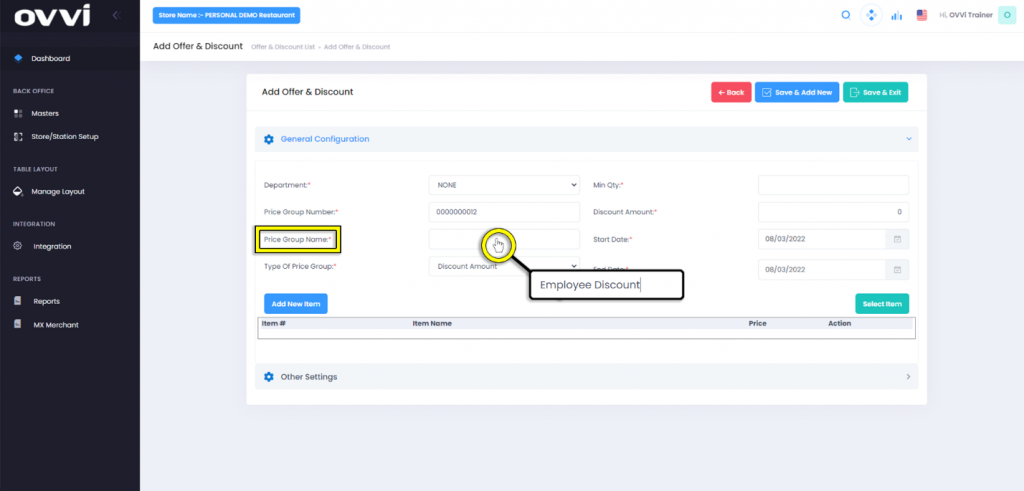
7. Go to ‘Price Group Name’ and click in the text box to input the desired name for the new Offer & Discount.
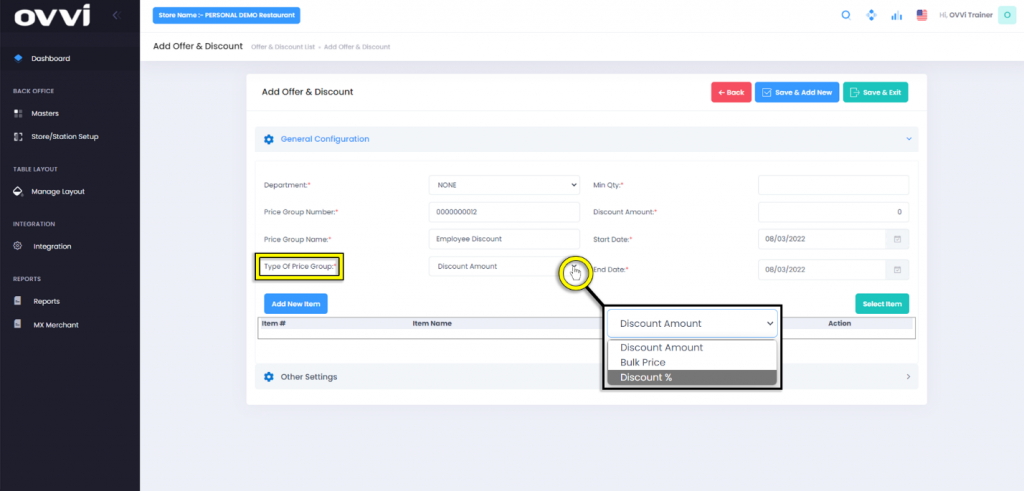
8. Go to ‘Type Of Price Group’ and click the drop-down menu to select between ‘Discount Amount’, ‘Bulk Price’, and ‘Discount %’ which will be applied to the items in an order.
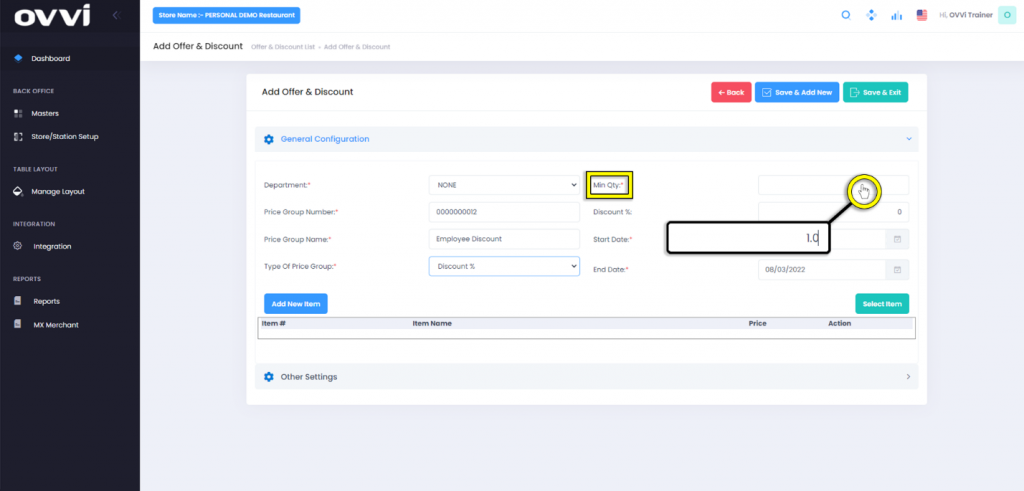
9. Go to ‘Min Qty’ then click in the text box and input the Minimum number of items in an order that will be permitted for the new Offer & Discount to apply.
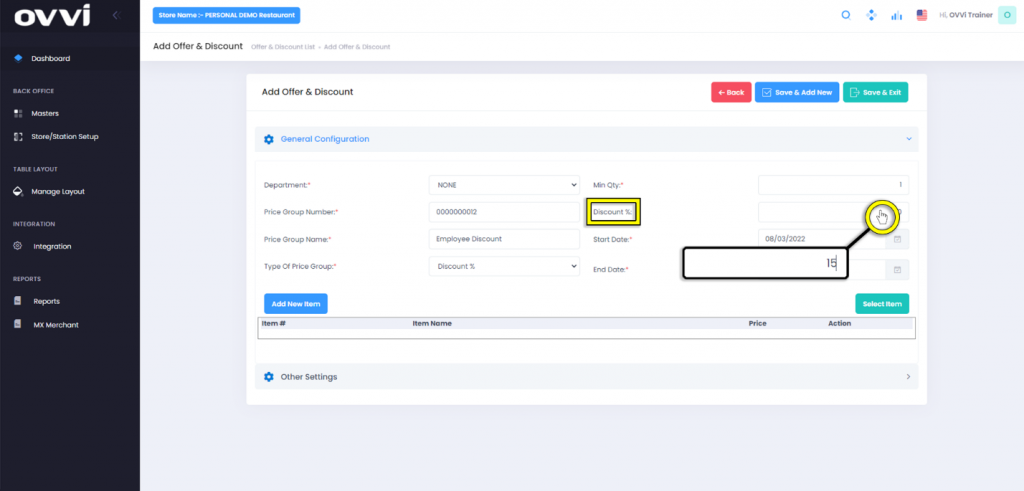
10. Click in the text box for ‘Discount Amount’ and input the desired amount, percentage, or price that will be when the Offer & Discount is applied to an order.
Please Note: The Amount entered will be in relation to the chosen ‘Type Of Price Group’.
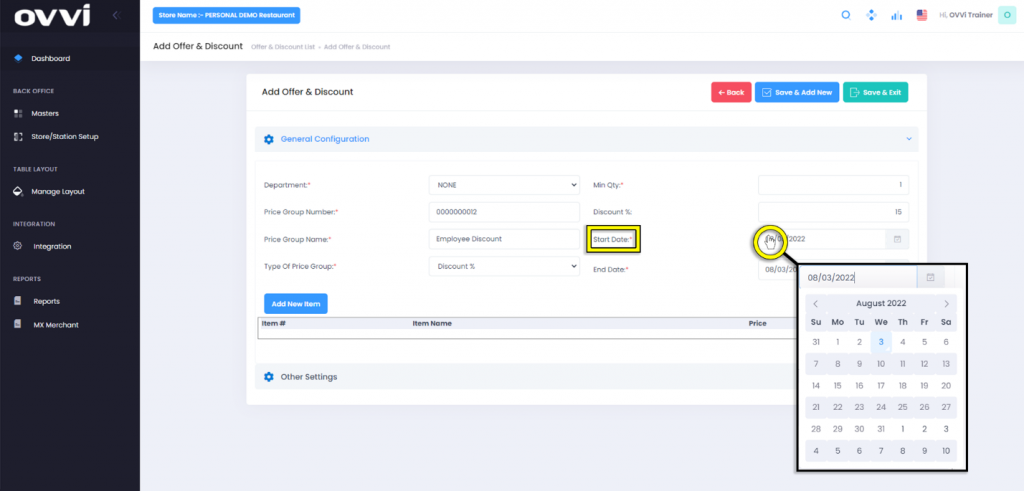
11. For ‘Start Date’ click the date box and select the desired date for when the Offer & Discount will begin.
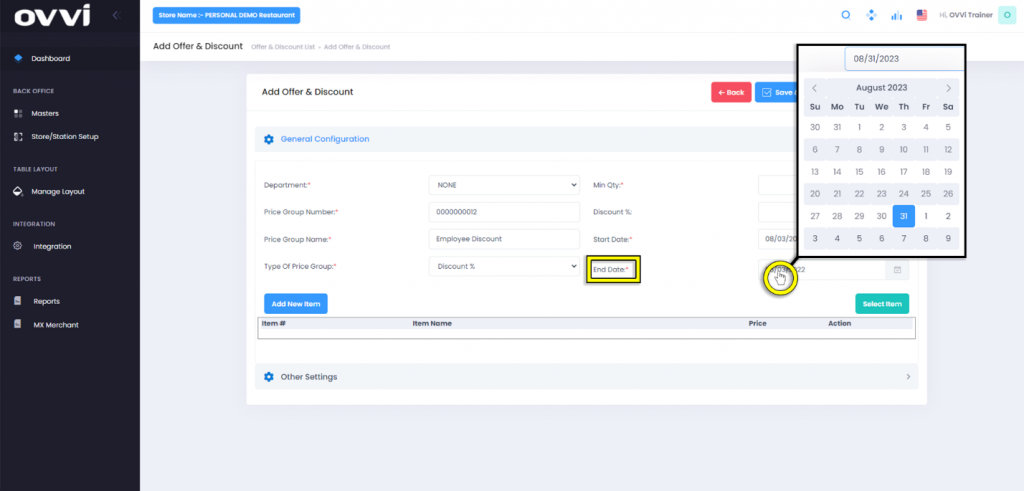
12. Click on the date box for ‘End Date’ to set the desired date for when the Offer & Discount will no longer be available.
Please Note: For ongoing Offers & Discounts, simply just set the End Date as far out as desired.
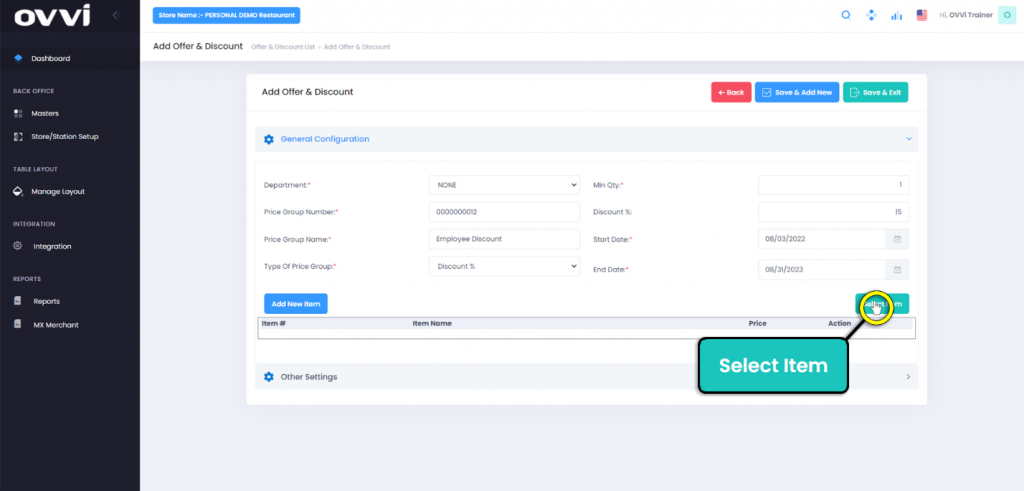
13. Click on the ‘Select Item’ button to assign items that will be associated with the Offer & Discount.
14. In the ‘Search Item/PLU’ pop-up, users can better search specific items by using any combination of the filter options located at the top.

15. Click the blank check boxes on the left column titled ‘Select’ to include those desired items in the selection.
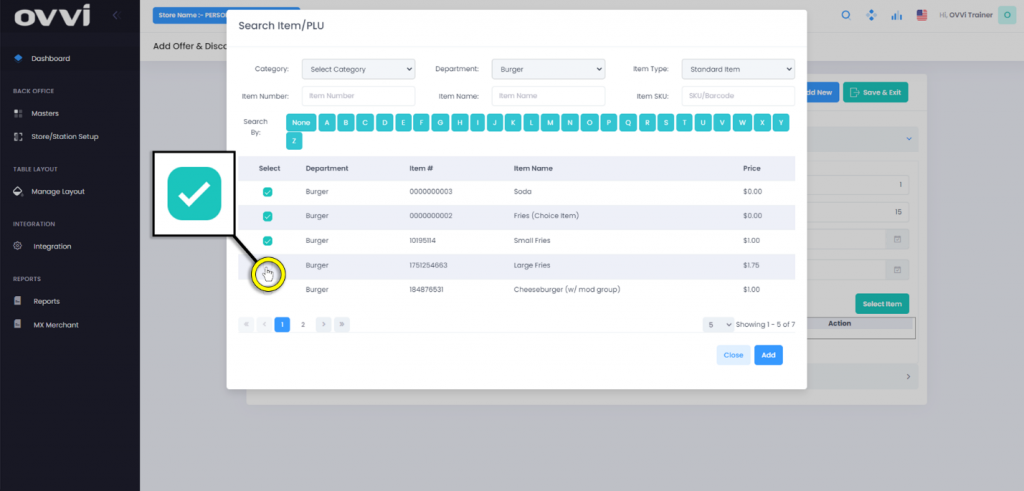
16. Click the ‘Add’ button.

17. For any items that need to be removed from the selection click on the ‘Trach Can’ action button to delete them from the group.

18. After clicking the ‘Trash Can’ action button, click on the ‘Yes, Delete it!’ button in the ‘Are you sure want to delete pop up appears to verify the removal of that item.

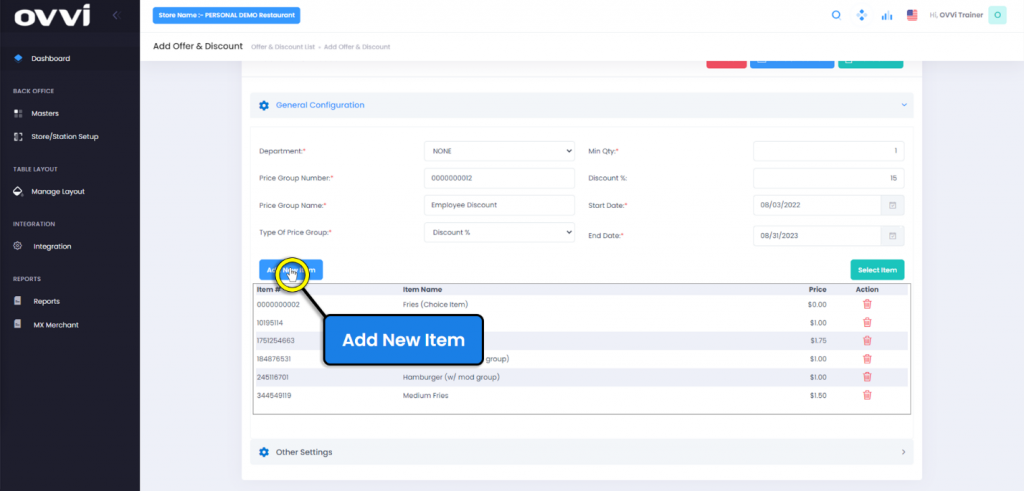
19. Click the ‘Add New Item’ button to build a new item that can then be included in the Offer & Discount selection.
Important: After adding new items, users will still need to add the item by clicking the ‘Select Item’ button.
Please Note: Refer to the Add or Modify An Item guide for additional training.
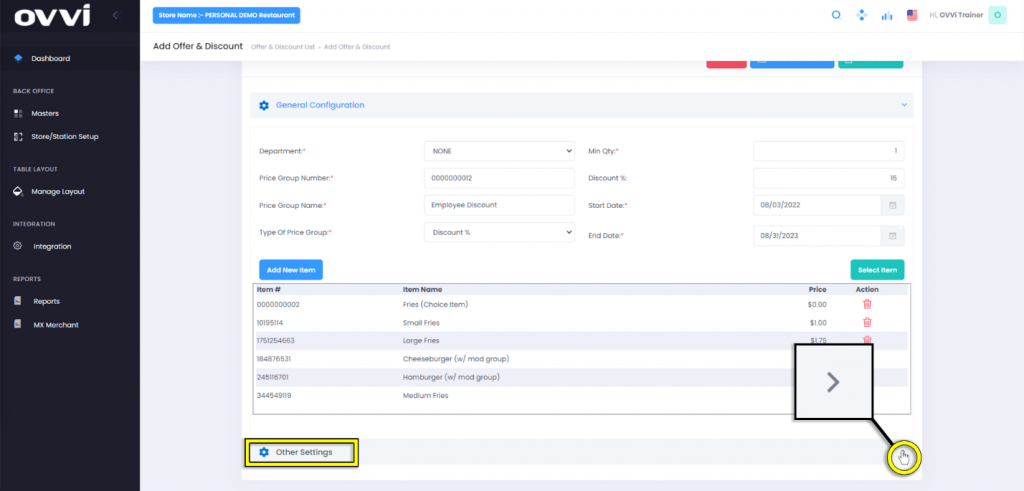
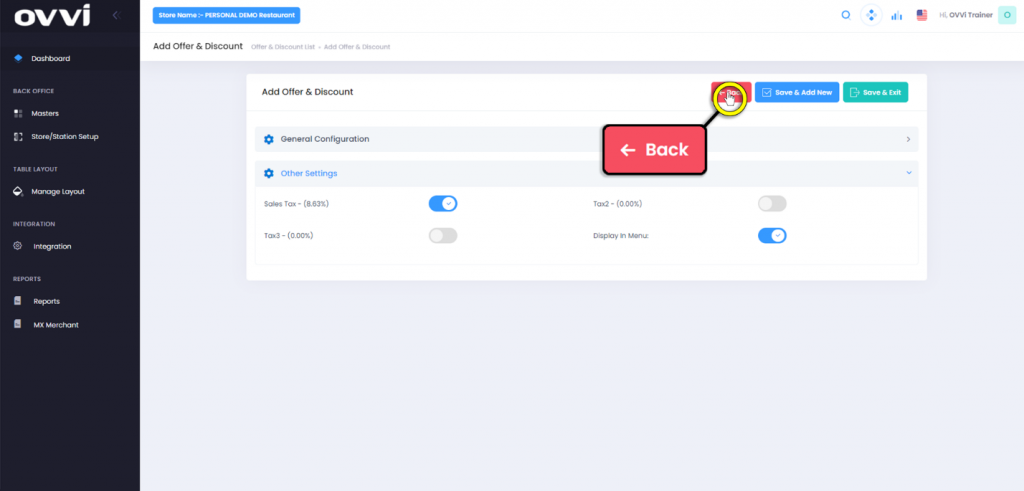
20. Click the expand ‘>’ button for the Section titled ‘Other Settings.
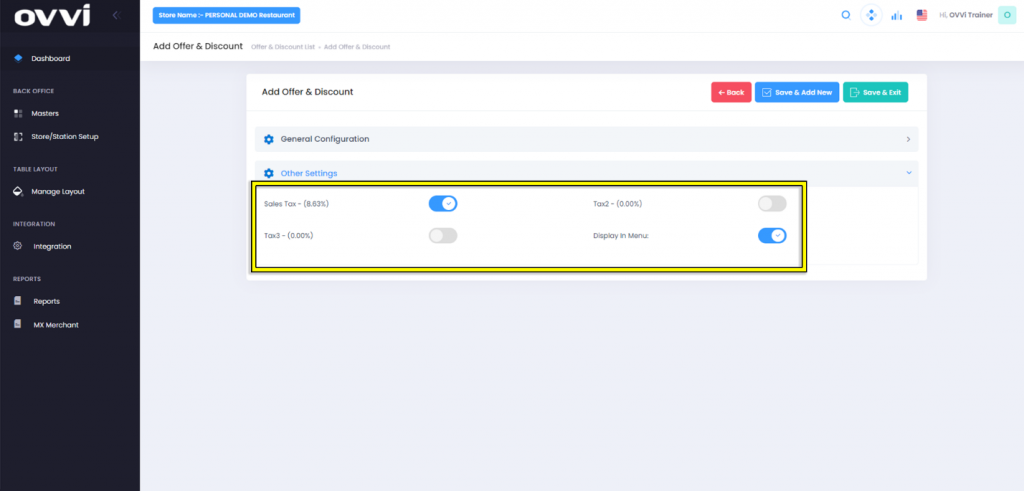
21. In this section, users will have the options to enable/disable ‘Sales Tax’, activate/deactivate alternative tax options (i.e. ‘Tax2’ and ‘Tax3’), and turn the ‘Display In Menu’ On or OFF.
Please Note: when ‘Display In Menu’ is turned off, the Offer & Discount will still be available on the POS but will NOT be visible in the Quick Order menu.
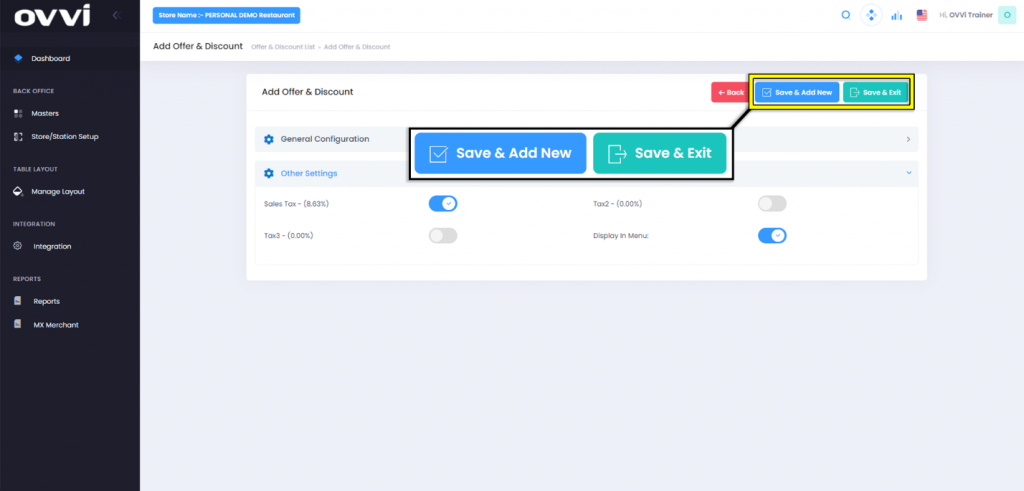
22. Click the ‘Save & Exit’ to go back ‘Manage Offer & Discount’ Page or the ‘Save & Add New’ button to continue creating additional Offers & Discounts.
23. When done editing the employee role, click the ‘Back’ button to return to the ‘Manage Offer & Discount’ page.
24. To edit or delete an Offer & Discount, click on either the ‘Pencil’ or ‘Trash Can’ to action buttons.

25. Click on the ‘Back’ button to return to the ‘Masters’ Page when done creating and editing Offers & Discounts.

26. This Concludes the guide on how to Setup Up Offers & discounts.
Was this article helpful?
YesNo
Related Articles: